Hypertherm Powermax30 AIR Service Manual User Manual
Page 164
164
Powermax30 AIR Service Manual 808850
6 – Power Supply Component Replacement
3. Rotate the internal compressor until it is inside the power supply. Slide the compressor’s other 2 brackets over the
2 retaining screws in the power supply.
4. Slide a metal washer over each of the 3 retaining screws.
5. Use an 8 mm (5/16 inch) wrench to tighten a hex nut onto each of the 3 retaining screws. Tighten the nuts to
23.0 kg·cm (20 inch·pounds).
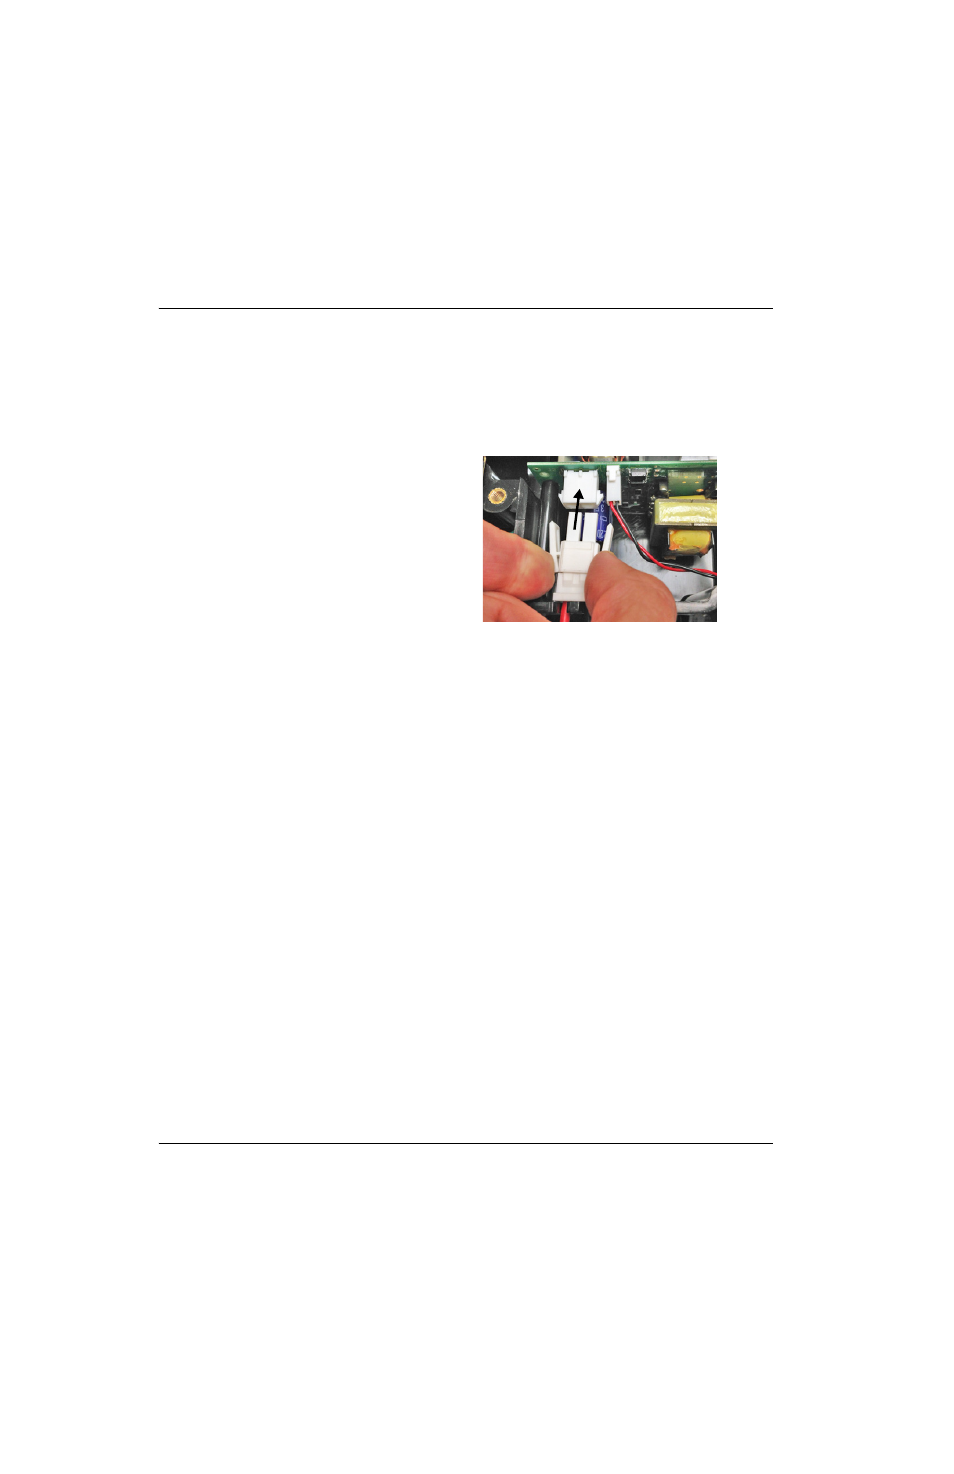
6. Plug the internal compressor’s wire connector
into J2 on the compressor-driver board. Route
the wires through the notches at the top of the
center panel labeled “RED” and “BLK.”
Position the wires in the wire chase up the side
of the rear panel.
7. Press the air filter’s drain hose into the hole in
the base of the power supply.
8. Complete the following procedures:
a. See Install the heat exchange coil on
b. See Install the fan on page 156.
c. See Reattach the rear panel on page 106.
d. See Install the power supply cover on page 99.
e. Reconnect the power cord, and set the power switch to ON (I).