Test 9b – check the internal compressor, Step 10 – Hypertherm Powermax30 AIR Service Manual User Manual
Page 92
92
Powermax30 AIR Service Manual 808850
5 – Troubleshooting and System Tests
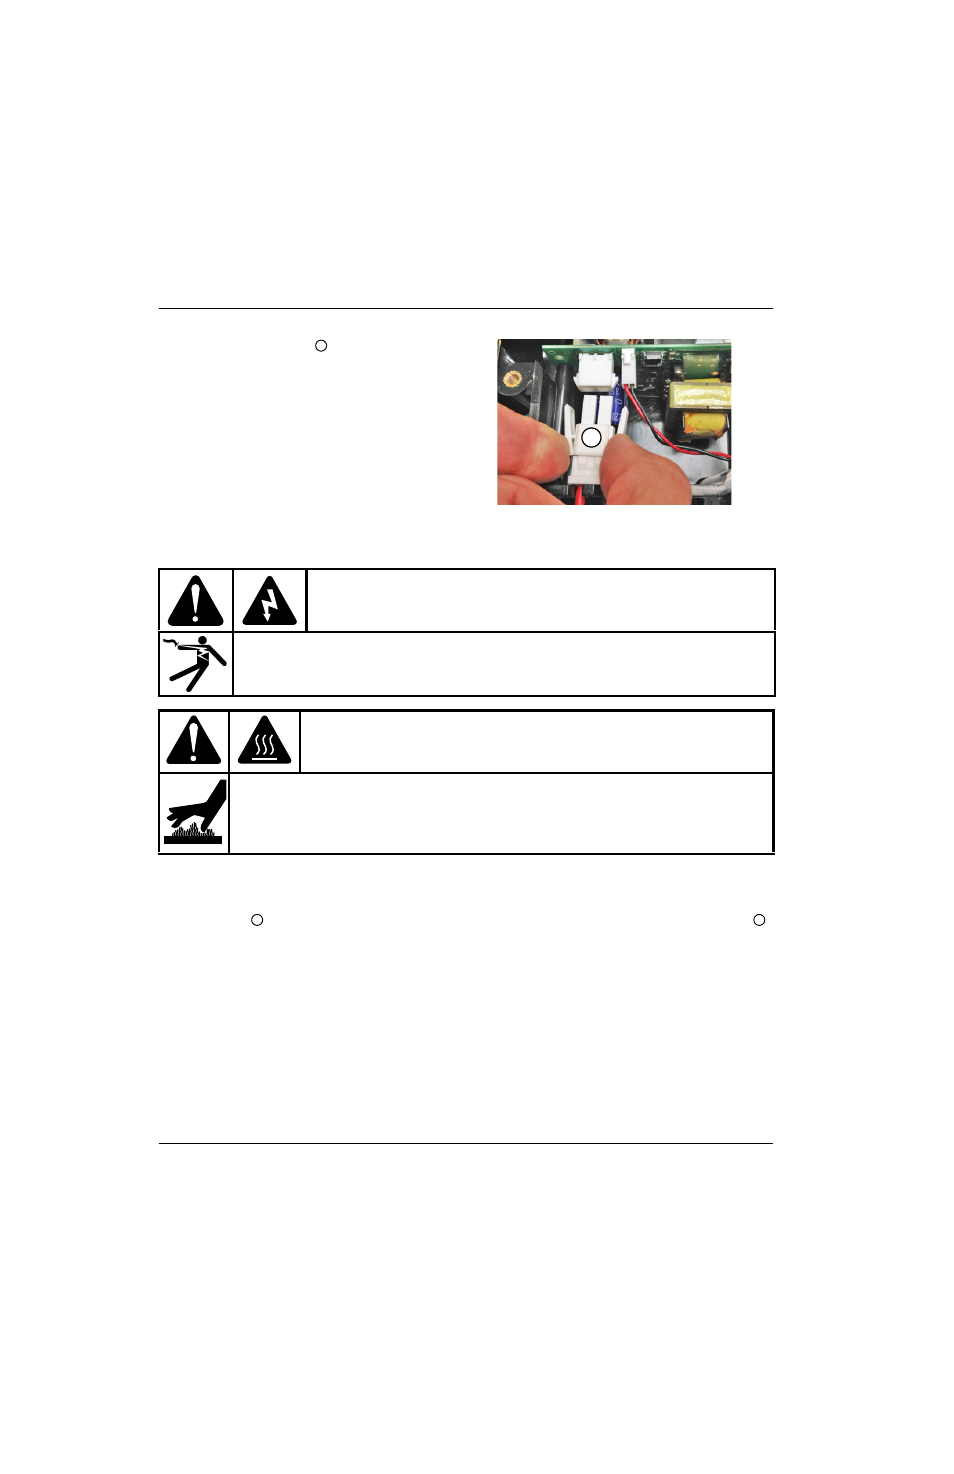
7. Remove the J2 connector
from the
compressor-driver board.
8. Set the power switch to ON (I).
9. Quickly tap the torch trigger, then watch the green
diagnostic LED (D5) on the compressor-driver
board. Does the LED illuminate while the torch is
being fired?
a. If yes, check the internal compressor. Continue
with the next step.
b. If no, check the compressor-driver board. Skip to step 16.
Test 9b – Check the internal compressor
10. Set the power switch to OFF (O).
11. On the fan side of the power supply, pull back the clip on the right side of the solenoid valve, and work the valve free
from that clip
. Carefully tilt the top of the valve towards you until you can see the gas shut-off override button
.
See
12. Connect the internal compressor to an external 12 VDC power source (for example, a car battery).
13. Hold down the gas shut-off override button on top of the solenoid valve, then quickly tap the torch trigger. Is the
compressor running, and is air blowing from the torch?
a. If yes, check the compressor-driver board. Continue with the next step.
b. If no, replace the internal compressor. See Replace the internal compressor on page 160. Be sure to push
the solenoid valve back into place between both clips from the center panel.
WARNING!
While testing, do not touch the nozzle at the end of the torch. Dangerous voltages can
cause serious injury.
WARNING!
HOT SURFACE CAN CAUSE INJURY
Allow the internal compressor to cool before touching it.
The surface of the compressor can become very hot during use and can cause serious
injury if it comes in contact with skin.
2
2
3
4