Hypertherm Powermax30 AIR Service Manual User Manual
Page 190
190
Powermax30 AIR Service Manual 808850
7 – Torch Component Replacement
Install the handle
1. Lay the right side of the handle on a flat surface with the inside facing up.
If you are replacing the handles, apply the Air T30 label to the left side of the torch handle.
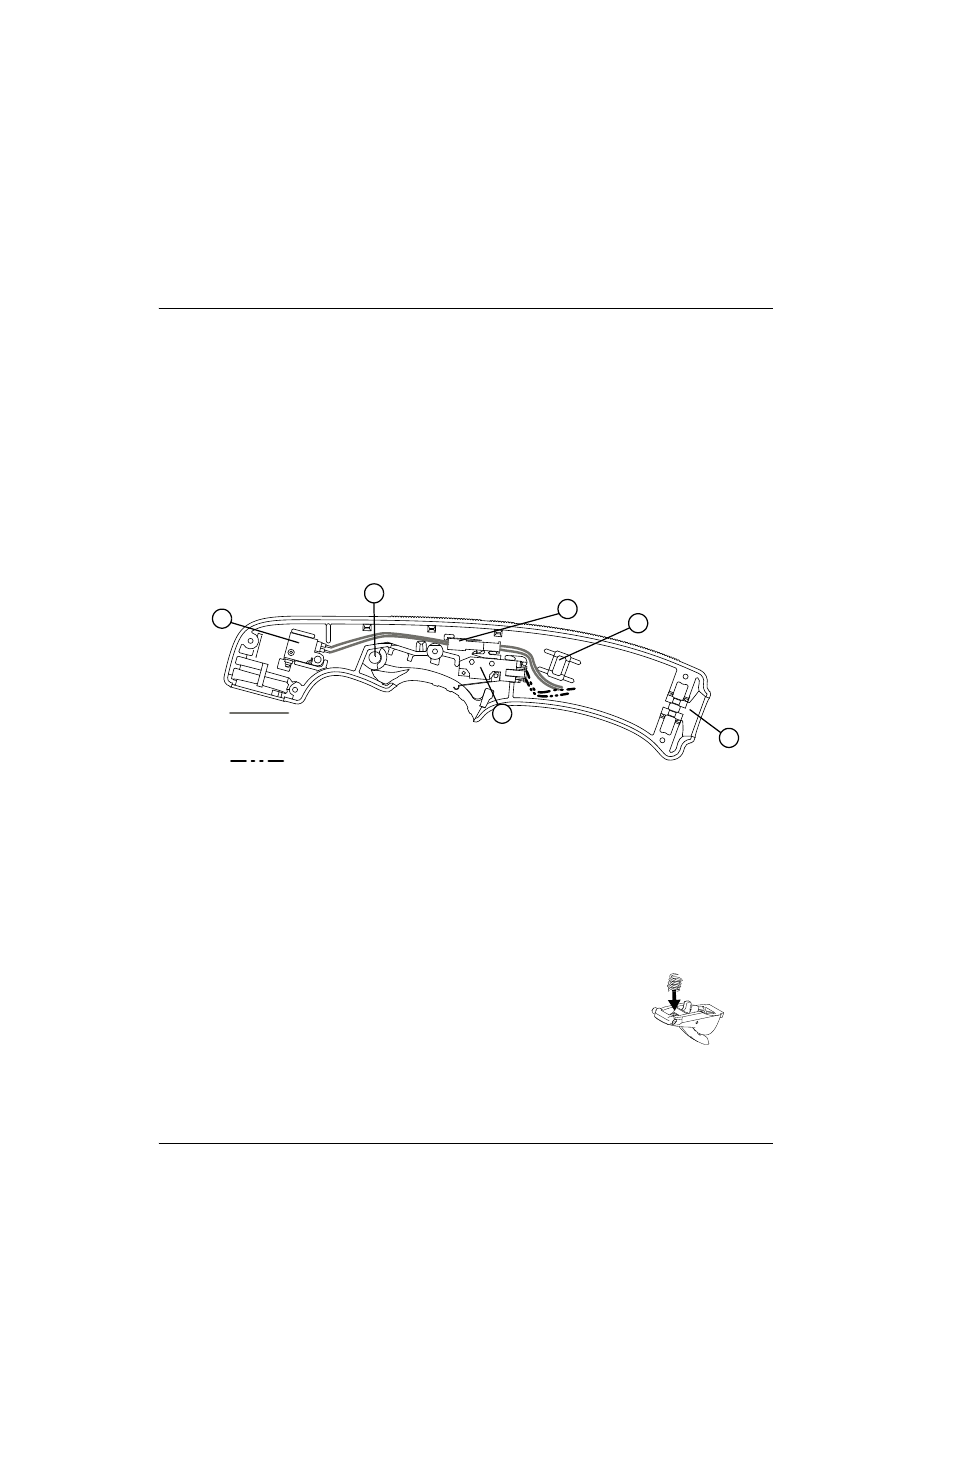
2. Press the cap-sensor switch into its post hole and onto its mounting post. See Figure 96 on page 189.
3. Route the cap-sensor wires as shown in Figure 98. Place the connector above the start switch’s posts with the wires
positioned below the slot for the gas hose fitting’s flange as shown.
4. Press the start switch onto the 2 mounting posts and position the wires below the slot for the gas fitting. The start
switch should hold the cap-sensor switch connector in place. See
Figure 97 on page 189 and Figure 98.
Figure 98
5. Press the torch body into the torch handle with the gas hose fitting’s flange aligned with the slot in the handle. Make
sure the flange does not pinch any wires.
6. Align the strain relief with the strain relief slot in the handle. See Figure 98 for the location of the strain relief slot.
7. Compress the trigger spring into the front half of the trigger. Slide the trigger and spring
into place.
8. Being careful that the handle does not pinch the wires, align the left half of the handle with
the right half. Make sure the trigger pivots are both located in the trigger pivot holes. See
Figure 98.
Cap-sensor switch wires
Start switch wires
1
2
4
5
3
6
1
Cap-sensor switch
2
Start switch
3
Slot for torch lead strain relief
4
Slot for gas hose fitting’s flange
5
Cap-sensor switch connector
6
Trigger’s pivot hole