2 assign permission to share – Niveo Professional NNAS-R4 User Manual
Page 64
NAS System
64
User Manual
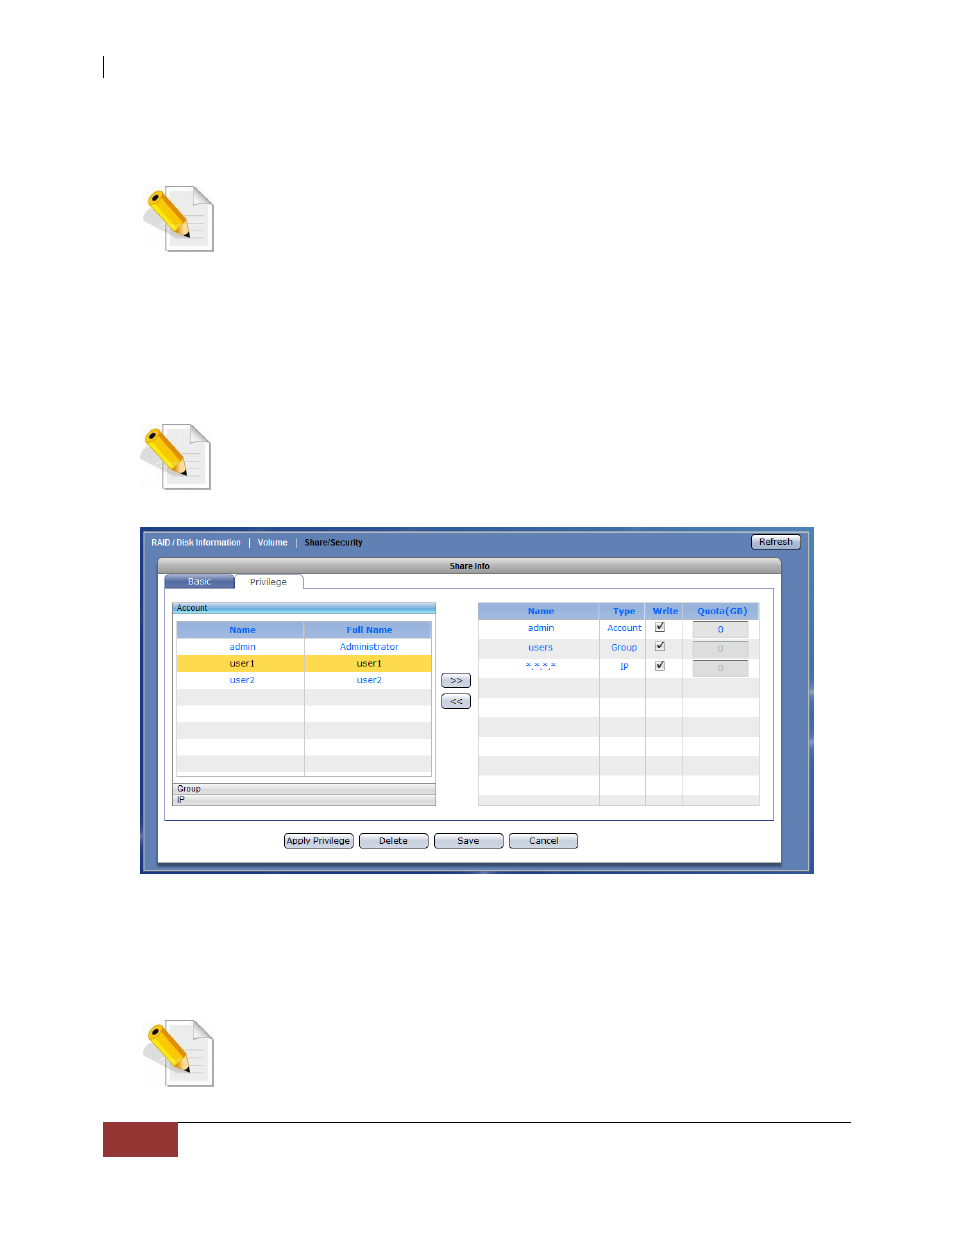
3.1.3.2 Assign Permission to Share
Steps to Assign User or Group Account Permission to the Share Folder:
NOTE: User or Group Accounts must have been created or NAS must
have been joined to Windows AD or NIS domain.
1. Select (highlight) the share folder then click “Edit Share Folder”, or double-click the
share folder name.
2. Select the Privilege tab. In the Account option, select the user accounts that will be
given access permission to the share folder, then click “>>”.The accounts will appear
on the right screen. Set the Write and Quota(GB) options as needed.
NOTE: Use the “<<” to remove an account from share folder privilege.
Select the account then click “<<”. The account will be removed from
the right column. By default, admin account and users group (group
account for local NAS users) have permission to a share folder.
Account Privilege Options:
Write – By default, this option is checked and the account is given Read and
Write permission to the share folder. To assign Read-Only permission,
remove the check mark.
Quota(GB) – This option is used to assign user account quota to the share
folder. Default is zero which means no limit (limit is volume capacity).
NOTE: The Account quota set in Privilege section of Share folder
applies only to the share folder itself. Other share folders can have
different account quota. Also, this quota is different from the user
account’s home folder.