Niveo Professional NNAS-R4 User Manual
Page 66
NAS System
66
User Manual
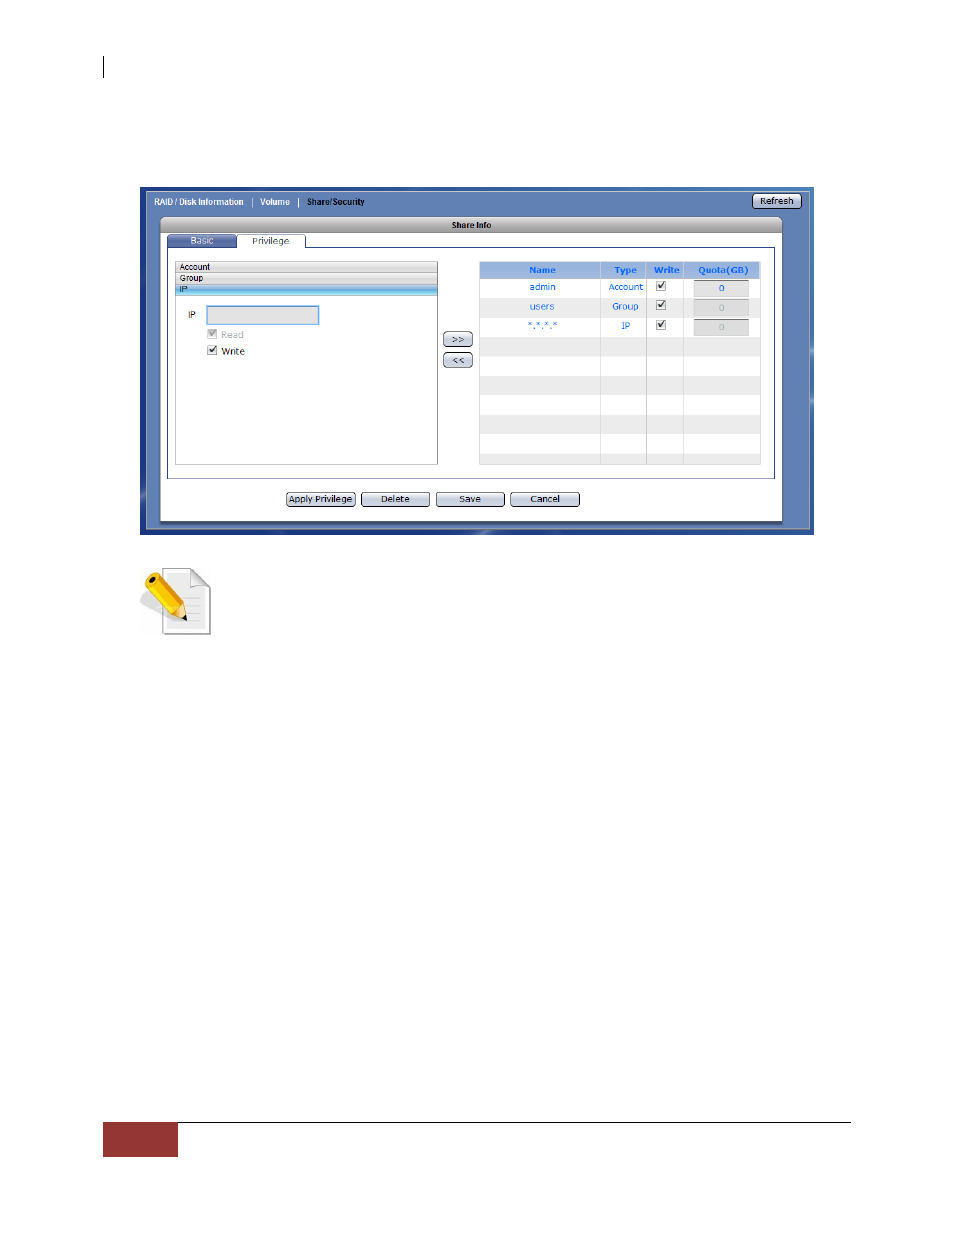
4. Click the IP option. Set up the IP address or addresses that will be allowed
connections to the share folder, then click “>>”.The IP address will appear on the
right screen.
NOTE: This option allows setting certain range of hosts to have an
access to the NAS. By default, NAS will accept connections from any
host (*.*.*.*). To allow connections only from certain IP address,
remove *.*.*.* then add the IP address/range. For example, add
192.168.100.*. This will only allow connections from your private
network 192.168.100 and all other connection will be refused.
NOTE: To remove an IP address from share folder privilege, select the
IP address then click “<<”.
IP Privilege Setup Options:
Read – This option allows Read access from the specified IP address or
address range.
Write –This option allows Write access from the specified IP address or
address range.
IP Privilege Edit Option:
Write – By default, this option is checked and the IP address or range of IP
address is given Read and Write permission to the share folder. To
assign Read-Only permission, remove the check mark.
5. Click “Save” when done. The permissions will be set in the share folder.