Insert text, Erase area, Preview – KIP Graphics Pro User Manual
Page 60: Nsert, Rase, Kip graphics pro
KIP Graphics Pro
No part of this publication may be copied, reproduced or distributed in any form without express written permission
from KIP. 2015 KIP. v1.
- 60 -
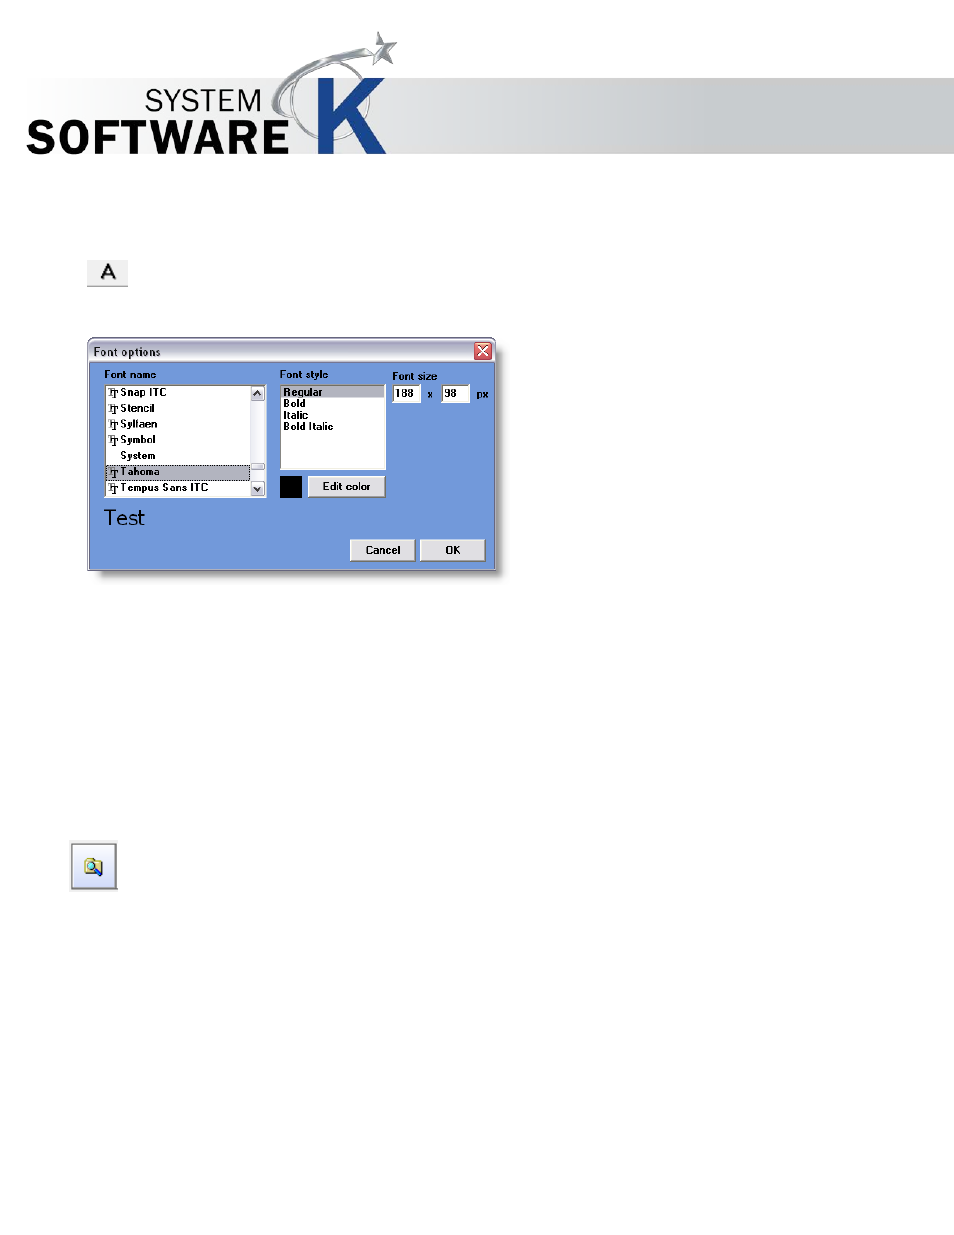
Insert Text
If you want to add a text (letters, numbers, etc.) into the image, use this button and set a starting point with the cursor
where to start the text content on the image. Now type the text into the image. If you want to change fonts, font style, color and
size, double click on the text. The configuration window
F
O N T
O
P T I O N S
will appear.
If your are satisfied with the text and its design, once again hit the button
I
N S E R T
T
E X T
in order to actually put the text on the
image.
Erase Area
If you simply want to erase certain parts of the image, click the
E
R A S E
A
R E A
button. Draw a rectangle around the area that is
going to be erased, and use the
E
R A S E
A
R E A
button again. The selected area is now erased.
Preview
The preview window can be gained by clicking on the button
P
R E V I E W
at the bottom of the main window or by selecting
the menu bar option
V
I E W
P
R E V I E W
. It is only possible to open up one preview at the same time. For leaving the
Preview just activate the
P
R E V I E W
button again.
A file has to be highlighted in order to change to the preview screen. If multiple files are selected, only the first file is
displayed in the preview.