Canon REALiS 4K501ST Pro AV 5000-Lumen LCoS Projector User Manual
Page 42
Installation Procedure
42
3
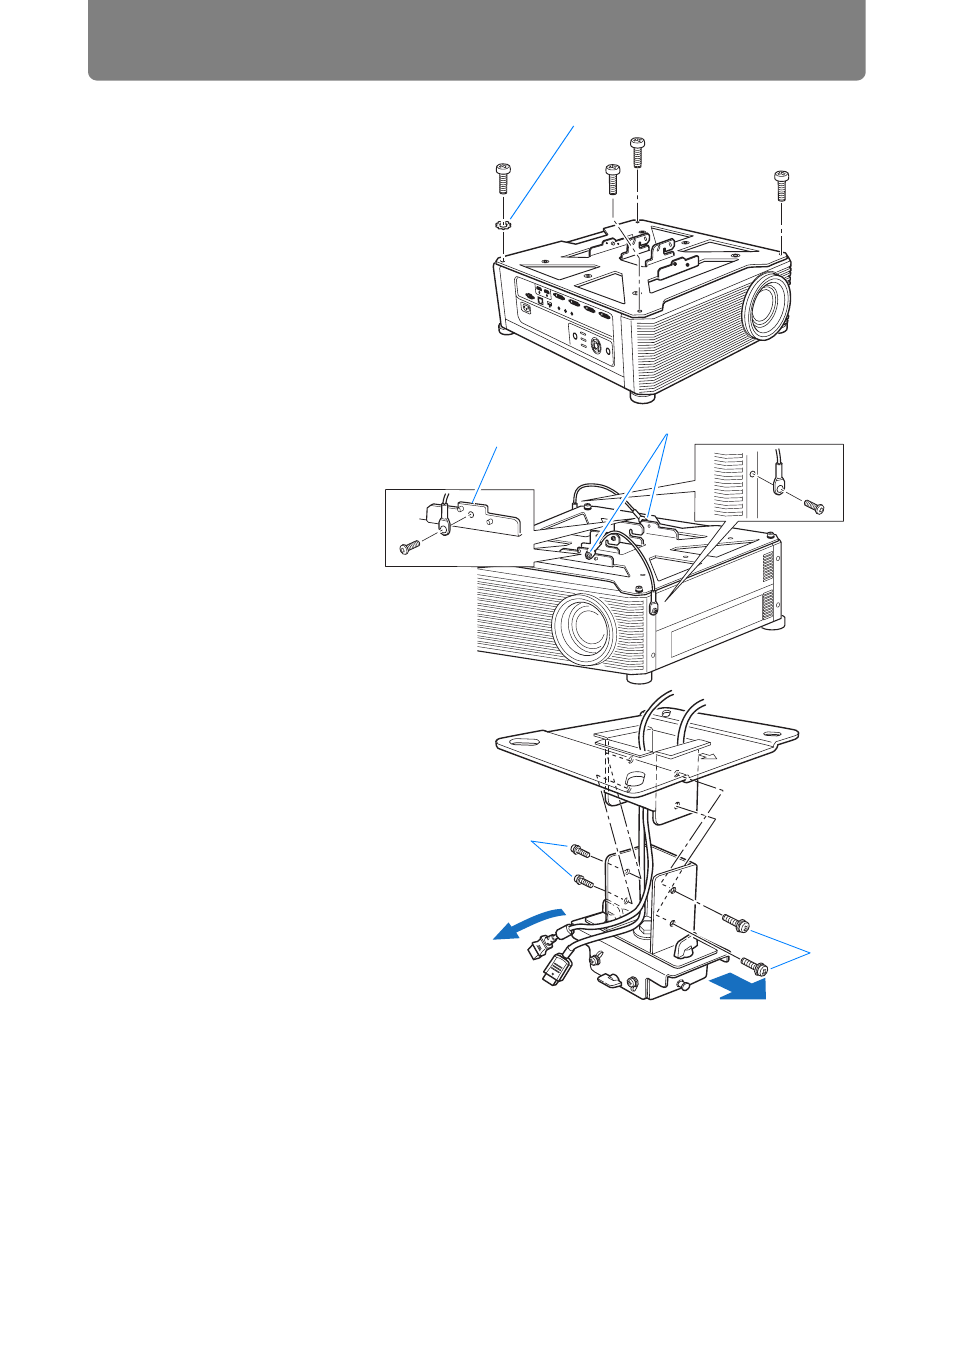
Attach the Base bracket to the
projector
1 Remove the four screws at each
corner on top of the projector.
2 Install the included M6 screws at
the four screw fastening
positions on the Base bracket.
Attach the included toothed lock
washer in the back-left position,
as shown at right.
4
Attach the anti-fall
wires
Secure the terminal
clamps at the end of
the wires to (C) on the
Base bracket using
supplied M4 screws.
•
Make sure to fasten
and tighten the
screw securely.
5
Pull cables out of the
cable hole in the
ceiling
•
As depicted in the diagram, let
cables pass through the hole on
ceiling-mount clamp.
•
If cables are too thick, make a
hole at a different position than
the hole on the ceiling-mount
clamp, and let them pass through
the new hole.
6
Attach the Joint fitting to the
Ceiling-mount bracket
Secure the Ceiling-mount bracket
using the four M5 screws (A)
removed during preparation.
Washer (Toothed Lock Washer)
C
C
A
A
Direction to the screen