Adjust the projection angle, Adjust the horizontal projection angle, Adjust the vertical projection angle – Canon REALiS 4K501ST Pro AV 5000-Lumen LCoS Projector User Manual
Page 47: Angle, Installation procedure
47
Installation Procedure
Bas
ic G
uide
In
st
allation
Pr
ocedu
re
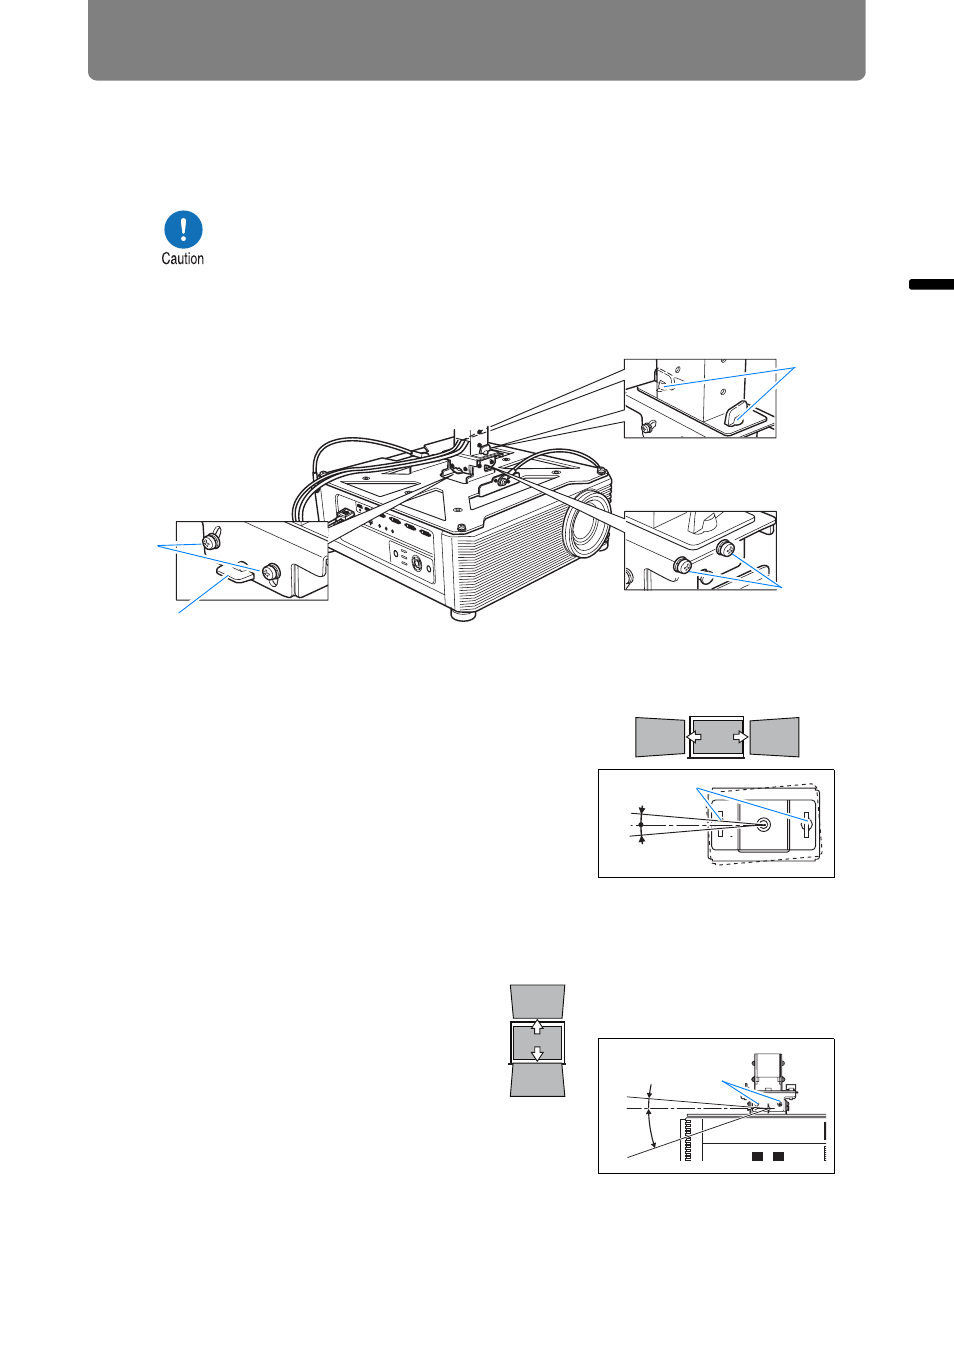
Adjust the Projection Angle
Turn on the projector, project an image, and then adjust the projection angle and
screen slant angle.
■
Adjust the horizontal projection angle
1 Loosen two wing screws (H). Move
the projector horizontally to adjust
the horizontal projection angle.
2 When the projector is correctly
positioned, tighten the wing screws.
■
Adjust the vertical projection angle
1 First loosen four screws (F) and then
loosen two wing screws (G). Move
the projector vertically to adjust the
vertical projection angle.
2 When the projector is correctly
positioned, first tighten the wing
screws (G) and next tighten the four
screws (F).
• After completion of adjustment, tighten the screws and check
that every fitting is secured firmly.
• Be sure to hold the projector from falling until the Ceiling-
mount bracket and Base bracket are secured firmly.
H
F
B
G
Adjust the horizontal
projection angle.
Adjust the screen
slant angle.
Adjust the vertical
projection angle.
5
q
5
q
H
20°
5°
F