Groups menu – Cloud Electronics DCM1 User Manual
Page 29
DCM1 & DCM1e Installation and User Guide v1.0
29
UTILITY
Select Input may be configured by clicking the
OUTPUTS tab, selecting the Zone in the left-hand drop-
down list, and then choosing the music source in the
Select Input
drop-down list. Click Send Output
to transmit the new setting.
Select Input may be configured by selecting Music,
followed by the Zone name (or number), and then
choosing the music source in the Line Input select
box.
Level
Level
SELECT INPUT
Rotary Control sets Zone Level
Numeric buttons select Zone
The Level function sets the volume of music in each Zone.
The eight numeric buttons correspond to the eight Zones;
select the one to have its level adjusted. If a Group is enabled,
selecting any Zone that is a member of that Group selects all
the Zones in the Group (see below).
The rotary control adjusts the audio level in the selected
Zone (or Group). An indication of relative level is given on
the lower row of the display in the form of a bargraph.
UTILITY
Level may be set by clicking the OUTPUTS tab, selecting
the Zone in the left-hand drop-down list, and then setting
the music volume (in dBs) from the Level drop-down
list. Click Send Output to transmit the new setting.
Level may be set by selecting Music, followed by the
Zone
name (or number), and then setting the music
volume, range 0 (mute) to 25 (max.) in the Level select
box.
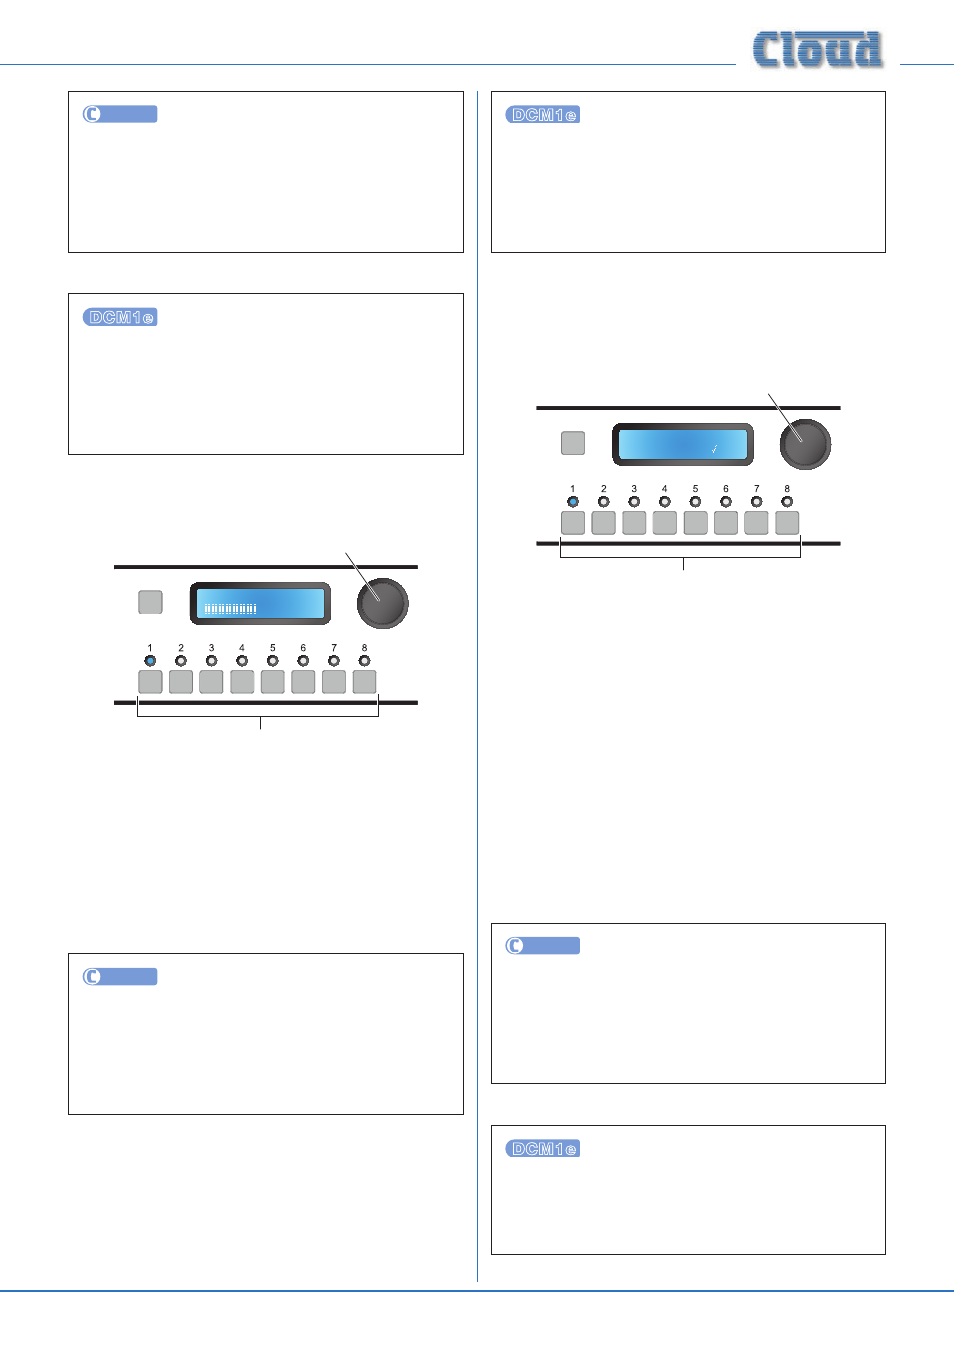
Groups menu
Group Enable
SELECT INPUT
Group 1
Enable
Rotary Control selects Group,
Press to enable/disable Group
LEDs confirm Group membership
The Group Enable menu function allows Groups of Zones
to be enabled or disabled. The Groups must have been
previously defined – see page 46).
The rotary control selects the Group (1 to 4) to be enabled/
disabled. These will be displayed as Group n unless they
have been renamed, in which case the names will be displayed
(see page 37 for details of renaming Groups).
Press the rotary control to enable or disable the Group. The
lower row of the display will show either a cross (X) or a
tick (ü) to confirm that the Group is disabled or enabled
respectively.
The LEDs above the numeric buttons illuminate in this menu
function to confirm Zone membership of the selected Group.
The buttons themselves are not used.
UTILITY
Group Enable may be configured by clicking the
OUTPUTS tab, selecting the Group in the left-hand
drop-down list (below Zone 8), and then clicking in the
Enabled
checkbox in the Group Members area.
Click Send Output to transmit the new setting.
Group Enable may be configured by selecting
Grouping
, followed by the Group name (or number),
and then clicking on the symbol adjacent to the On/Off
select box (ü = enabled; X = disabled).