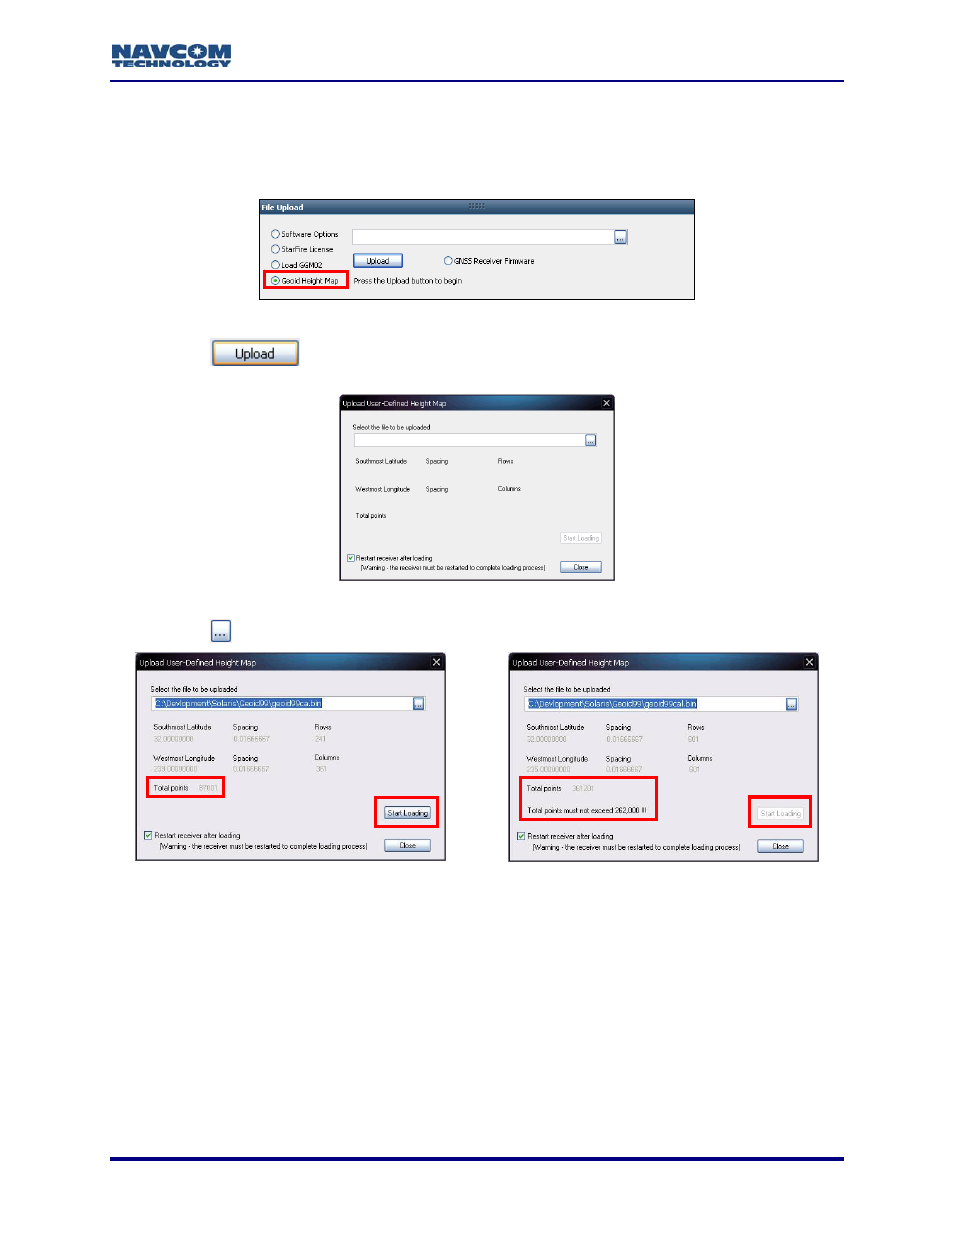
Upload a user-defined geoid height map, Figure 62: file upload window – geoid height map, Figure 63: upload user-defined height map window – NavCom StarUtil-3000 Rev.A User Manual
Page 49
StarUtil-3000 User Guide – Rev A
Upload A User-Defined Geoid Height Map
1. Open
the
Receiver Options tab (see Figure 58).
2. Select
Geoid Height Map in the File Upload window (see Figure 62).
Figure 62: File Upload Window – Geoid Height Map
3. Click
the
button. The Upload User-Defined Height Map window opens (see
Figure 63: Upload User-Defined Height Map Window
4. Click
the button.
Total Points < 262,000 Limit – Upload Permitted
Total Points
262,000 Limit – Upload Denied
Figure 64: Upload User-Defined Height Map Window – File Selected for Upload
Refer to Figure 64 for the steps below:
5. Browse to and select the appropriate file. The path to the file appears in the upload field.
Data retreived from the file is displayed:
Southmost Latitude / Spacing (distance interval in latitude) / Rows (number of rows of
latitude)
Westmost Longitude / Spacing (distance interval in longitude) / Rows (number of
columns of longitude)
Total Points: < 262,000 limit. If the limit is exceeded, upload is denied.
4-47