NewTek TriCaster Advanced Edition User Guide User Manual
Page 109
Page | 97
B
ACKGROUND
T
RANSITION
Transition control settings in this section apply to the Background video layer only. In
most respects, these tools are identical to the DSK transition controls discussed earlier
(Section 9.4.1), but there is one difference worth mentioning.
The Duration menu for the Background transition offers two additional items compared
to the similar menu in the DSK control groups:
Reverse – configures the current transition to run in reverse direction the next
time it is applied.
Ping Pong – when enabled, this option causes the direction of the transition to be automatically
swapped after each time it is applied.
T
RANSITION
D
ELEGATES
An executive maxim suggests “Don’t do anything yourself when you can delegate it”. The familiar main T-bar,
Auto and Take controls occupying the left half of TriCaster’s Transition control group are surmounted by a
set of Transition Delegate buttons.
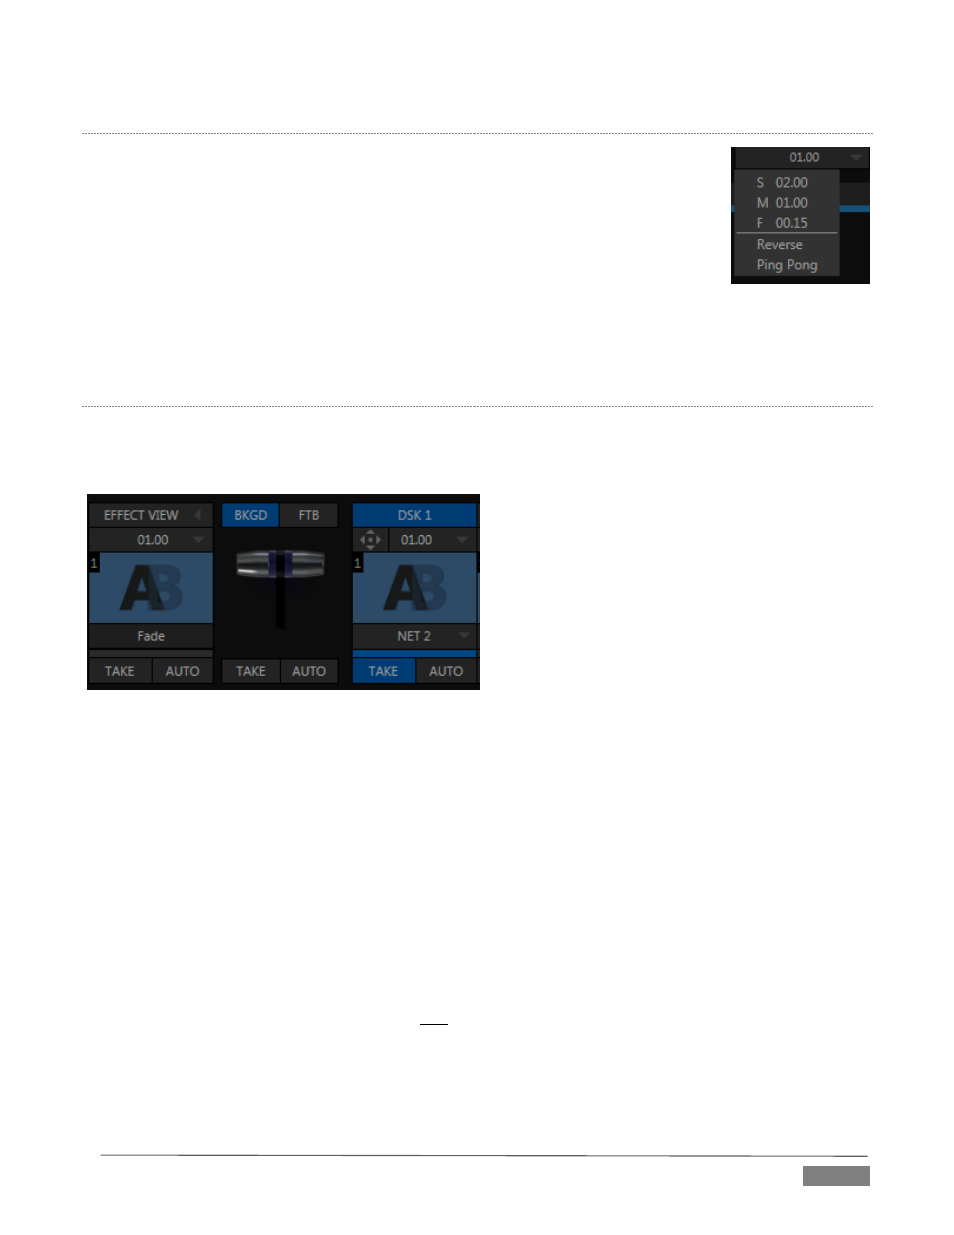
FIGURE 101
Let’s see how applying the concept of delegating controls affects their use:
Assign something suitable to the DSK 1 and DSK 2 layers.
Click the solo Take buttons in the DSK control groups to hide these DSK layers, if they are visible on
output.
Click the BKGD button.
Click the main Auto button (below the T-bar).
Now, hold down the Ctrl key and click the delegate button for DSK 1. Or, press both the BKGD and DSK
1 buttons in the TriCaster CS (control surface) Transition Delegate group at the same time instead.
You have just delegated the controls below to two video layers. You can likely guess what comes next.
Press Auto or Take, and observe the result.
Now add DSK 2 to the delegate selection, and switch again.
FIGURE 100