Figure – AGI Security SYS-16HN44P User Manual
Page 156
144
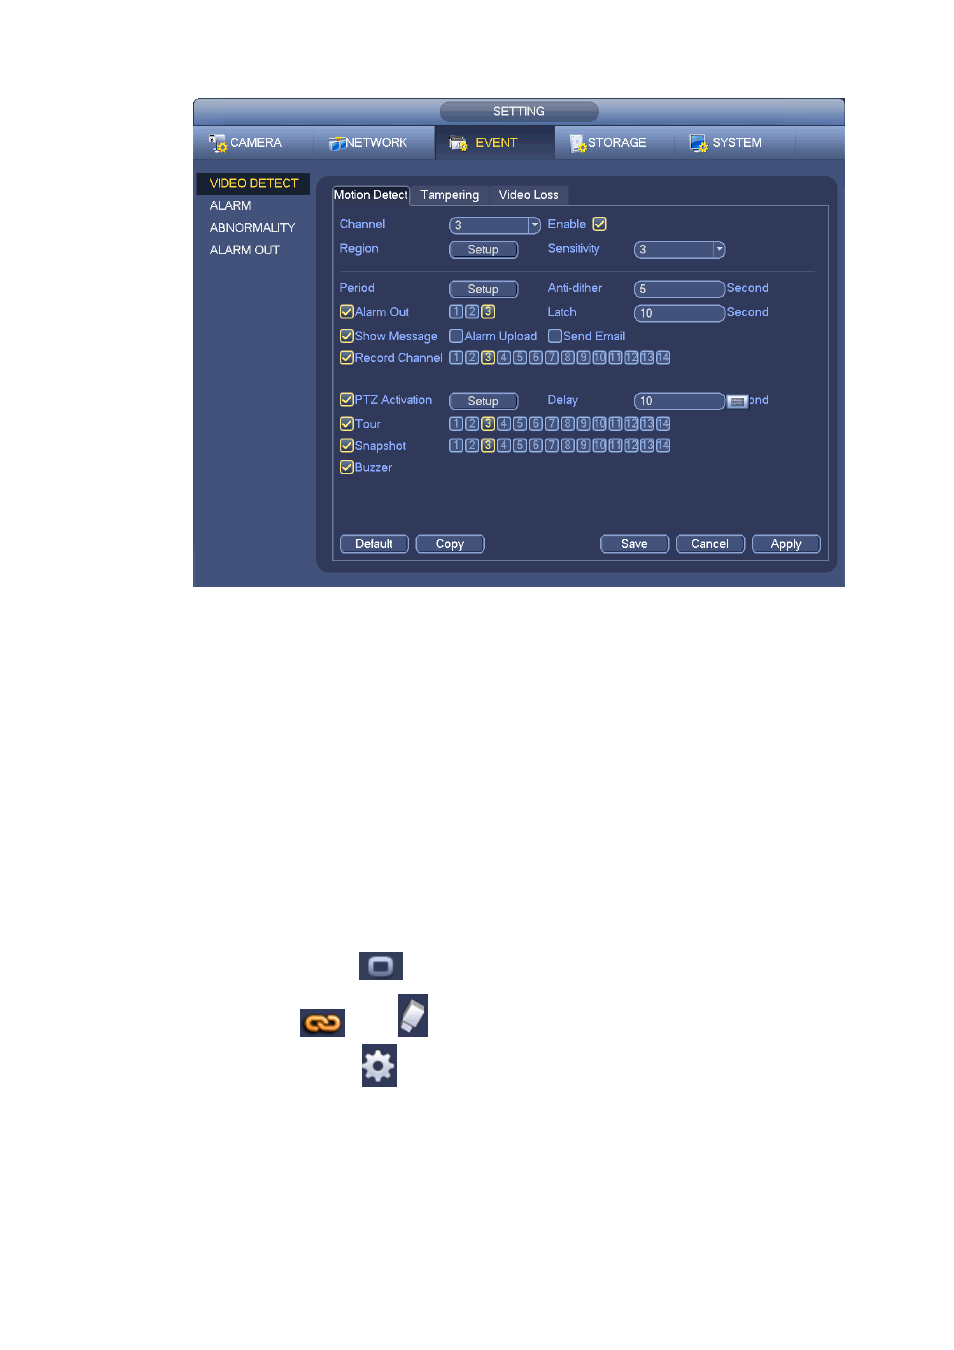
Figure 4-61
b) Select motion detect from the event type dropdown list. Select a channel from the dropdown list
and then check the enable button to enable motion detect function.
c) Click Region Select button to set motion detect zone. There are 396(PAL)/330(NTSC) small
zones. The green zone is current cursor position. Grey zone is the motion detection zone. Black
zone is the disarmed zone. You can click Fn button to switch between the arm mode and disarm
mode. In arm mode, you can click the direction buttons to move the green rectangle to set the
motion detection zone. After you completed the setup, please click ENTER button to exit current
setup. Do remember click save button to save current setup. If you click ESC button to exit the
region setup interface system will not save your zone setup.
d) Period: Click set button, you can see an interface is shown as in Figure 4-84. Here you can set
motion detect period. System only enables motion detect operation in the specified periods. It is
not for video loss or the tampering. There are two ways for you to set periods. Please note
system only supports 6 periods in one day.
In Figure 4-84, Select icon
of several dates, all checked items can be edited together. Now
the icon is shown as
. Click
to delete a record type from one period.
In Figure 4-84. Click button
after one date or a holiday, you can see an interface shown as in
Figure 4-85. There are four record types: regular, motion detection (MD), Alarm, MD & alarm.
e) Set sensitivity. Please note the sixth level has the highest sensitivity.
f)
Click Save button to complete motion detect setup.
g) From Main menu->Setting->Storage->-Schedule. See Figure 4-55
h) Set motion detect record channel, period and the record type shall be motion detect (MD).
Please refer to chapter 4.8.2.