3 nvr11h/11h-p/41h/41h-p/41h-8p series, 4 nvr42/42-p/42-8p/72/72-8p/42-4k/42-8p-4k series, Nvr11h/11h-p/41h/41h-p/41h-8p series – AGI Security SYS-16HN44P User Manual
Page 94: Nvr42/42-p/42-8p/72/72-8p/42-4k/42-8p-4k series
82
3.3.3 NVR11H/11H-P/41H/41H-P/41H-8P Series
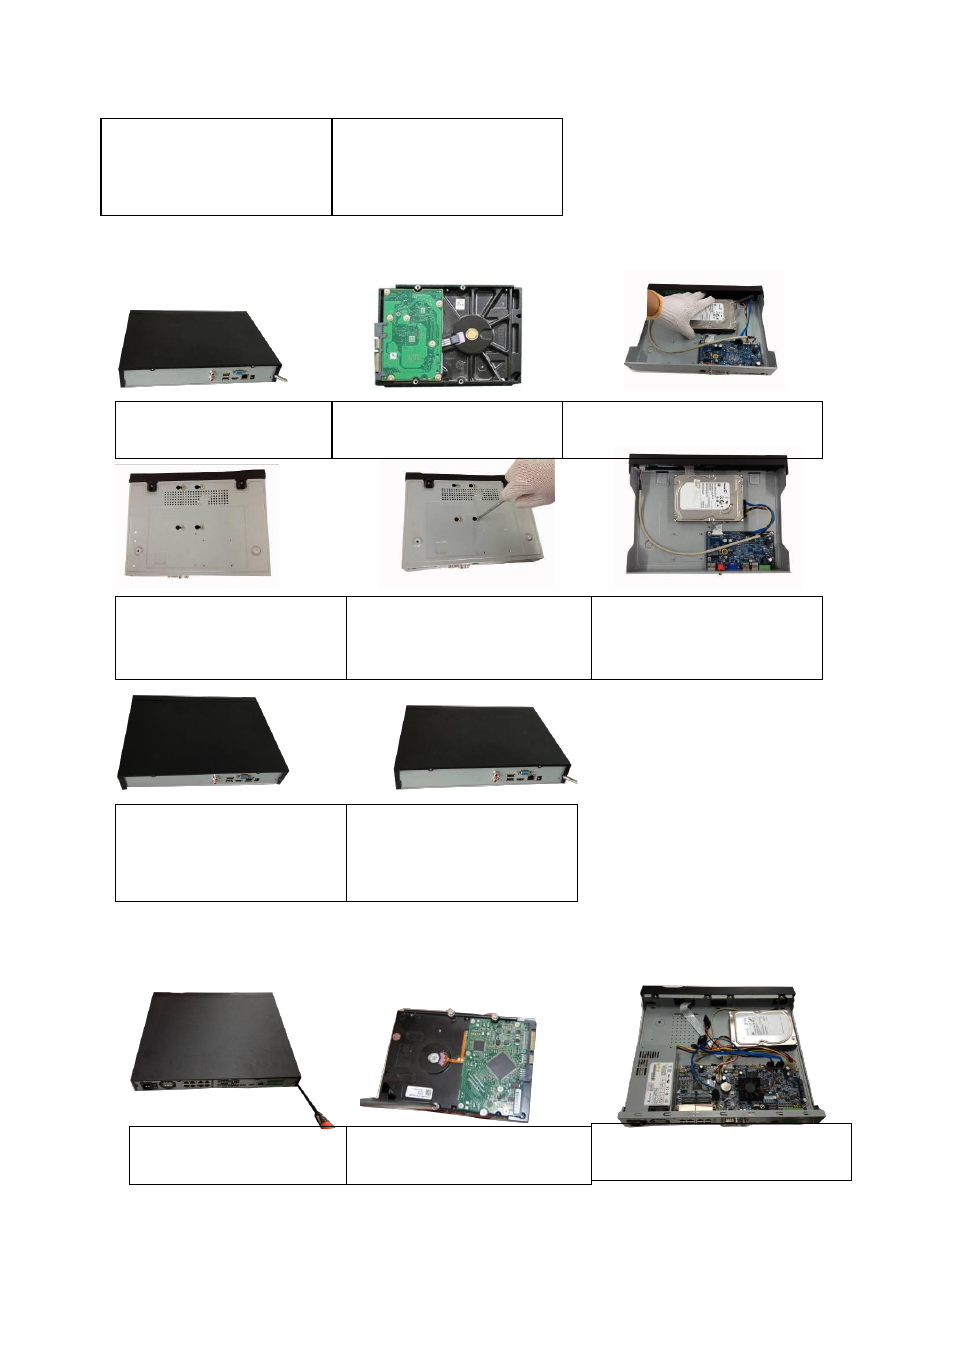
3.3.4 NVR42/42-P/42-8P/72/72-8P/42-4K/42-8P-4K Series
The following figures are based on the NVR 72-8P series.
1. Loosen the screws of the
upper cover and side panel.
2. Fix four screws in the HDD
(Turn just three rounds).
3. Place the HDD in accordance with
the four holes in the bottom.
7. Put the cover in accordance
with the clip and then place the
upper cover back.
8. Secure the screws in the
rear panel and the side panel.
1. Loosen the screws of the
rear panel and side panel.
2. Fix four screws in the HDD
(Turn just three rounds).
3. Place the HDD in accordance with
the four holes in the bottom.
4. Turn the device upside down
and then turn the screws in
firmly.
in the chassis.
5.
Fix the HDD firmly.
6. Connect the HDD cable and
power cable.
7. Put the cover in accordance
with the clip and then place the
upper cover back.
8. Secure the screws in the
rear panel and the side panel.