Issue notice, Adding a notice, Shown in – H3C Technologies H3C Intelligent Management Center User Manual
Page 79: Figure 44
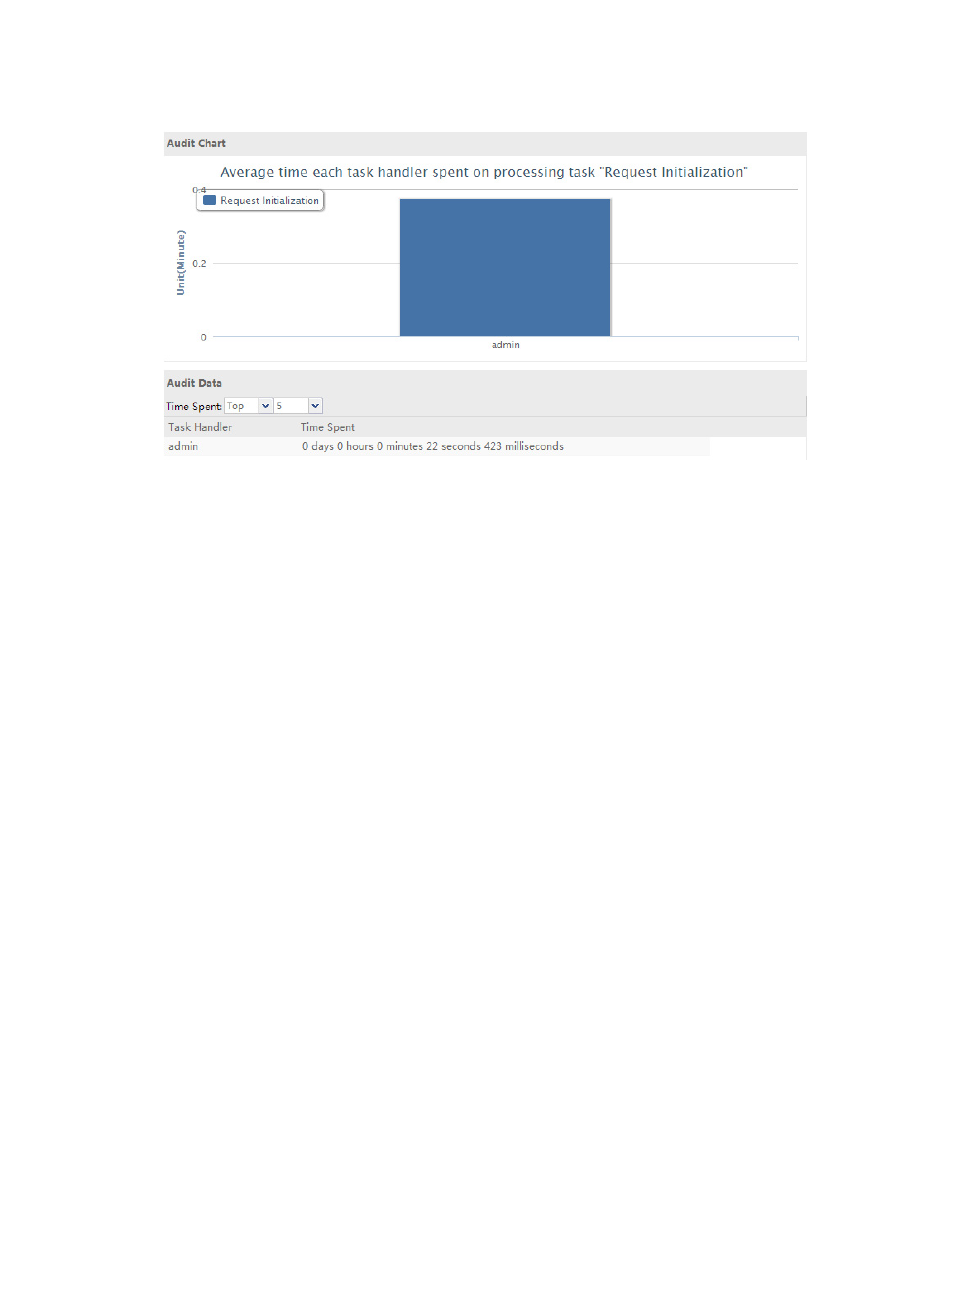
71
Figure 44 Auditing by task handler
Issue notice
The notice issuing function allows you to manage notices issued by SOM.
Adding a notice
To add a notice:
1.
Select System Management from the navigation tree, and double-click Issue Notice.
2.
Click Add.
A dialog box for configuring notices appears, as shown in
Enter information in the text fields as follows:
•
Initiator—Enter the issuer of the notice.
•
Title—Enter the title of the notice.
•
Content—Enter the content of the notice.
•
Accessory—If the notice contains an additional document that needs to be viewed, click
Browse next to the Accessory field to select an accessory for the notice.
•
Validity Period—Select a number from the Validity Period list. The validity period is in days,
starting from the day when the notice is modified. Within the validity period, you can receive
and read the notice.
•
Enable—Select whether or not enable the issuing of the notice. Options are: Yes and No. By
default, Yes is used. If No is selected, the notice will not be issued, and the SOM accounts
cannot receive the notice.
•
Privilege—Specify which accounts have the privilege to receive the notice. Options are:
Public and Private. By default, Public is used. If Private is selected, specify the user list that can
receive and read the notice.
•
User List—If Private is selected, specify the user list that can receive and read the notice.