1 adding a projector – Doremi DC-POST User Manual
Page 76

16.1 Adding a Projector
•
Click the “Add” button from Figure 95 above.
•
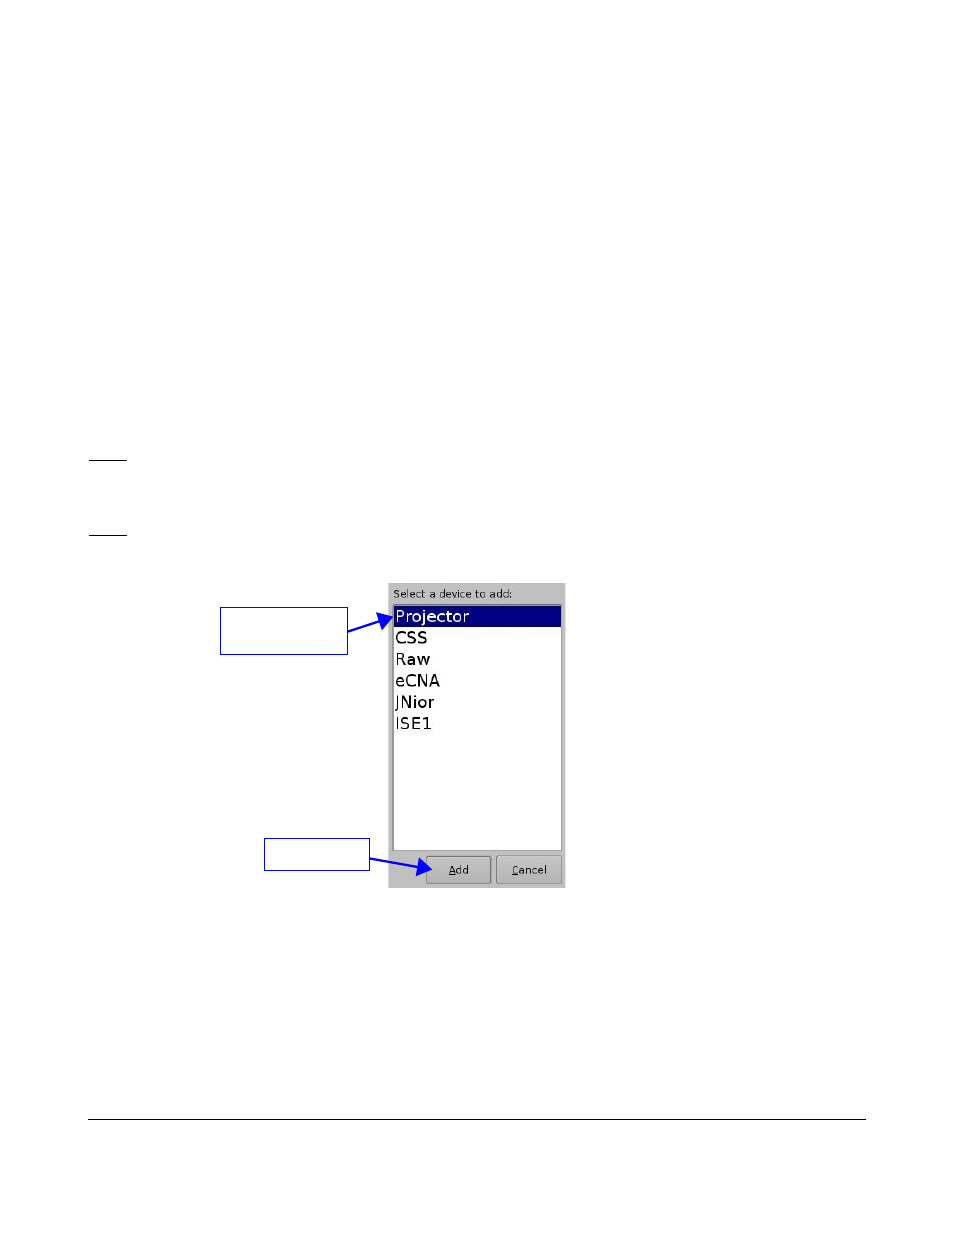
You will be prompted to the “Device Selection” Window (see Figure 96).
•
Select the “Projector” from the list and click Add.
•
You will then be prompted to the main configuration window (see Figure 97).
•
Make sure that the “Enabled” check box is checked at the top right corner of the GUI.
•
Specify a projector identifier (i.e., projector name, screen #, 3D-left, 3D-right, etc.) in the first
field – especially if you are setting up several projectors (see Figure 97).
•
Choose the correct projector model you want to connect to the DC-Post using the “Projector
model” field(s).
•
Enter the DLP Head IP address, and then click the “test” button located at the right.
•
Enter the Vendor IP value in the corresponding field (see Figure 97).
•
Enable or disable subtitles if needed using the corresponding buttons (see Figure 97).
Note: If you enable subtitles without the DC-Post being connected to a projector, the server will not
operate properly.
•
Specify if this is the primary projector by clicking yes or no.
Note: The DLP Username and Password are used for specific projectors only and cannot be changed.
•
Click the “Save” button to record these settings – you will be asked for a password.
Figure 96: Device Selection Window – “Projector” Item Selected
DPT.OM.001128.DRM Page 76 of 101 Version 1.2
Doremi Labs
“Add” button
“Projector” item
selected