Comtech EF Data turboIP-G2 User Manual
Page 41
turboIP-G2 Performance Enhancement Proxy
Revision 2
Installation and Startup
CD-TURBOIP-G2
2–5
2.2.2.1 1/2-Width turboIP-G2 – Single Unit Rack Mount Configuration
The tools required for this installation are a medium Phillips
™ screwdriver and, optionally for use
with Item 9, a 1/4” drive socket. This configuration, as illustrated in Figure 2-4, is assembled as
follows (refer back to Figure 2-3 to identify all parts referred to in these instructions by Item #):
Step
1/2-Width Single Unit Mount Assembly Procedure
1
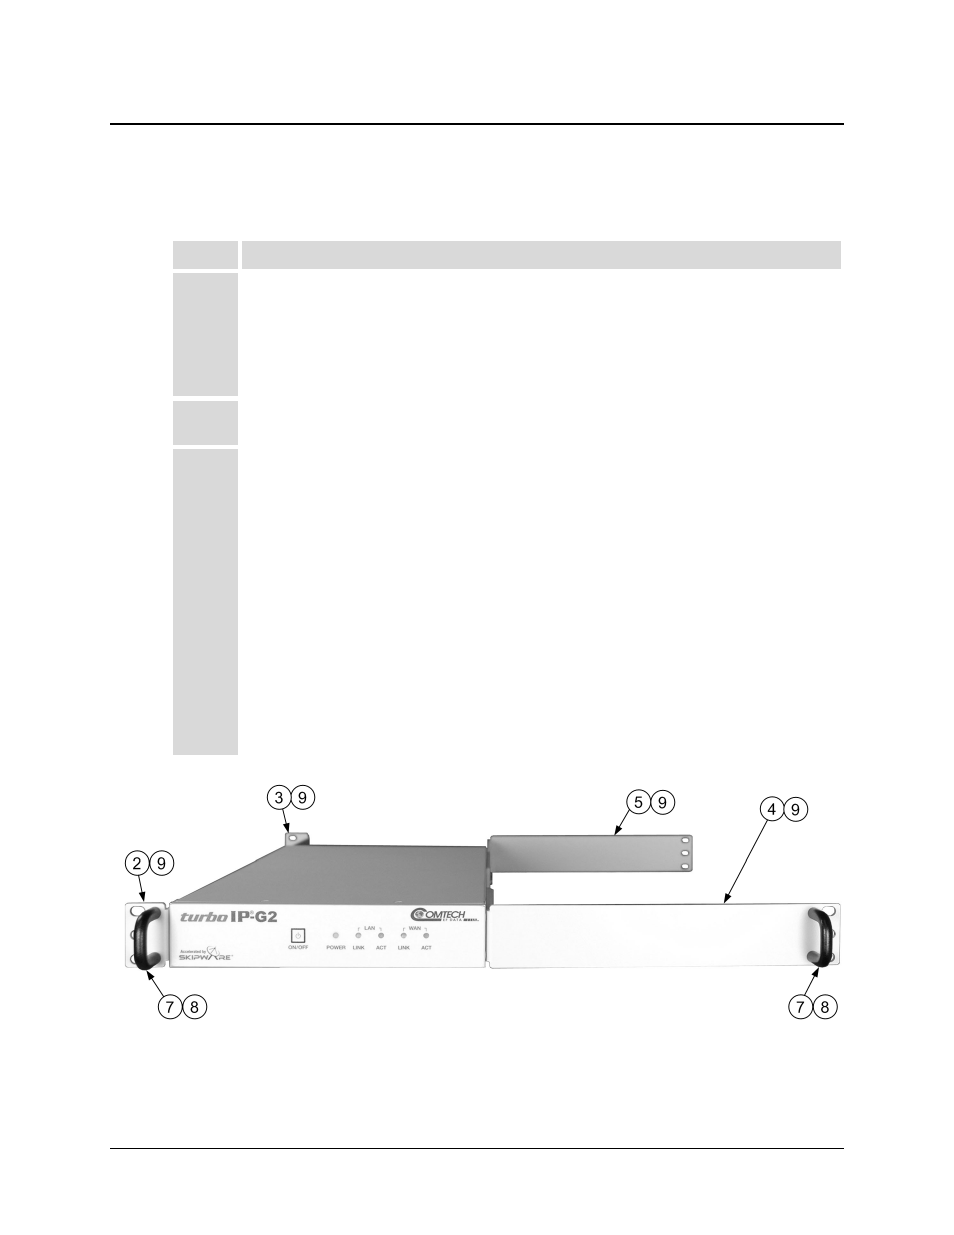
As shown in Figure 2-4: Assemble one each of the Front and Rear Universal Short
Brackets (Items 2 and 3) to the left side of the 1/2-Width chassis, and the Front and
Rear Long Brackets (Items 4 and 5) to the right side of the chassis, using the #6-32 x
1/4" long hex head machine screws (Item 9).
Do not fully tighten the rear bracket screws until the assembly is adjusted for proper
rack mounting (as per Step 3 of this procedure).
2
As shown in Figure 2-4: Install the handles (Item 7) onto the right and left front
bracket rack ears using the M4 x 8mm long flat head screws (Item 8).
3
As shown in Figure 2-1: Install the turboIP-G2 assembly into the rack as needed. The
rear brackets are slotted to adjust the assembly to suit the required rack depth.
Depending on the style of rack used:
a. Bolt the assembly into the rack using the front mounting ears (mounting
hardware provided by customer).
b. Slide the rear brackets back or forth until the rear bracket mounting ears
contact the rear rack mounting rail.
c. Mark the left and right rear brackets at the inside edge of the unit chassis, and
then remove the assembly from the rack.
d. Tighten down the rear bracket screws on both sides, making sure the marked
depth is maintained for the rear brackets.
Reinstall the assembly into the rack. Use the front and rear mounting ears on the rack
brackets to secure the configuration to the rack mounting rails as needed (mounting
hardware provided by customer).
Figure 2-4. 1/2-Width Rack Mount Kit Assembly – Single Unit Configuration