3 heatsink cooling fan replacement, Heatsink cooling fan replacement – Yaskawa iQpump Drive User Manual User Manual
Page 162
7.3 Heatsink Cooling Fan Replacement
162
YASKAWA TM.iQp.01 iQpump Drive User Manual
7.3
Heatsink Cooling Fan Replacement
◆ Models CIMR-P7U20P4 thru 2018 (25HP @ 208V/240V) and 40P4 thru 4018
(30HP @ 480V)
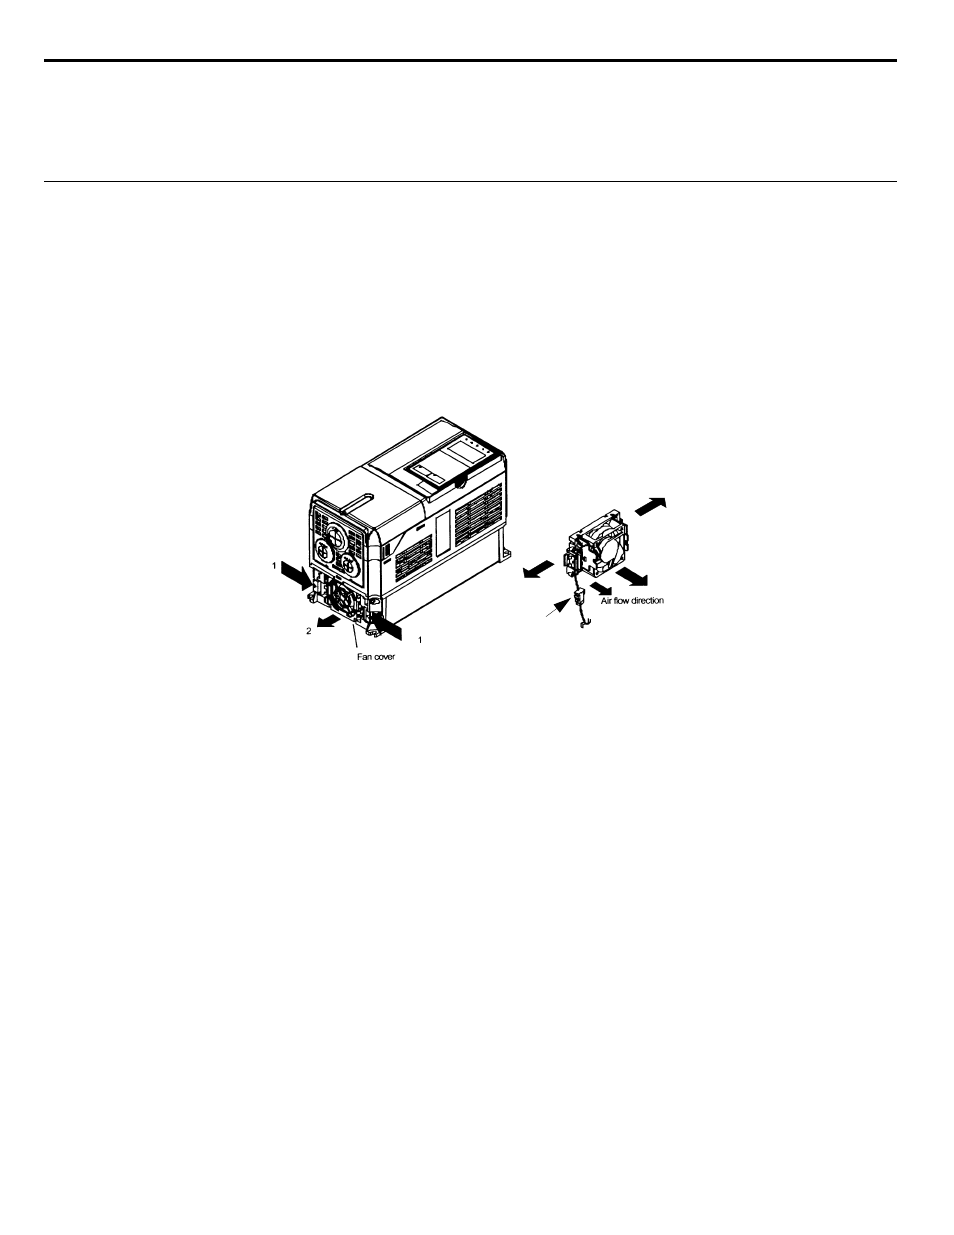
A cooling fan is attached to the bottom of the iQpump drive.
If the iQpump drive is installed using the mounting holes on the back of the iQpump drive heatsink, the cooling fan can be replaced
without removing the iQpump drive from the enclosure panel.
If the iQpump drive is mounted with the heatsink external to the enclosure, the cooling fan can only be replaced by removing the iQpump
drive from the enclosure.
■
Removing the Heatsink Cooling Fan
1. Always turn OFF the input power before removing and installing the heatsink cooling fan.
2. Press in on the right and left sides of the fan cover in the direction of arrows “1” and then pull the fan out in the direction of arrow “2.”
3. Pull out the cable connected to the fan from the fan cover and disconnect the power connector. See
.
4. Open the fan cover on the left and right sides in the direction of arrows “3” and remove the fan cover from the fan.
Figure 7.1
Figure 7.1 Cooling Fan Replacement Procedure
■
Installing the Heatsink Cooling Fan
1. Attach the fan cover to the cooling fan. Be sure that the air flow direction indicated by the arrows above faces into the iQpump drive.
2. Connect the power connector securely and place the power connector and cable into the fan cover.
3. Mount the fan cover on the iQpump drive. Be sure that the tabs on the sides of the fan cover click into place on the iQpump drive.
Power
Connector
3
3