Using name sets – Grass Valley NV9000-SE v.3.0 User Manual
Page 521
NV9000-SE Utilities • User’s Guide
501
17. Using Name Sets
Updating a Name Set
3 Right-click on the system controller you are currently working with and from the pop-up menu
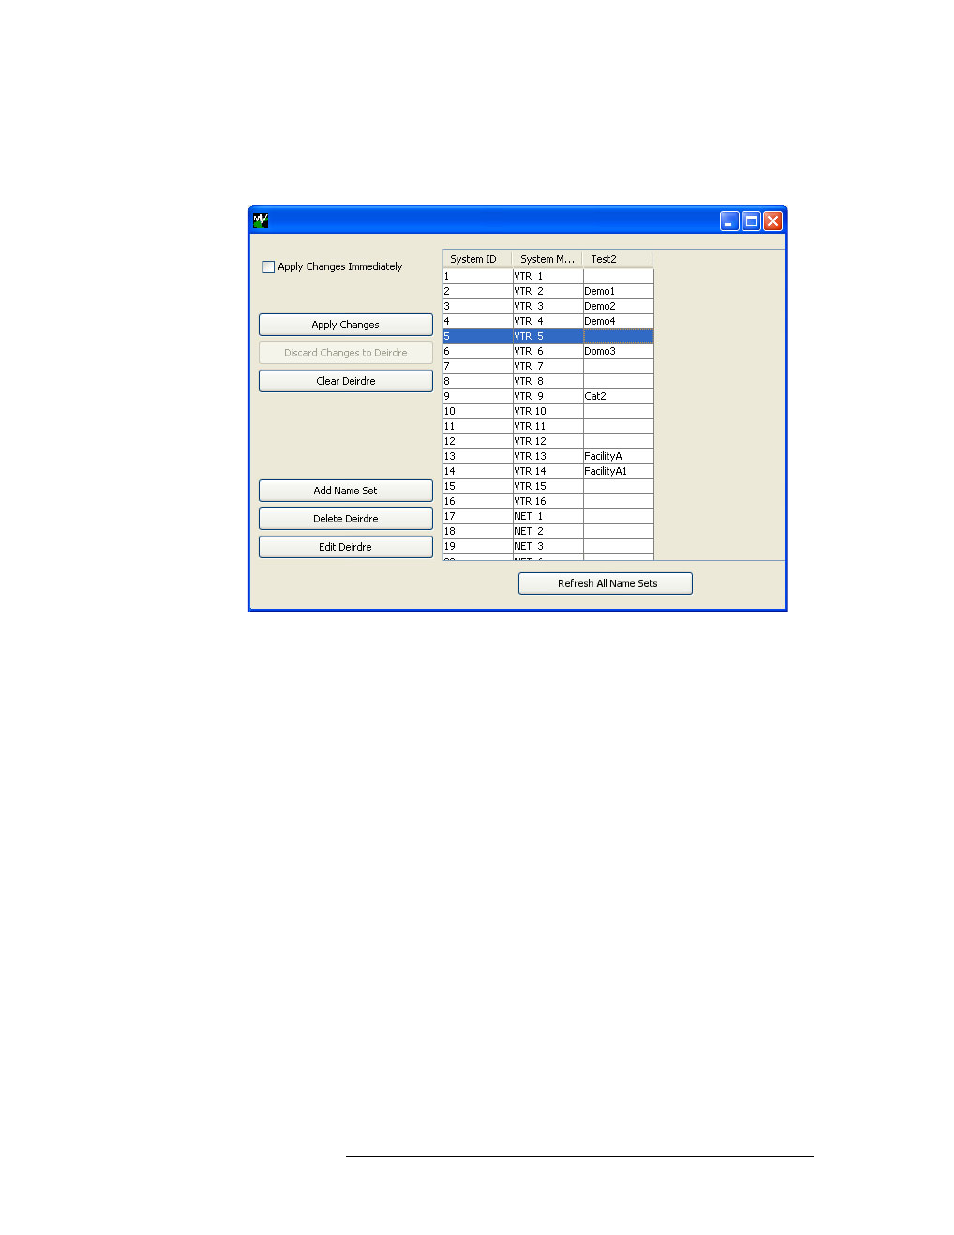
select ‘Edit Name Sets’. The ‘Name Sets’ window appears, as shown in Figure 17-4. All name
sets currently defined in the system are listed.
Figure 17-4. Name Sets Window
4 To have changes sent to control panels immediately as each name is updated or removed in a
name set, without having to complete making changes to the name set as a whole, check the
‘Apply Changes Immediately’ check box.
To have changes applied only after you have made all updates to the entire name set, make sure
‘Apply Changes Immediately’ is unchecked.
5 To change the name of a name set, click on the name set column and click
Edit Name Set
. In the
‘Edit Name Set’ dialog box that appears, enter a new name and click
OK
.
6 To remove or change a name in a name set, click on the row listing the name to activate the cell
and either enter a new name or remove the name completely.
Or
To remove all names in a name set, click on the name set column and click
Clear Name Set
.
And/Or
To undo the removal of all names in a name set, click
Discard Changes
.
7 If ‘Apply Changes Immediately’ is unchecked, click
Apply Changes
to send your changes to
control panels.
8 Click
X
on the window title tab to close the window.