3 click add. a blank row appears, 7 click save. the alias is saved to the system, N in figure 18-1 – Grass Valley NV9000-SE v.3.0 User Manual
Page 524: Using the alias table
504
Rev 3.0 • 25 Mar 10
18. Using the Alias Table
Adding an Alias
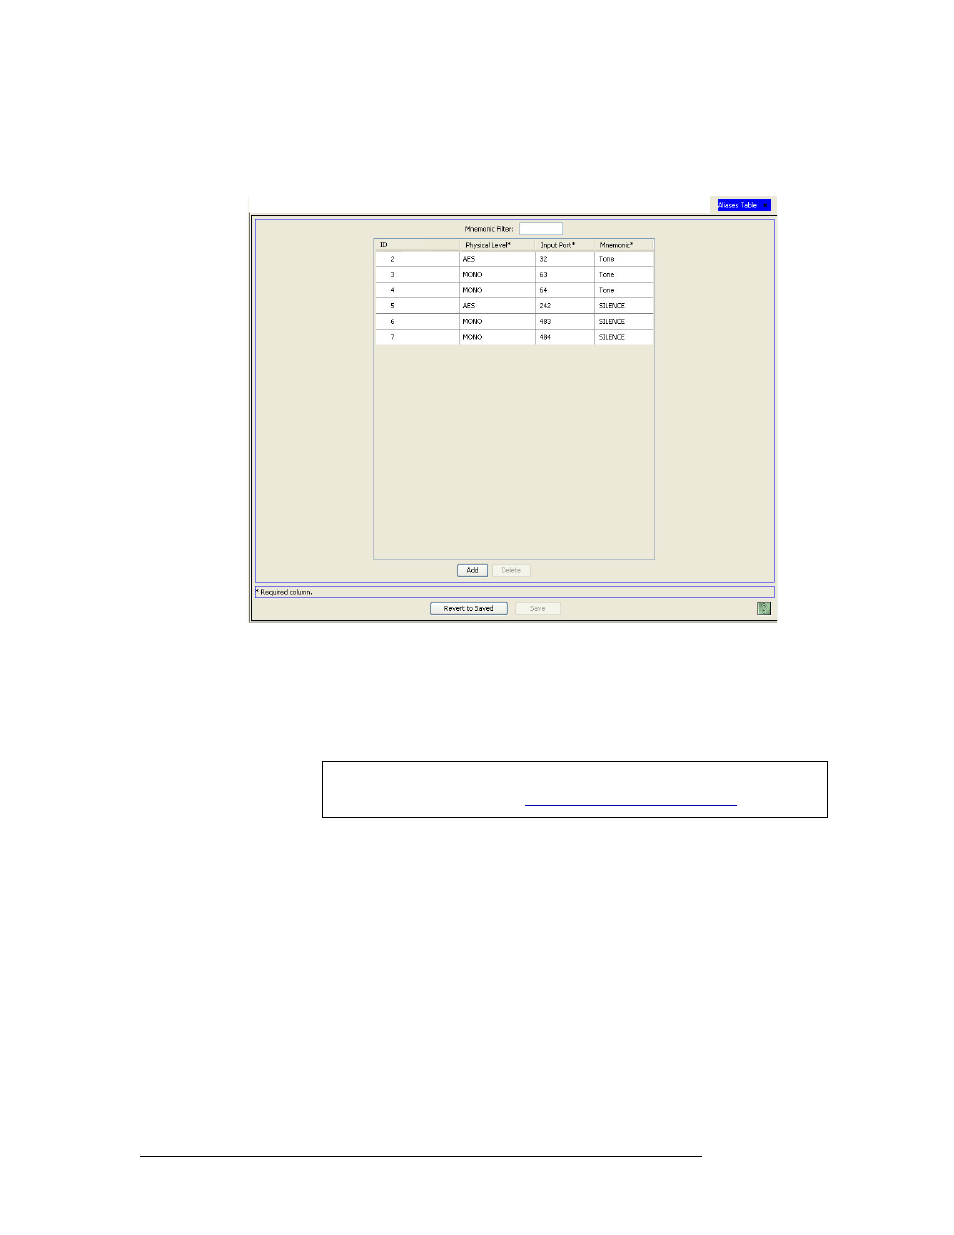
All aliases currently defined in the system are listed. To narrow the list, enter the first characters
of the alias’s name in the ‘Mnemonic Filter’ field. The list is automatically reduced to display
only aliases matching that character string.
Figure 18-1. Aliases Table
Asterisks denote required fields.
3 Click
Add
. A blank row appears.
4 In the blank row, click in the ‘Physical Level’ column and select a physical level for the port
from the drop-down list.
5 In the same row, click in the ‘Input Port’ column to activate it and enter the number of the port.
6 In the same row, click in the ‘Mnemonic’ column to activate it and enter the name assigned to
the port. Alpha-numeric characters may be used, but no symbols or punctuation marks.
7 Click
Save
. The alias is saved to the system.
8 Click
X
on the window title tab to close the table.
Note
Input ports are identified by port number and physical level. For more infor-
mation on physical levels, see