2 project settings – MacroSystem Bogart SE Ver.2 User manual User Manual
Page 22
20 Chapter 4
These options can be activated (mark box) if you wish to
power up (and down) the unit using the optional remote . The
remote can also be used to partially operate the entire system .
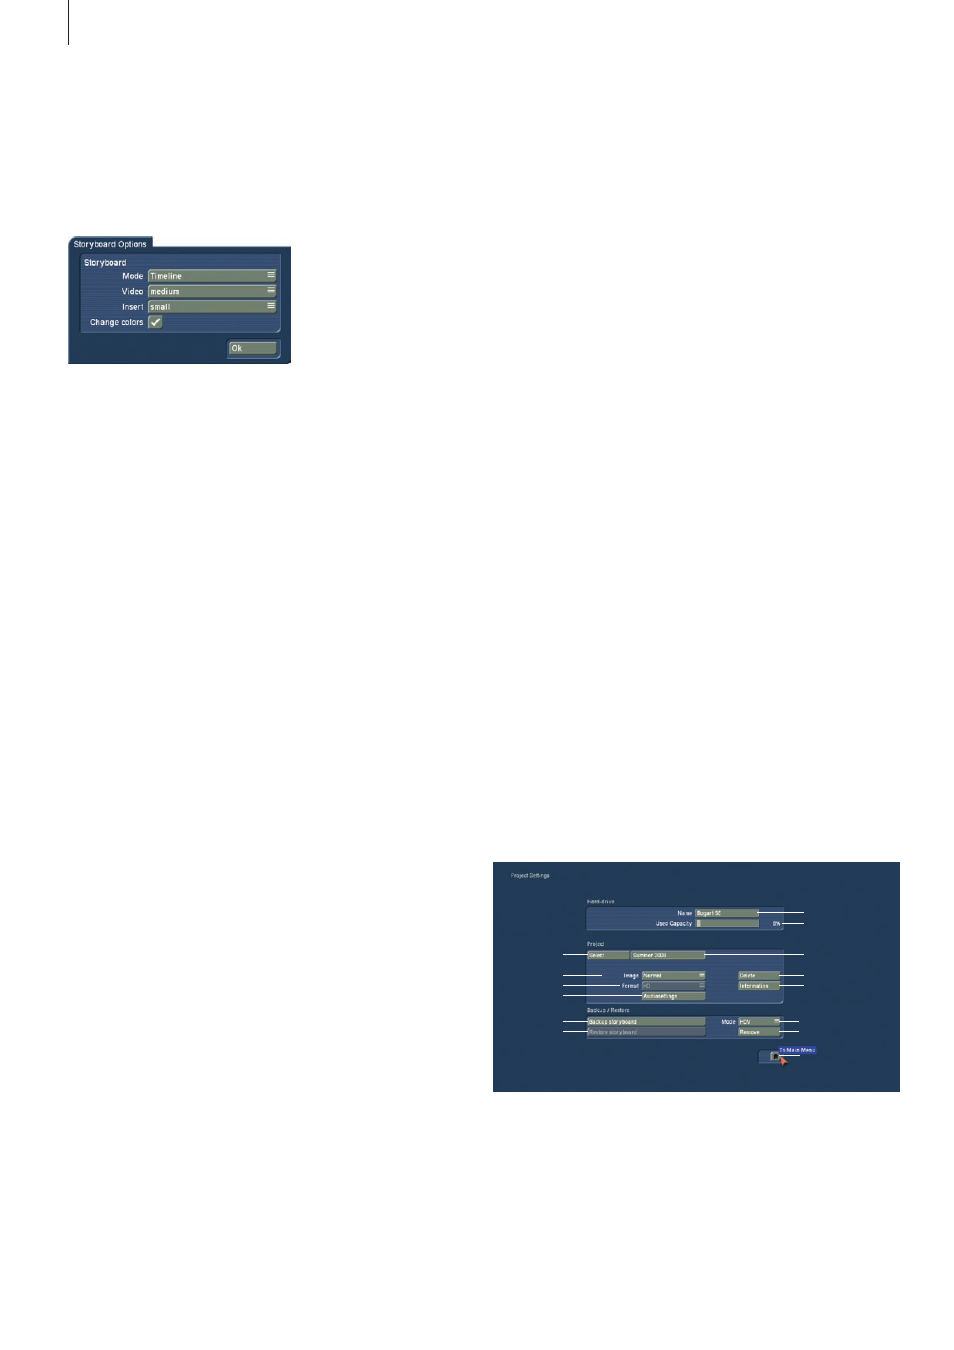
(9) The `Storyboard options´ button is used to select the type of
editing method: Storyboard or Timeline .
To use the `Timeline´ method, you require a VGA or DVI resolu-
tion of at least 1024x768 pixels . A video monitor is not suit-
able for Timeline editing . Before you activate the Timeline, it
is essential that you select a suitable screen resolution . Go to
System Settings > Storyboard options:
Storyboard - mode: This switches between the Storyboard and
Timeline display . The Timeline method gives you two options:
Either `Timeline´ for using the Timeline in all menus, or `Timeline
(only audio)´ for using the Timeline only in the audio mix screen .
Storyboard - video: You can display a text in a scene or you
can have an image (frame) shown at the start and end of a
video scene segment . If you opt for the image, you can also
select a size (small, middle, large) . The images have priority
over the text so in some cases, the text may be overlapped by
the image .
Storyboard - insert: You can make the same settings that are
possible for the video track . In addition, you can also deacti-
vate the insert track altogether, if you don't need it .
Storyboard - colour change: This button activates an alterna-
tive scene display for the video track . If you activate this op-
tion, scene will also be displayed in differing tones of blue, in
addition to the yellow separation line .
(10) Click the selection button `language´ to open a separate
menu with items to select . Select the desired language and the
switch takes place immediately .
(11) The "Keyboard" button is used for selecting a specific
keyboard language layout on an external keyboard .
The "As language" setting automatically uses the same setup
defined under "Language" . You can of course also set it to a
different keyboard as specified by the interface language .
(12) The “Backup/Restore Archives” function allows you to
store saved data archives (colors, title texts, audio-effect com-
binations) to a separate medium and later restore back into the
system . This way, you can access your archives data after a
full re-installation, or you can transfer data to a second unit .
Click onto the `Backup/Restore Archives´ button and a window
will appear – this allows you to choose between `Backup´ and
`Restore´ .
Press the `Backup´ button to select a target medium such as
CD/DVD, an external Firewire hard-drive or a USB stick (for
this, you require the Card Drive software) . Select one option
and press `Ok´ and you will be asked to enter a name for the
document .
Additionally, here you will see all previously saved documents .
Confirm with `Ok´ and insert/connect (USB stick, Firewire hard-
drive) medium as requested . If you are using an already burned
CD/DVD RW, the system will first delete the contained data – it
is not possible to add data to the disc! Then, the CD/DVD will
be burned or the data will be saved to the USB stick or hard-
drive . You can confirm the procedure by pressing “Ok” .
If you decide to perform a “Restore”, you must first choose a
`Source´ (CD/DVD, USB stick or external Firewire hard-drive)
and then decide if you wish to `Overwrite existing files´ (a
check in the box) . Once you have opted for a medium and
pressed `Ok´, you will be requested to insert the medium or to
connect the external medium containing the archived data to
your system .
(14) This information field displays the OS version and the
device serial number . Click on the information panel brings up
the system information .
(15) Clicking on the menu symbol returns you to the Main
menu . Clicking the right trackball button does the same .
4.2 Project settings
In this menu you make the settings for your current or next
project . This affects, for example, the project name, image
size, and audio settings .
1
2
3
3
4
5
6
7
8
9
10
11
12
13
(1) On the upper edge (the "Hard-drive" section) you see the
"Name" button . Clicking on the name-field brings up the on-
screen keyboard with which you can enter the desired name
for the hard drive . You can also see (on a suitable system)
which hard drive is currently in the system . This is otherwise
not possible because the label on the hard drive is not visible
when the hard drive has been inserted into the machine .