MacroSystem Bogart SE Ver.2 User manual User Manual
Page 37
35
Bogart SE 2 user manual
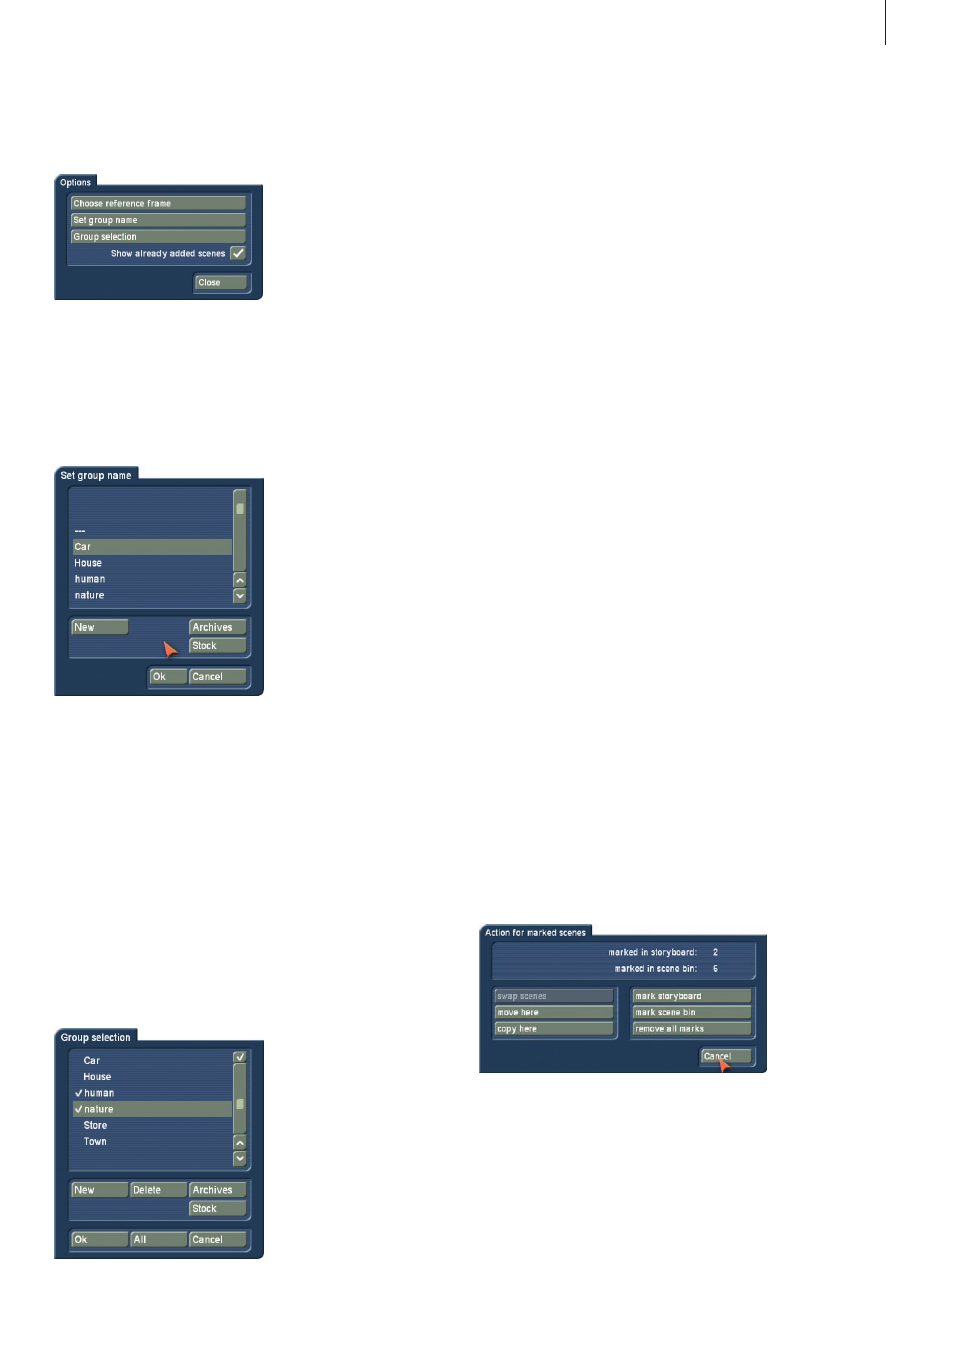
(28) The `Opt´ button gives you further options that can be
used to improve and optimize the scene arrangement in the
scene bin .
In order to differentiate better between the various scenes, it
may be necessary to change the `Reference frame´ which rep-
resents the entire scene . To do this, go to the options `Opt´ and
press `Select Reference image´ . You will see a menu that allows
you to determine the image within the scene . Activate `Position´
to scroll through the scene and to select a new image .
You can assign scenes to groups and make things a lot more
organised . For example, you can only show the scene of a par-
ticular group . In VGA mode, beneath every scene name, you’ll
find a small field (26) displaying the assigned group name . If
the field is empty, there’s no group assigned . In video mode,
the group can’t be seen directly, you have to first press the
“Opt” button and then the information button “i” .
If you wish to change an already assigned group, click onto the
group name below the scene stamp (VGA only) . You will see a
list of group names – simply choose the new name here . The
option “New” allows you to enter a totally new group name . If
you are working using the video mode, press “Opt” to open
the group selection and select “Assign group name” .
Working with groups has many advantages . If you wish to
show only selected scenes or a particular group or even
several groups, press “Opt” and then “Group selection” . This
next list contains all available groups for this project . Use the
multiple selection function to choose one or more groups by
placing a tick next to the groups . Press Ok to now show only
the selected groups of scenes . The remaining scenes are not
deleted, merely “hidden” .
If you wish to delete an group name of a scene (un-assign),
select the “---“ name from the group list . If you wish to see all
scenes, even those not assigned to any group, open the group
selection once more and confirm by pressing “All” . You will
now once again see all of your clips in the scene bin .
Whenever you are not displaying all scenes, the header of the
scene bin, on the right next to “Scene bin”, you’ll find the text
“Filter active” . Make sure to check for this if you feel that some
scenes are “missing” .
You can even improve the organisation of the scene bin more
by hiding any scenes that you already added to the Story-
board . Go to the options menu “Opt” . If the checkbox next to
“Show added scenes” is ticked, any added scenes (all scenes
marked with a small white dot above the stamp) will be shown
in the scene bin . An unticked box means that the function is
deactivated and that already added scenes are not shown in
the scene bin . Of course, “hiding” scenes in this fashion does
not mean that they are deleted, but merely not shown .
Another way to adopt the scene bin are using the two buttons
found at the bottom edge of the of the screen .
The two buttons `Mark´ and `Action´ are used in combination .
They allow you to reorganise our scene bin easily . This can
be used in addition to the group function . Mark a scene and
move/copy it to another position in the scene bin, where it may
more sense . Press `Mark´ to tag the current scene in the scene
bin . The scene is tagged with a filled square . (see point 7) . If
you want to mark/tag different scenes, simply select another
scene and mark it too . You can also press the small left button
to mark a scene . Alternatively, use the Power Key option .
The `Action´ button allows you to initiate an action related to
the marked scenes . There will be differing options, depending
on the number of scenes you have tagged:
• Swap scene: This function swaps around two scenes and is
only available if you have tagged exactly two scenes .
• Move here: All marked scenes are moved to the position
after the currently selected scene . This deletes the previous
scenes' position .