MacroSystem Bogart SE Ver.2 User manual User Manual
Page 40
38 Chapter 4
To purchase and unlock an effect, contact your Dealer .
Note: In going to print, not all effects were HDV capable and
could therefore not be made available in HDV projects.
The list is already split up once you chose the first effect . The
top part contains the effects that you have already used . This
is the favourites list and contains the last 10 used effects . This
is to help you add frequent effects faster without scrolling
through the list too long . Below the division line, you'll find the
regular list of effects .
(3) After you have selected an effect that has further options,
the effect options are displayed in the field to the right of the ef-
fect list . There you can, for example, define colors and effect di-
rections, and other parameters specific to the individual effects .
(4) This button allows you to switch the effect list to single
points . The button offers the following three functions .
The function "All" shows all transition effects which are to be
found in the system . "Default" shows the transition effects,
which are integrated in the system and "Optional" only shows
the transition effects which have been installed afterwards .
If you have installed additional transition effects, they are also
shown in this list (underneath the three settings listed above) .
Thus it is possible just to see only one effect type in the list .
(5) Clicking on the "i" button, you’ll get information about the
transition effect activated in the effect list . If it is an additional
effect, the window "product information" appears, which offers
a description of the effect . Is the effect to be found a standard
effect, the product information refers to the manual .
(6) You use the "Add" button to apply the selected and defined
effect between the scenes in the storyboard middle . The ef-
fect symbol then appears between the two scenes with a red
flag (must be created) . The effect duration corresponds to the
duration that was last used . This enables you to insert many
effects with the same duration between different scenes .
If you select an new transition effect although there already is
one between the two scenes, then the new effect replaces the
old, without you having to click again on "Add" .
(7) A click on the "Remove" button removes the added effect
from the storyboard . If you would like to replace the current
effect with another, then you can simply select the new effect
and it automatically replaces the current effect in the story-
board . In this case you don't have to click on the "Remove"
button .
(8) With this button you can set the duration of the effect .
This button is enabled after you have inserted an effect
between two scenes . The duration then shown is 1 second
(assuming that neither of the two scenes lasts less than 1 sec-
ond) . Clicking on this button displays a window in which you
use a slider to set the time exactly . Also provided are the dura-
tions 1/2 sec, 1 sec and 2 sec, which you can click directly,
or use the slider to set the duration to its maximum limit - the
length of the shorter of the 2 scenes used .
An effect between two normal scenes shortens the total story-
board length by the running time of the transition effect . An ef-
fect between a normal scene (background) and an Insert scene
(foreground) does not shorten the length of the storyboard .
Transition effects may not overlap . For example, if a scene is 5
seconds long then the total duration of the two effects con-
necting this scene with the previous scene and next scene
cannot be longer than 5 seconds . For effects where an insert
scene is present, the duration of the insert scene is the maxi-
mum limit .
Audio is automatically cross-faded . This means that the audio
of the previous scene becomes quieter and the audio of the
next scene becomes louder . If a scene's audio is too quiet or
too loud, then you should correct the volume when dubbing
(audio mix) .
If an insert scene is involved with the effect, the audio is not
changed because Inserts do not affect the original audio of the
background scene .
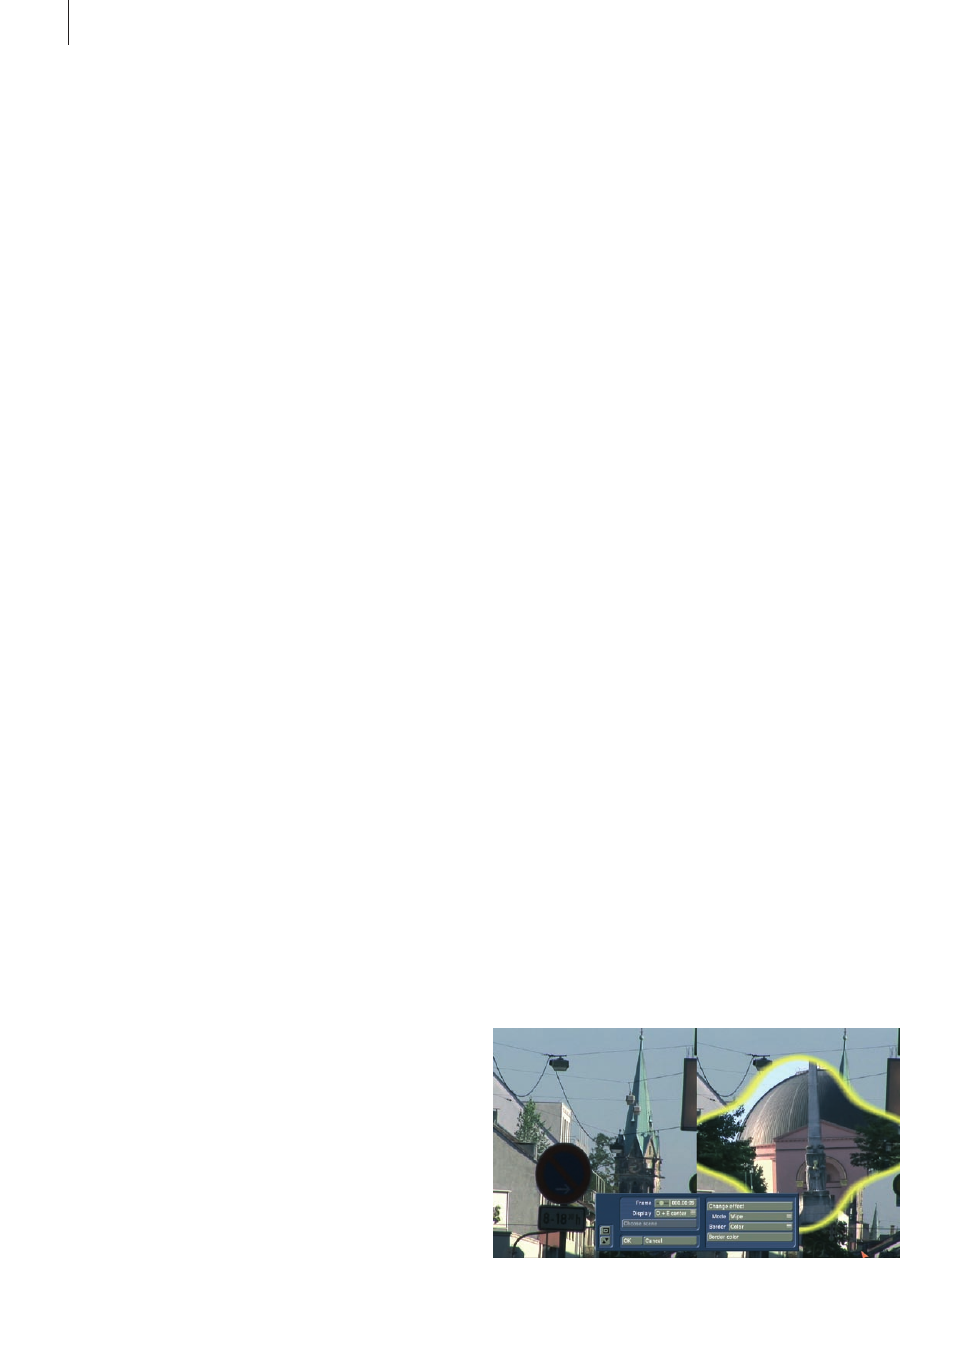
(9) The "Preview" button can only be clicked when the inserted
effect is an effect that must be created (indicated with red
outline) . A screen opens in which the last second of the first
scene, the effect, and the first second of the following scene
are displayed, so that you can view the transition and perhaps
make further corrections (concerning color, direction, time,
etc .), before you finally create the transition effect .
The duration of the preview is approximately that of the final
version . The preview may be a little "jittery" because it does
not work at the normal frame rate . This will not occur in the
created effect . For complex effects a certain wait time even for
preview may be necessary .
A preview does not require any hard-drive space .
(10) After you have added a transition effect and perhaps
defined its duration, you can click on the "Full Size" button
and bring up a further preview menu, if your system supports
this function . There you see the middle frame of the transition
effect . The video image is superimposed by an operating panel
in which you can see the effect options (if available) on the
right side .