11 titling – MacroSystem Bogart SE Ver.2 User manual User Manual
Page 49
47
Bogart SE 2 user manual
eye can distinguish only about 100 different levels of bright-
ness, but about 100,000 different colors.
24. Spread: Here you create a "shimmering" image . This is
achieved by distributing the pixels within a circle (which you
set with "Step" 1-10) containing the original pixel .
25. White balance: In case recording has led to erroneous
white matching resulting in white and gray surfaces that look
wrong but the color is OK, you can specify the location and
size of a rectangle with the button "Reference Color" . Then the
color fault within the rectangle is averaged and the deviations
in the entire image are canceled out . Note that only light color
faults can be improved . You can turn a red surface into a gray
one, but the effects on the rest of the image are extreme (color
distortion) . In the case that there is no colorless surface in the
image, then a color correction can only be done with the effect
"Control Color" .
26. Zoom: A defined image area can be zoomed in . Under
"Position" you give the location and size of the rectangle area .
Under "Zoom In" and "Zoom Out" you specify the start and
end time of the effect (up to 12 seconds) .
Note: Increasing the zoom during editing does not fully replace
an optical zoom found in the camera. Digital zooming during
editing always results is quality loss.
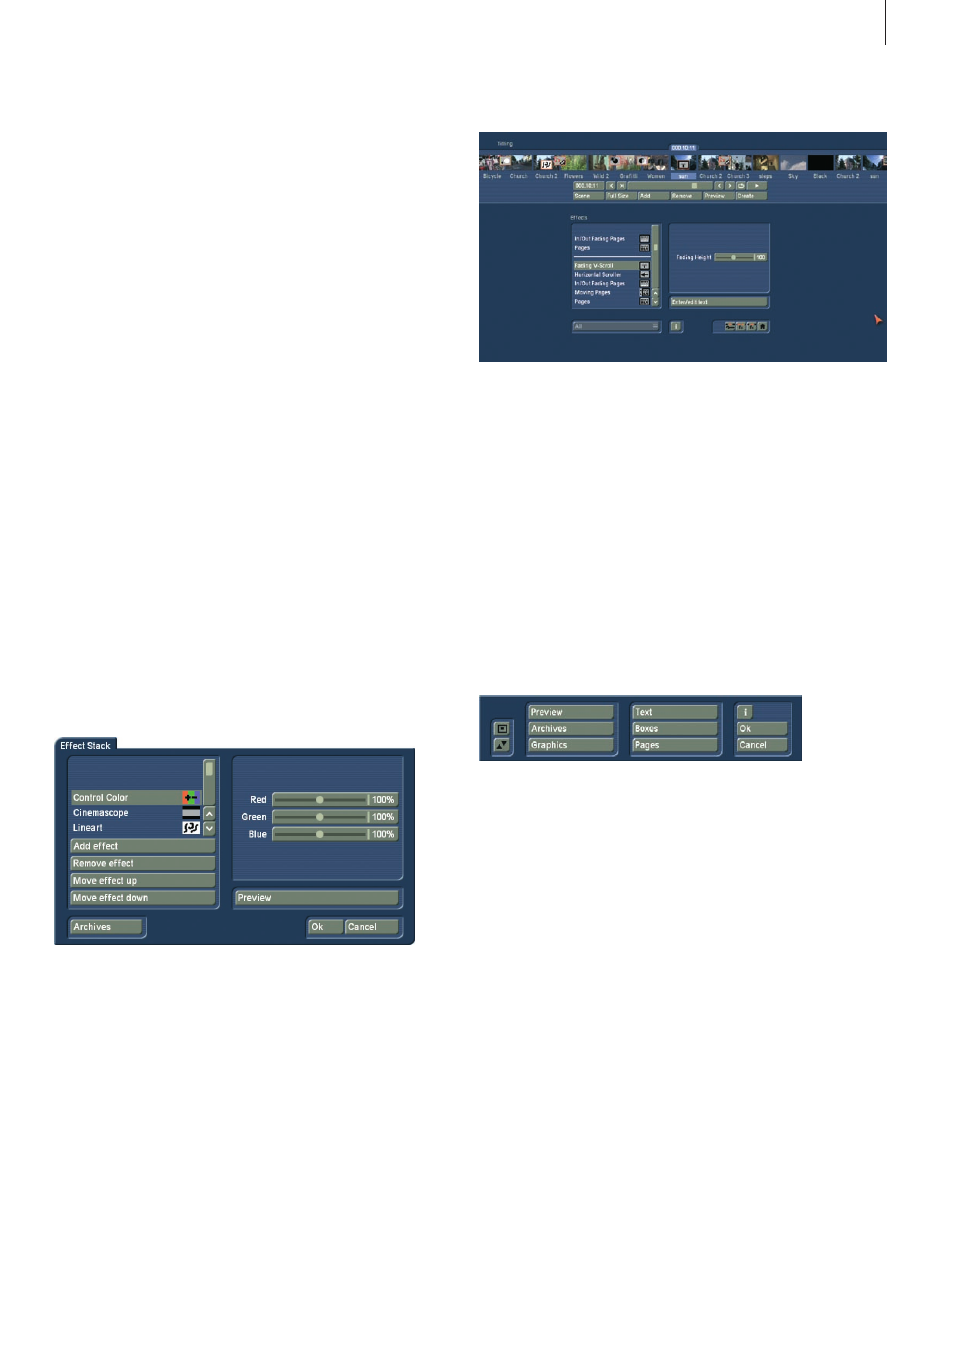
27. Effect stack: This effect allows you to bundle as many ef-
fects as you wish and apply them to a scene in one go . To use
it, access the settings for this effect .
In the screenshot above, you can see the effect list in the top
left . Underneath, the following options:
`Add effect´: Choose effects from the image processing effect
list to be added to the stack .
`Remove effect´: Removes an effect from the stack .
`Effect to the top´: Moves the currently selected effect to the
top of the stack .
`Effect to the bottom´: Moves the currently selected effect to
the bottom of the stack .
Moving effects within the stack makes sense as the effects are
applied in the order going from top to bottom . This way, each
effect is influenced by the previous effect . The order of effects
may therefore be crucial . Use the preview button to check the
result before rendering .
4.11 Titling
Titling functions much the same as if it were an Image
Processing effect . Titling is actually done as a picture-editing
effect . Instead of a "filter”, digital text is added to your video .
Titling has two menus . The settings in the "Titling" menu corre-
spond closely to those of the image processing effects menu .
You can read the corresponding description there for informa-
tion about functions such as Insert, Delete, Range, Preview,
Single image, Calculate, and Scene .
After you have selected a desired title effect, and perhaps set
further Options in the field to the right of the effect list, you
must first add the effect into the storyboard . You can then en-
ter the Titler menu by clicking on the button "Enter/edit Text"
below the effect options .
(1) In the background you see the first frame of your video
scene . This full frame display serves as orientation for adding
text . This lets you immediately see how the text looks overlaid
on the particular scene you are editing . At the vertical or hori-
zontal edge of the window you may see - according to effect -
a scroll bar, with which you can scroll through the text box .
If text boxes are already present in the video image, then you
can use this menu to enter text with the help of an external
keyboard .
(2) If you click on the button “Text”, you will continue to see the
first image of your scene . There is a task bar in the foreground .
This task bar provides you with several components that are
described in the following:
• With the keyboard you can enter the text of your choice. It is
also possible to connect an external keyboard (e .g . PowerKey
option) to enter the text . Any adjustments you make to the set-
tings will automatically be applied to the next line of text entry .
If you want, you can enter the text later, but it is recommended
that you enter some letters now in order to better judge the
results later .
If you would like to format every line with its own settings (e .g .
font, size, color), then click on the newline key after every