MacroSystem Bogart SE Ver.2 User manual User Manual
Page 86
84 Appendix
inputs . Press `1´ to choose the input . Connect the source to
this input . Now press `2´ to choose an image quality: Reduced,
normal and high quality . The best quality setting here depends
on the footage itself . You can experiment with short scenes
and all three settings . There‘s no point in recording vary old
footage with the highest recording setting . You can enter the
title and album name right here and begin recording by pres-
sing the Record button . The Pause button stops the recording .
Press Pause (or Record) again to continue recording . Press
Stop to end the recording session . The next recording will
create a new film in the archive .
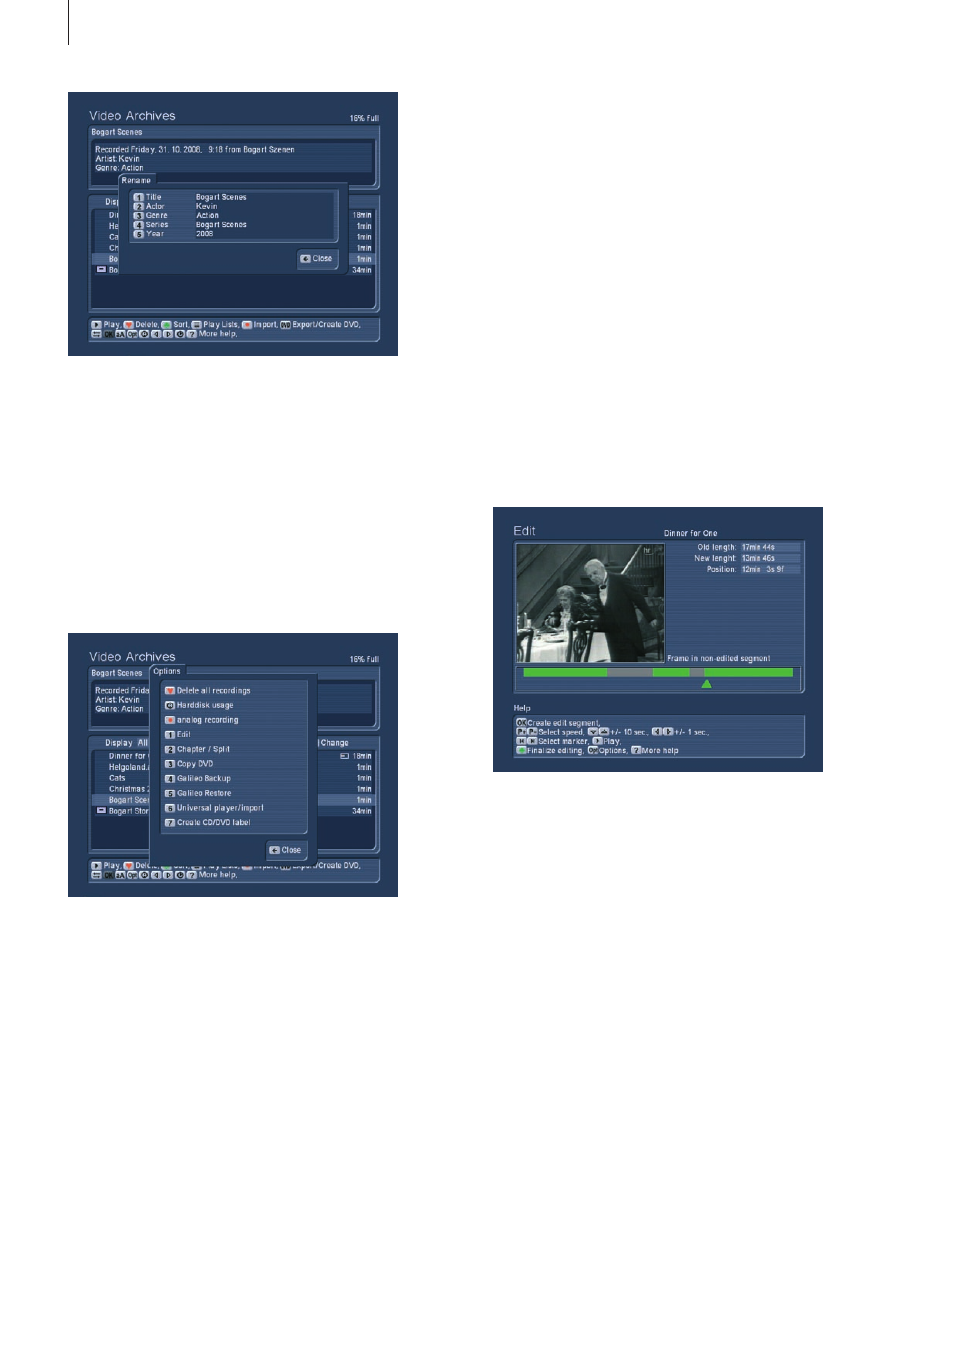
Edit film
At the top, you can see a preview screen of the film . At the top
right, you can see the title or name of the film . Below, some
time data: Old length corresponds to the length of the comple-
te recording . New length is the current length, according to the
editing marks set . You can see the two lengths differ – it is the
preset pre-roll and post recording time making this difference .
The position is where the current key point is located, more
about this in the next paragraphs .
Beneath the film is a time bar displaying the film graphically .
The single segments (usually bits and pieces from previous
and following TV shows) determine what is to be deleted .
As you already know, the first key point is automatically set .
You can recognise this key point by the arrow below the time
bar . Its position depends on the defined pre-roll time . The
grey/green segment to the left of the key point represents the
currently marked segment to be deleted – which still needs to
be confirmed .
You may notice that the Help page shows you some of the
key functions . Press the direction buttons to skip through the
film in 10 frame steps (back and forth) . The P+ and P- buttons
change the step size . Press the P+ button one time to change
the setting from frames to seconds, press again and chan-
ge seconds into minutes . The steps of ten and single steps
remain unchanged .
The more your archives are organized from the start, the easier
you will be able to find particular films later . Think about mea-
ningful terms and information for the available text fields .
Tip: If you rename an album to a name already used by ano-
ther album, the two albums will be reduced to one .
2.2.10 Options
In order to edit an imported film directly using the Media Ma-
nager, press the options button . There are several options:
Delete all recordings
Press the red heart button to delete (move to trashcan) all the
films in the archive in one go . If the system is set to `all films´
you will not see any items at this stage . Select another display
type with left/right to the series/album display – this will show
you the trashcan . Press OK to restore all films and put them
back into the regular list . Alternatively, enter the trashcan and
select single films with OK to restore them individually .
Hard disk usage
This gives you detailed information about the hard-drive capa-
city and the archives . It shows the number of films and series
folders, the number of music tracks and albums as well as the
number of photos and albums .
Analog recording (this function is not available on all devices)
Some editors are capable of recording using the analogue