MacroSystem Bogart SE Ver.2 User manual User Manual
Page 96
94 Appendix
tic´ display mode . If you choose a time value larger than 0, the
automatic system delays the switch from a 4:3 to 16:9 image
(and vice versa) by that time . This way, TVs do not have to
constantly switch between 4:3 and 16:9 display . Some TV sets
may flicker and display wrong information during this time, but
it‘s not harmful .
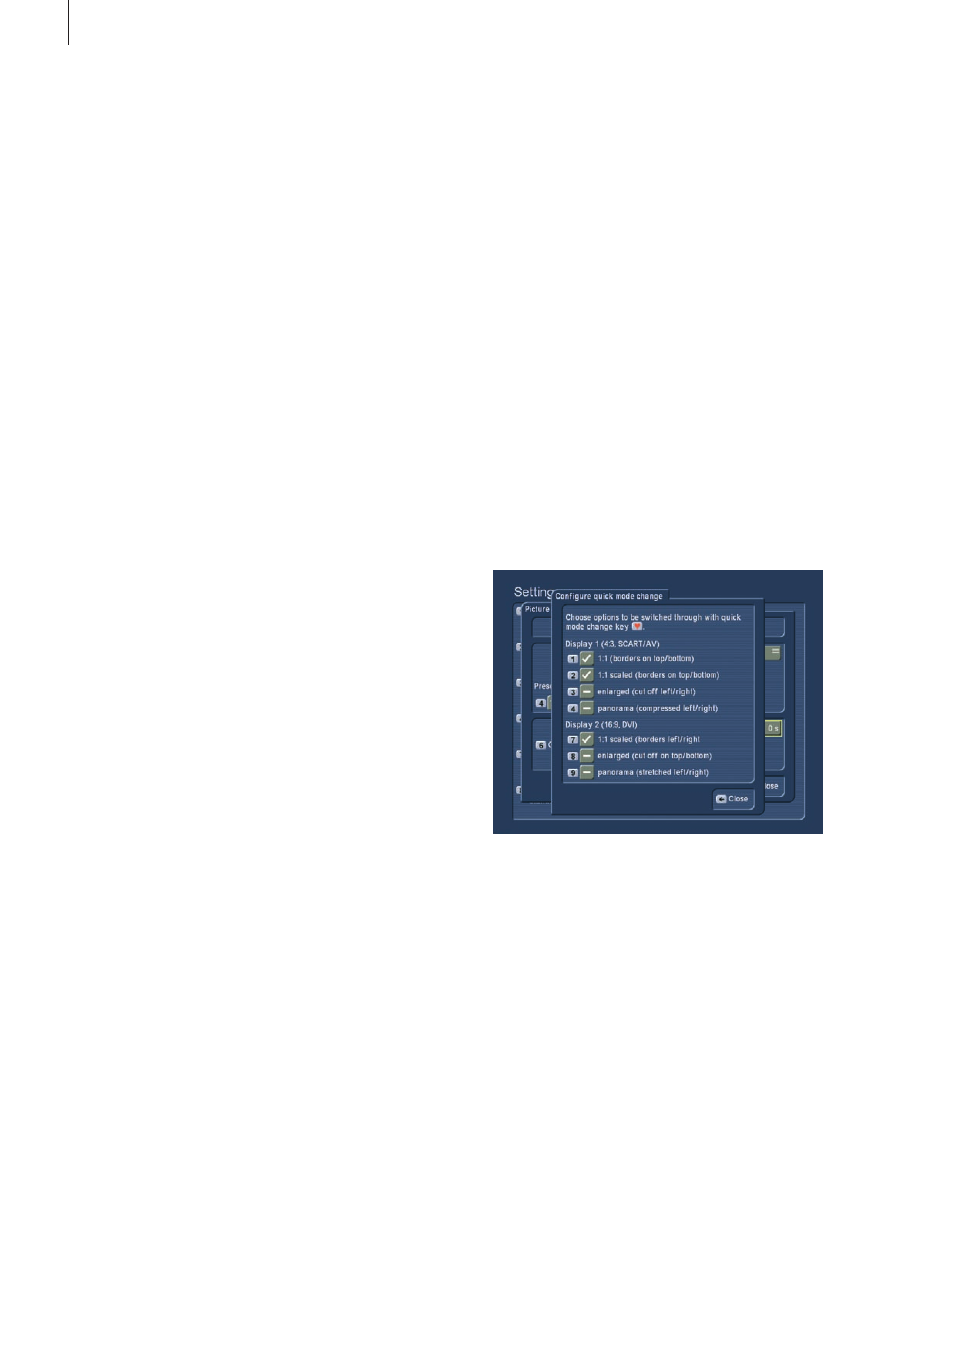
The function `Configure quick mode change´ is only for use
with the optional remote control . As you can‘t always use the
above described method to quickly switch between display
modes, you can use this function to configure the remote to
handle the job . The screen shows the chosen display method
and all available display modes . In fact, it shows both screen
outputs . Click the boxes for each mode you wish to use with
the remote . Now, each time you can use the more to switch
through all the ticked display modes . For example: If you
activate both `Screen 1´ and ´Screen 2´ boxes, you can use
the remote to switch between all the modes available for both
screen outputs . This can be very useful if you are using a TV
with both SCART/AV and DVI connection to your editor .
Switching display modes during playback
When you first press the programmed button on the remote
(e .g . the red heart symbol), the current mode will be shown in
the top right corner . It does not yet switch to another mode .
You can use this to check the status of the current mode .
Press again to switch to the next activated display mode . The
screen will switch after a short while, not immediately . If you
quickly press again, you will skip this mode and move on to
the next . You can press OK to speed up the process . Press
`Return´ to cancel .
Cinema mode
This has an influence on the DVI/HDMi output, not on the
SCART/AV connection . It is to be used for some films, created
specifically for the cinemas, not for TV recordings . The option
optimizes the HD signal . The `Automatic´ option allows the
system to find the best setting itself . Sometimes, the required
information is not available, so that the `automatic´ feature
may select the wrong setting . If you are unsure or if you notice
picture artefacts (in particular when watching a TV film with the
Cinema mode), simply deactivate the Movie mode .
same time and remains blank . You have to confirm a selection
first, before the system switches to the other output . If you
do not confirm within 30 seconds, the system reverts back to
the previous output . The editor‘s front display will show you a
countdown .
The function `Format´ is used to set up a 4:3 or 16:9 screen for-
mat . Older TV sets usually have a 4:3 aspect ratio, newer sets
(LCD, Plasma) often already have a 16:9 ratio . When watching
a 16:9 film on a 4:3 set, you can set up four different modes for
display:
- 1:1 Automatic (borders on top/bottom)
This mode offers the best quality for both 4:3 and 16:9 films
and always shows the complete image . To achieve this, it
is required that the signal is connected via a full-pin SCART
cable, which also supports the 4:3 and 16:9 switch (switched
voltage) . Newer devices usually support this . You may need to
check the manual of your TV set . If 16:9 films are shown with
bars at the top and bottom, everything is correct . Just try it
out . If the signal is stretched, check your settings and cables . If
it doesn‘t work, you will have to select the following mode `1:1
scaled´ .
- 1:1 scaled (borders on top/bottom)
Older 4:3 sets (TVs or beamers) often do not support the true
16:9 format . Even if you connect the system via SCART, the
picture may not be shown correctly . In this mode, the Cas-
ablanca will always show a 4:3 signal . True 16:9 films will be
shown in 4:3 . The picture quality in this mode is around a 25%
lower amount of lines . This is a Letterbox format, such as the
format used by some smaller Pay-TV channels .
- Enlarged (cut off left/right)
Both previous methods have the disadvantage that a 16:9 film
only uses a portion of the screen . The top and bottom of the
screen is covered with bars . When you activate this mode, the
screen is zoomed . The bars disappear and instead, parts are
cut off left and right . With some films, the sides of the film may
not be that important . Please note that some films originally
filmed for the cinema are even wider than 16:9 (Cinemascope,
2,35:1 or similar) . Despite the zoom effect, borders may still be
visible at the top and bottom if the screen .
- Panorama (left/right compressed)
This setting too `stretches´ the image so that the entire screen
is filled out . However, the image is not simply cut off at the
sides, it remains fully visible . For this purpose, the sides are
`squeezed´ to fit . The middle section of the image remains
unchanged . Only very busy scenes or scenes with frequent
camera pans may pose a slight problem with distorted image
portions on the side . You can avoid this by choosing a diffe-
rent mode .
The option `Delayed switch between 4:3 and 16:9´ is only
functional when using the SCART/AV connection and `automa-