MacroSystem Bogart SE Ver.2 User manual User Manual
Page 89
87
Bogart SE 2 user manual
to move or delete them (red heart) . You can `jump´ to a split
position by pressing the chapter+ and chapter- buttons . Press
the green clover button when done to split the audio . The ori-
ginal recording remains untouched, the system merely creates
copies of the new split audio .
Notes
• The search is done by looking for low volume passages in
the audio . This may require manual corrections . As many pi-
eces begin with a very sudden high volume, it may make more
sense to search from the back . This way, the software will find
the positions faster .
• If the pause between two pieces is too short, it may not
be found . In such cases, you may need to find the position
manually .
2.3.5 Deleting music
(See chapter 2 .2 .3 .)
2.3.6 Organizing music
In the music menu, instead of actors, you can sort according
to artists . More information can be found in chapter 2 .2 .4 .
2.3.7 Music playlists
(See chapter 2 .2 .5 .)
2.3.8 Exporting/creating an audio CD
This enters the screen for adding a list of audio pieces . You
can read more about this in chapter 2 .2 .7 . of the film archive
section . The differences in the music archive: Press Options to
choose between `Audio CD´ and MP3 quality settings for CD/
DVD . If required, the system converts the audio format (PCM
<-> MP3) and the sample frequency . If you select Audio CD,
the target medium is fixed, MP3 formats require that you select
from the available media: CD/DVD/Blu-ray/USB . You can also
enter the Options and create folders/albums on the CD/DVD .
If you activate both options the top folder will be set up for the
artist, the second folder layer represents the albums . Please
note that although the CD/DVD holds this folder structure, the
list itself shows all tracks . You can also activate the option
for adding the track number in front of the track name . This is
for creating an MP3 CD with numbered tracks . Some players
may require this to play the music in the correct order . These
numbers are not shown in the title names and normally do not
show up .
2.3.3 Playing music
(see chapter 2 .2 .2 .)
If you do not specifically stop playback of a single track, play-
back will continue for all remaining tracks in the list . The music
archive remembers the last playback position and asks if you
want to continue playback from there next time .
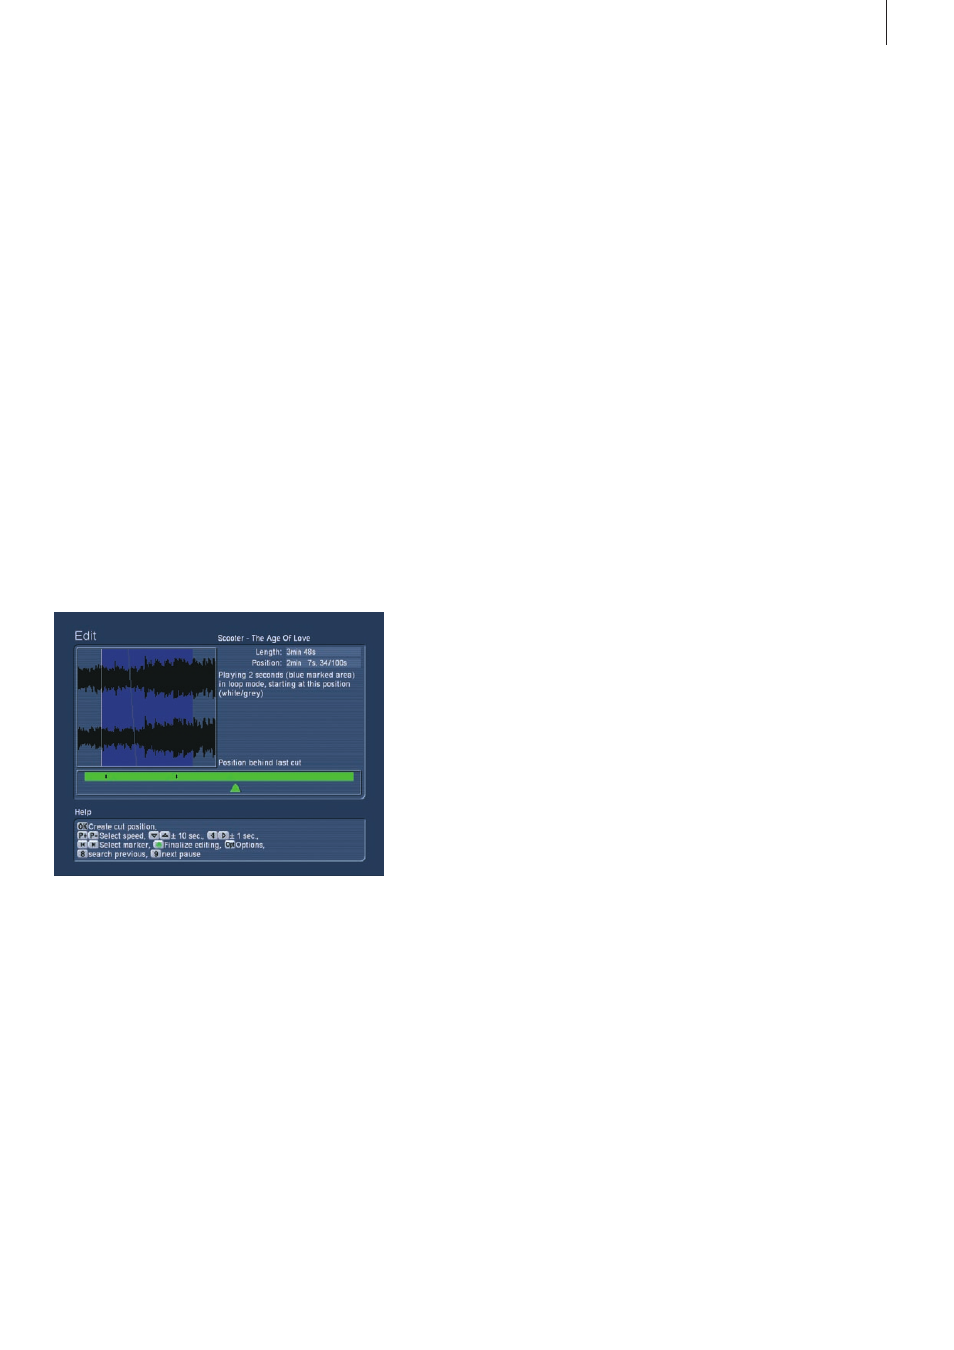
2.3.4 Splitting music
You can manually split music tracks just like films . This will
create new split sections and also leave the original track in
one piece . It‘s great for analogue recordings . Select the music
piece, press options, `1´: The menu works in the same way as
the film archive, so it shouldn‘t pose a big problem to under-
stand how it works, The principle is simple: Set key points
wherever you want the piece to be split up . When ready, you‘ll
see the additional split up pieces . You can delete some of the
pieces you don‘t need .
In the screenshot, you can see the marked piece with five key
points . The second point is marked with a black triangle . You
can also pick up this point again and move it some more .
Use the arrow buttons to move in the recording and thus move
the position manually . The steps taken can be set using the
P+ and P- buttons . The blue part is the section that repeats for
2 seconds . You’ll see a line move along the section showing
you the playback position . Once you find a location where you
wish to split the audio piece, press OK . A mark will be placed
at that position in the green section . It is now the beginning of
the blue section . This is where the audio will be split . There is
also an automatic feature for finding still or low volume part of
the audio . To use this function, press `9´ to search for the next
position, or `8´ to search for the previous position . This hap-
pens pretty fast, as the search is already started in background
while you work . If a section has not been analyzed yet, you can
monitor the analysis live on the screen . In most cases, after a
few manual tweaks, you’ll have the perfect split position . If you
find low volume sections that are part of the recording, simply
continue the search . Once you place all the marks, press OK