Altera High-Speed Development Kit, Stratix GX Edition User Manual
Page 60
5–16
Quartus II Version 3.0
Altera Corporation
Perform the Standard Tests
High-Speed Development Kit, Stratix GX Edition User Guide
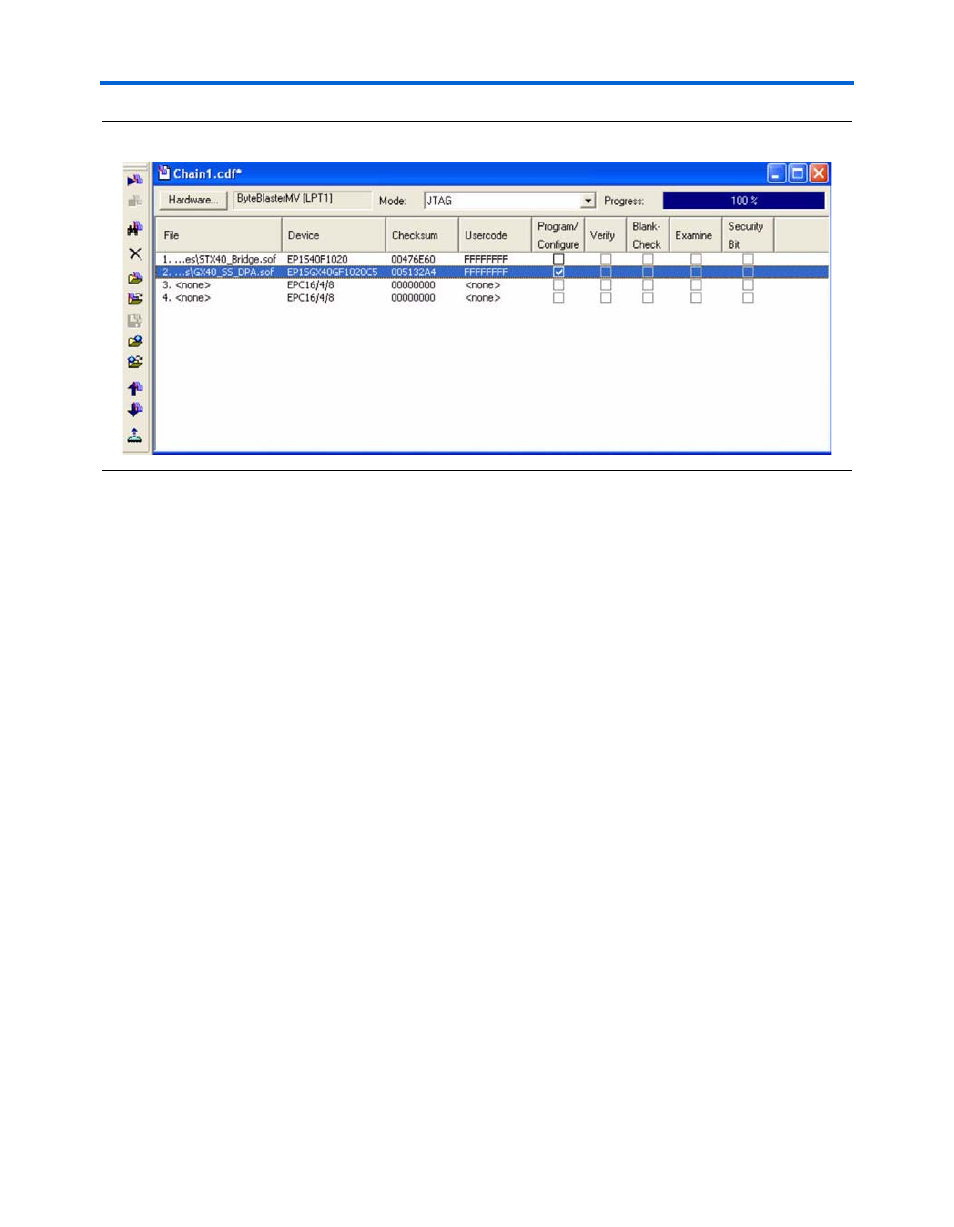
Figure 5–18. Quartus II Programmer for the Source-Synchronous DPA Test
4.
Click Start. When configuration is complete, the GX_CONF_DONE
(D7) LED illuminates.
5.
Press the reset pushbutton switch (GX_CLR) to initialize the design.
The GX_DEV_CLR LED illuminates.
6.
Press the start pushbutton switch (GX PB0). Several LEDs
illuminate.
●
LED0 is the match LED; it illuminates if the test is successful.
LED1 indicates that the test is running.
●
LED2 indicates that the device has received the data through the
cables.
●
LED3 is the per channel match. This LED is used for the per
channel feature.
●
LED4 is turned off.
●
LED5 is the error signal.
7.
Press the stop pushbutton switch (Stratix_GX_PB1) to stop the
device from transmitting.
8.
Press the reset pushbutton switch (GX_CLR).
9.
Press the start pushbutton switch (Stratix_GX_PB_0).
10. Inject an error by pressing Stratix_GX_PB_2 (S4) once. The number
01 displays on the Stratix GX 7-segment display (D9) and Stratix GX
LED5 illuminates.