Create rows and columns of text – Adobe Illustrator CS3 User Manual
Page 300

ILLUSTRATOR CS3
User Guide
294
Leading
Uses the text’s leading value as the distance between the baseline of the first line of text and the top of the
type object.
x Height
The height of the “x” character falls below the top of the type object.
Em Box Height
The top of the em box in Asian fonts touches the top of the type object. This option is available only
when the Show Asian Options preference is selected.
Fixed
Specifies the distance between the baseline of the first line of text and the top of the type object in the Min text box.
4
For Min, specify the minimum value for the baseline offset.
For example, if you select Leading for First Baseline and specify a minimum value of 1p, Illustrator uses the leading
value only when it’s greater than 1 pica.
See also
“Shift the baseline” on page 314
“Display Asian type options” on page 333
Create rows and columns of text
1
Select an area type object.
2
Choose Type > Area Type Options.
3
In the Rows and Columns sections of the dialog box, set the following options:
Number
Specifies the number of rows and columns you want the object to contain.
Span
Specifies the height of individual rows and the width of individual columns.
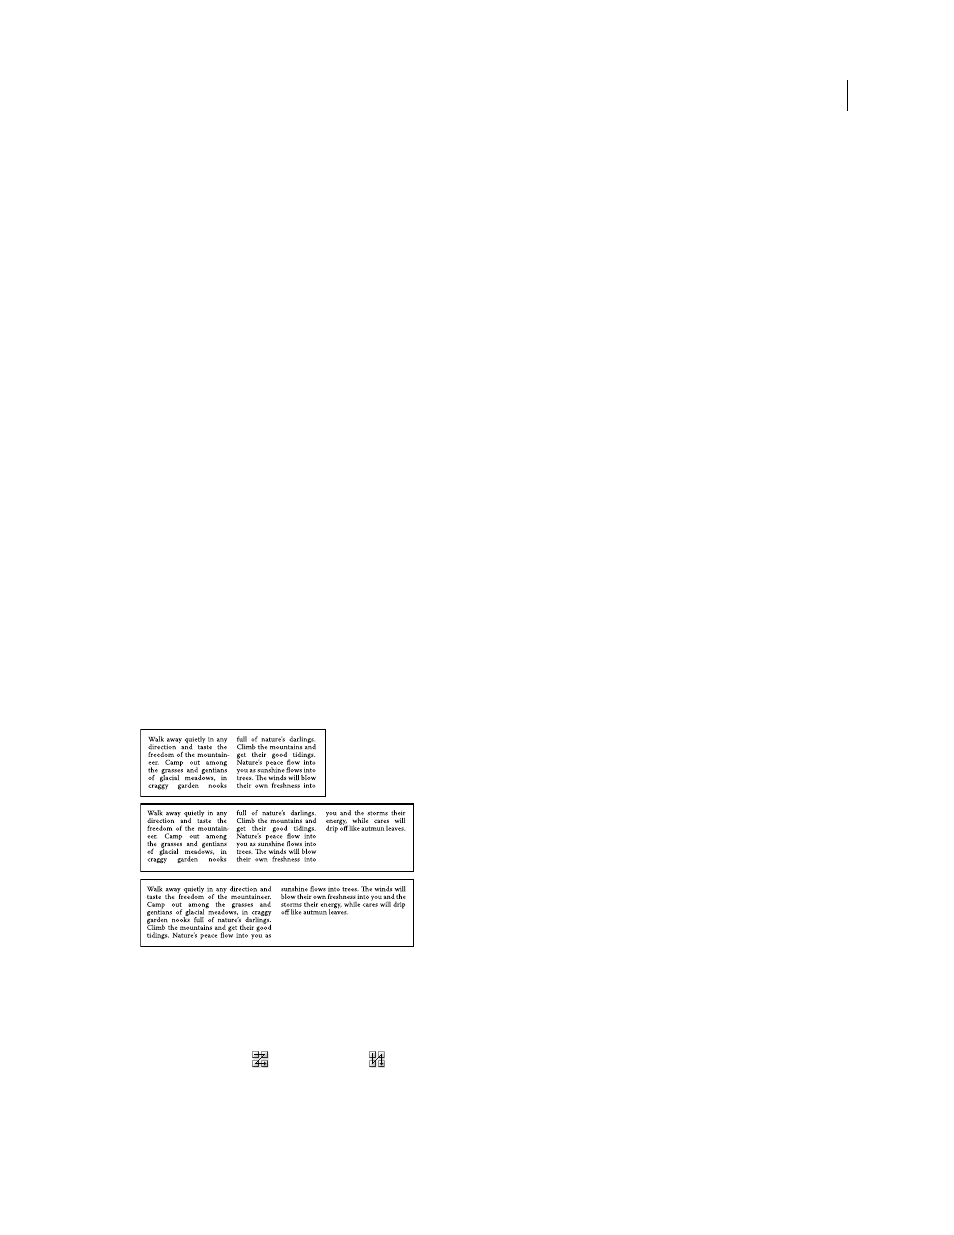
Fixed
Determines what happens to the span of rows and columns if you resize the type area. When this option is
selected, resizing the area can change the number of rows and columns, but not their width. Leave this option
deselected if you want row and column widths to change when you resize the type area.
Options for resizing rows and columns
A. Original columns B. Columns resized with Fixed selected C. Columns resized with Fixed deselected
Gutter
Specifies the distance between rows or columns.
4
In the Options section of the dialog box, select a Text Flow option to determine how text flows between rows and
columns: By Rows
or By Columns .
5
Click
OK.
A
B
C