Panasonic Lumix GX8 User Manual
Page 149
149
5. Focus and Brightness (Exposure) Settings
When selecting [
]/[
]/[
]
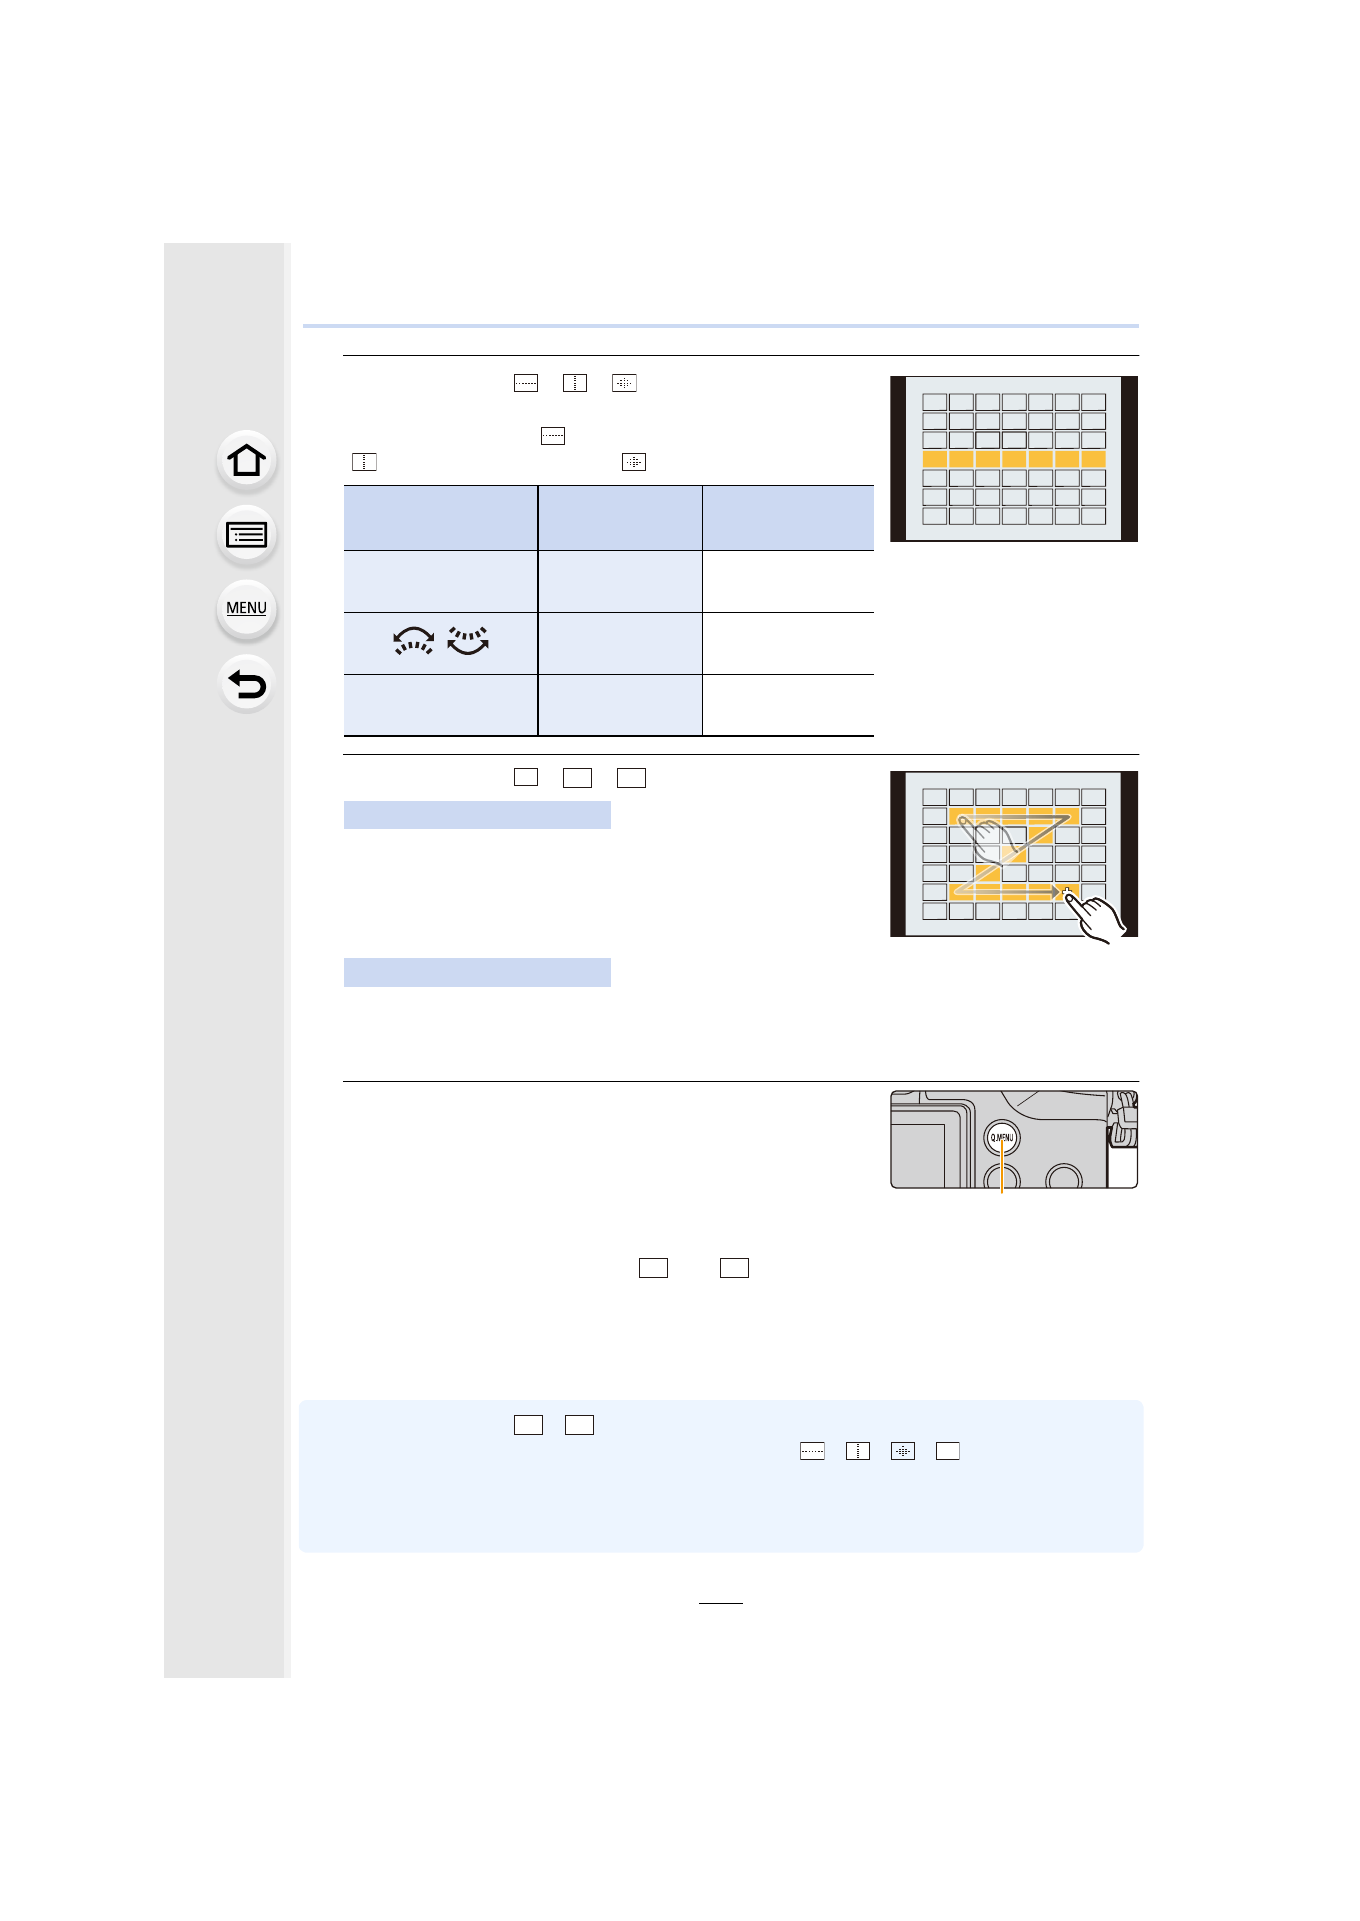
You can adjust the size and position of the area in the
vertical direction for [
], in the horizontal direction for
[
], and in all directions for [
].
When selecting [
]/[
]/[
]
Drag your finger over the parts you want to set as AF
areas.
•
If you touch one of the selected AF areas, the selection of
the area will be canceled.
Press 3/4/2/1 to select the AF area, and then press [MENU/SET] to set (repeat).
•
The setting is canceled when [MENU/SET] is pressed again.
•
If you press [DISP.], all the selections will be canceled.
6
Press [Fn2] ([Q.MENU]).
A Function button [Fn2]
∫
Registering the set AF area to [
] or [
]
1
On the screen in step
3
on
, press 3.
2
Press 3/4 to select a destination to which the setting will be registered, and
press [MENU/SET].
•
Confirmation screen is displayed. It is executed when [Yes] is selected.
•
Settings registered to
[
]/
[
]
will be stored even after this unit is turned off.
•
Turning off this unit will return the setting adjusted with [
]/[
]/[
]/[
]
back to the default
setting.
•
If you press a cursor button when [Direct Focus Area] in the [Custom] menu is set to [ON], the
AF area setting screen will be displayed.
Button operation
Touch
operation
Description of
operation
3/4/2/1
Touching
Moves the
position
/
Pinching in/out
Changes the size
(3 levels)
[DISP.]
[Reset]
Restores the
default setting
Touch operation
Button operation
FREE
ヤヒ
ヤビ
A
ヤヒ
ヤビ
ヤヒ
ヤビ
FREE
- Lumix G85 Mirrorless Camera with 12-60mm Lens Lumix DMC-G85M Lumix DMC-G85 Lumix GH5 Lumix GX80 Lumix GX85 Mirrorless Camera with 12-32mm and 45-150mm Lenses Lumix G7 Mirrorless Camera with 14-42mm and 45-150mm Lenses (Black) Lumix G7 Mirrorless Camera with 14-42mm Lens Deluxe Kit (Silver) Lumix G7 Mirrorless Camera with 14-42mm Lens (Silver) Lumix DMC-G7 body