Al] socket, P335 – Panasonic Lumix GX8 User Manual
Page 335
335
12. Connecting to other equipment
2
Turn on the TV and select the input to match the connector in use.
3
Turn the camera on and then press [(].
•
Input of the TV will switch automatically and playback screen is displayed when
connected to a VIERA Link compatible TV using an HDMI micro cable with the [VIERA
Link] set to [ON].
•
Depending on the [Aspect Ratio], black bands may be displayed on the top and bottom or the
left and right of the pictures.
•
Change the screen mode on your TV if the picture is displayed with the top or bottom cut off.
•
Output from the HDMI micro cable has priority when both AV cable (optional) and HDMI micro
cable are connected.
•
The connection with the USB connection cable (supplied) will take priority when you connect
the USB connection cable (supplied) simultaneously with the HDMI micro cable.
•
When you play back a picture vertically, it may be blurry.
•
Proper playback will be dependent on the TV used for viewing.
•
No sound is output from the camera speakers.
•
Read the operating instructions for the TV.
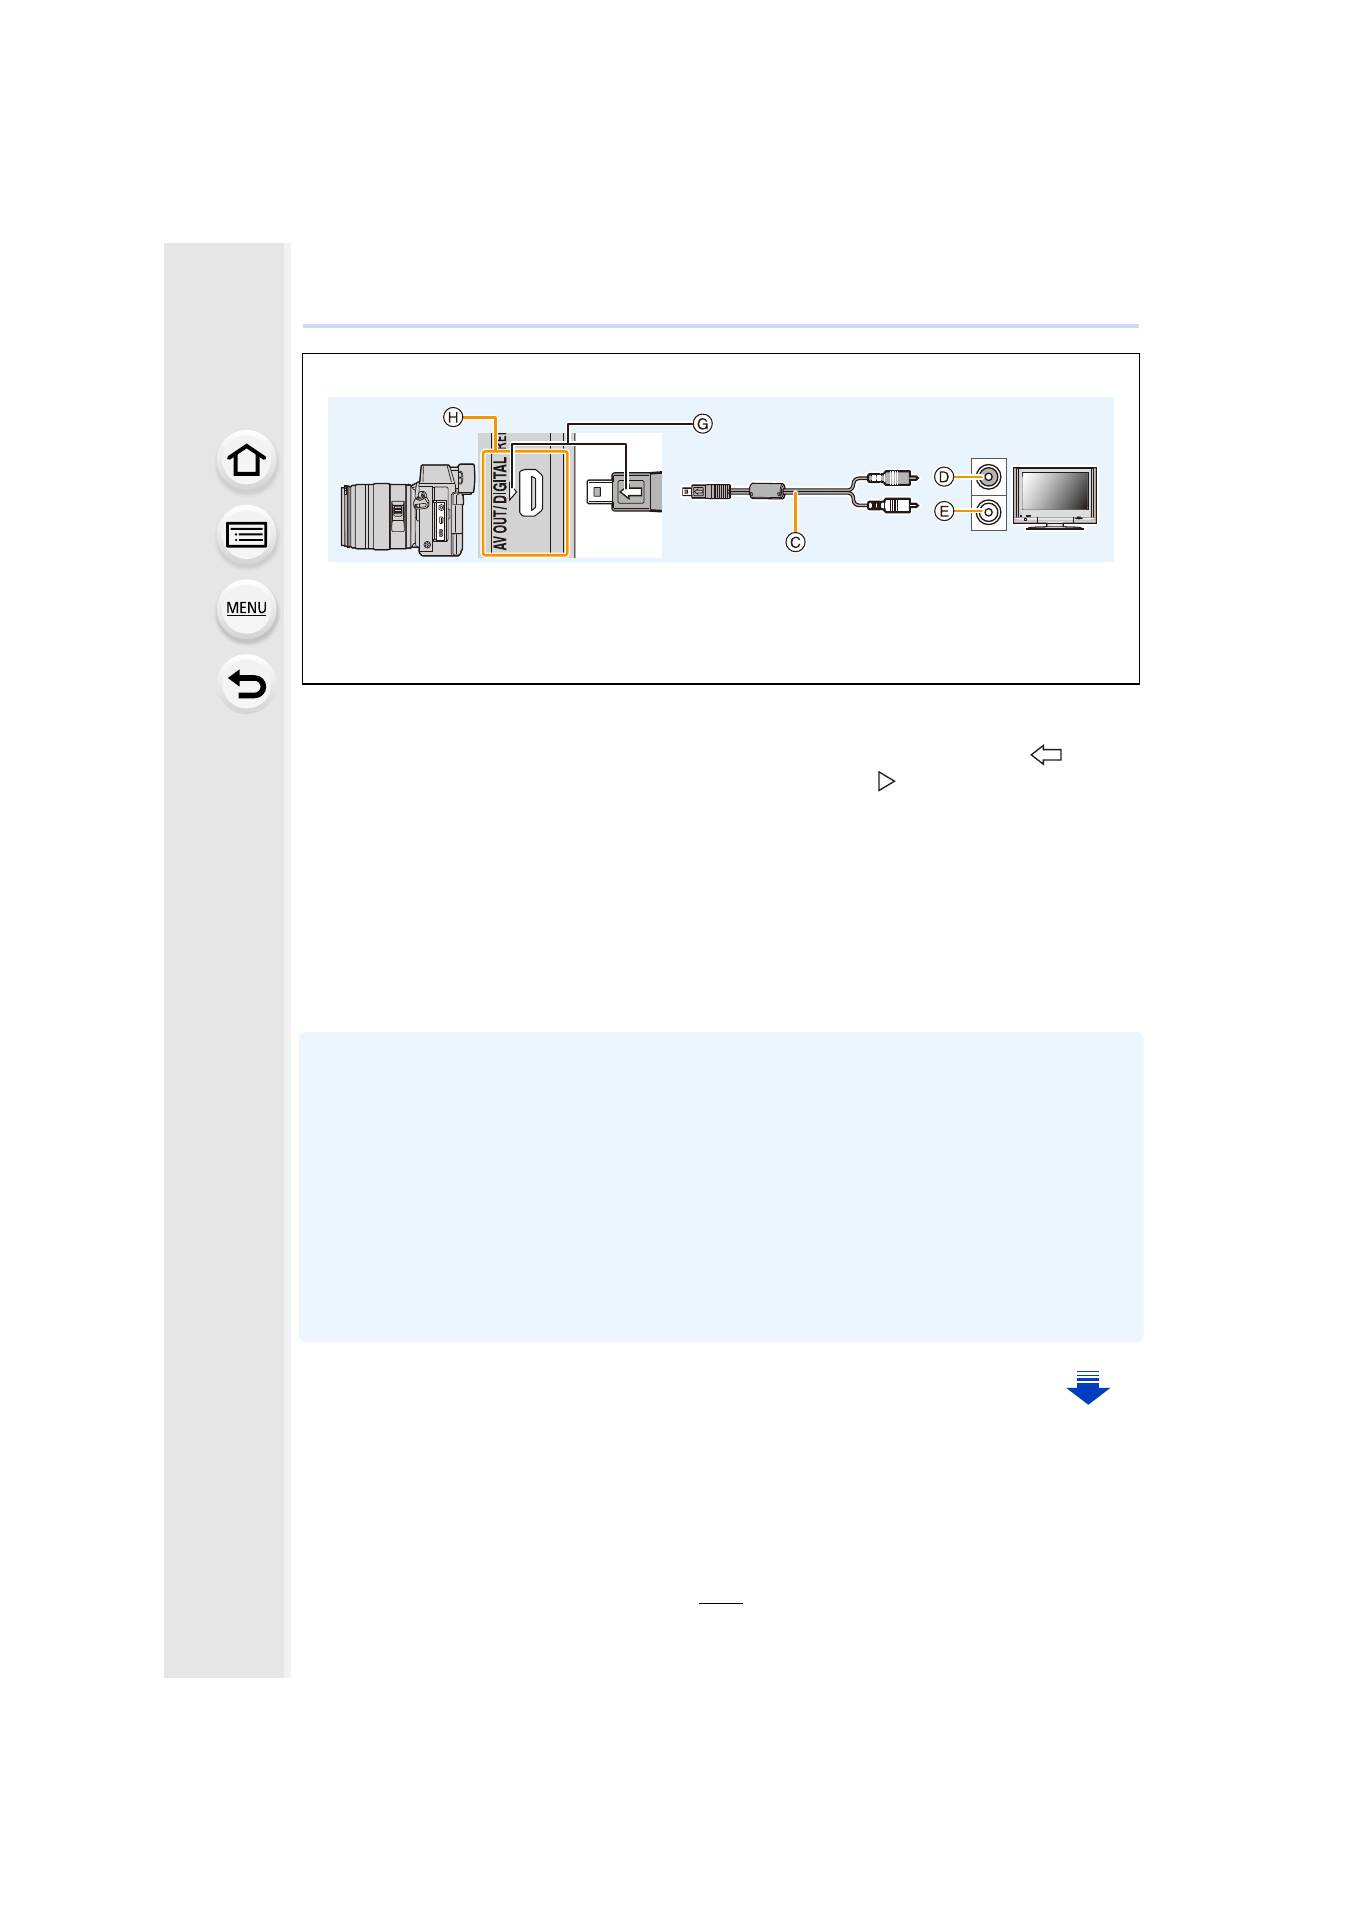
To connect with an AV cable (optional)
•
Always use a genuine Panasonic AV cable (DMW-AVC1: optional).
•
Check the [TV Aspect].
•
Audio will be played back in monaural.
•
The viewfinder cannot be displayed when connected with a AV cable.
A HDMI micro cable
B HDMI socket
C AV cable (optional)
D Yellow: to the video input socket
E White: to the audio input socket
F Align the marks, and insert.
G Insert the AV cable so that its [
] mark
will face the [
] mark side of the camera.
H Check the terminal.
- Lumix G85 Mirrorless Camera with 12-60mm Lens Lumix DMC-G85M Lumix DMC-G85 Lumix GH5 Lumix GX80 Lumix GX85 Mirrorless Camera with 12-32mm and 45-150mm Lenses Lumix G7 Mirrorless Camera with 14-42mm and 45-150mm Lenses (Black) Lumix G7 Mirrorless Camera with 14-42mm Lens Deluxe Kit (Silver) Lumix G7 Mirrorless Camera with 14-42mm Lens (Silver) Lumix DMC-G7 body