Zoning: edit ports screen, Figure 27. zoning: edit ports screen, Edit ports dialog – MultiDyne ACI-2058 User Manual
Page 110: Screen, Zoning: edit, Ports screen
Chapter 6: Ports/Blades
A54-3000-100 A
71
A
PCON
, Inc.
6.4.5.1.
Edit Ports dialog screen
The screen includes these options:
Buttons
The buttons on this screen perform the following actions:
• Edit Ports: Displays the
screen where you
can add or delete ports included in this zone. For details about
this screen, see
• Edit Users: Displays the
dialog box where you
can add or delete users included in this zone. For details about
this dialog box, see
• Add: Creates a new zone.
• Rename: Changes the name of a zone.
• Remove: Deletes a zone.
Zone listing
Displays the ports and users included in the specified zone.
Tabs
Displays zone ports in the order you specify:
• View By Zone: Displays zones in alphabetical order and
indicates the ports, if any, assigned to each zone.
• View By User: Displays users in alphabetical order and
indicates the zone, if any, to which each is assigned.
• View By Port: Displays ports in ascending order and indicates
the zone, if any, to which each is assigned.
Field
Description
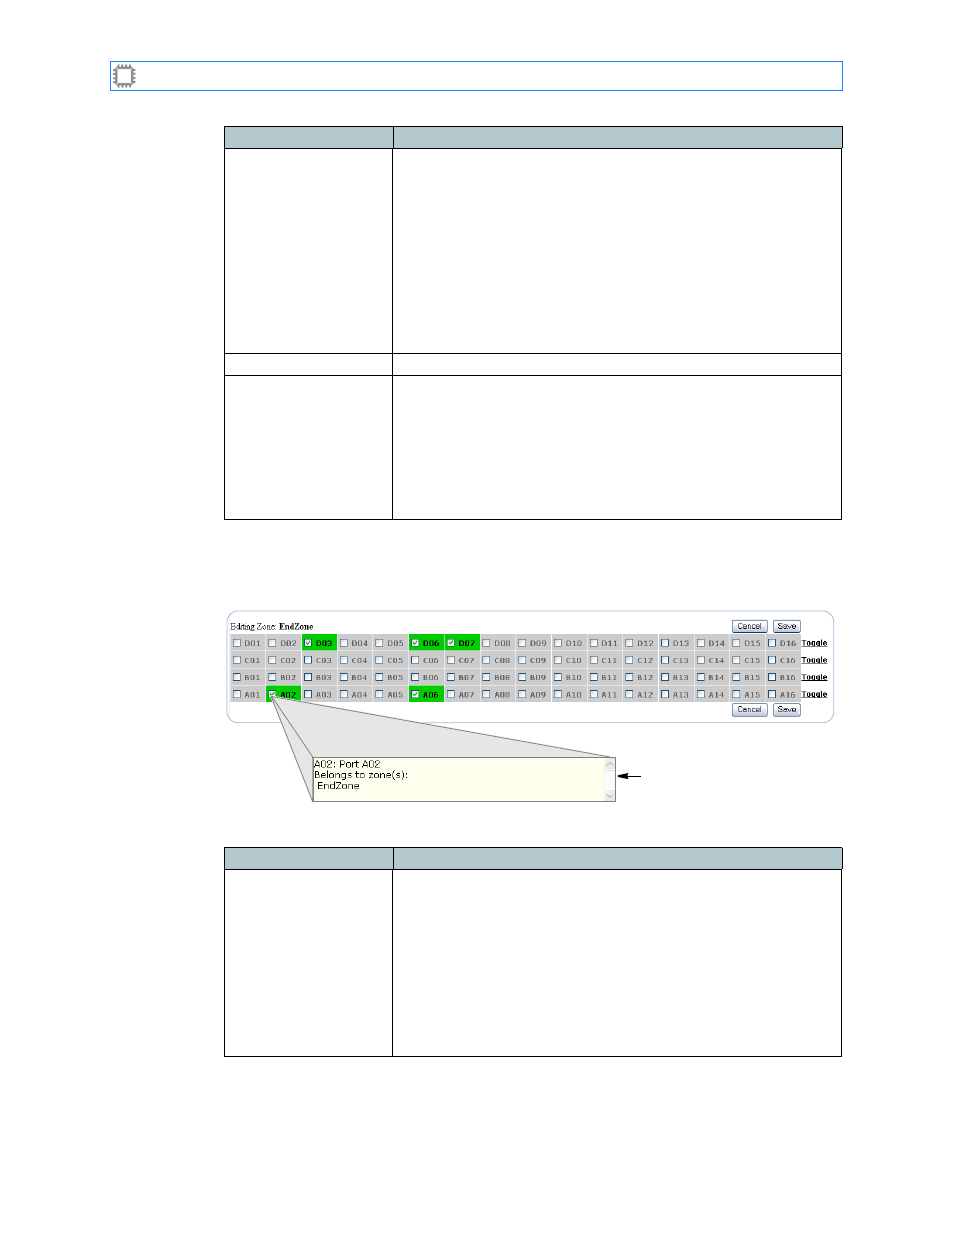
Figure 27. Zoning: Edit Ports Screen
Zone details
Field
Description
Editing Zone:
Identifies the zone and serves as the link location when adding
ports to a zone. To add a port to a zone:
1. Select the port(s) you want to add using one of these methods:
• To add a port to a zone, place the cursor over the port’s
checkbox and click.
• To add a blade to a zone, click the Toggle link, located on the
right side of the screen.
2. Click the Save button.
Locked ports display as green, while unlocked ports remain gray.