Locks: view by user tab, Figure 17. locks: view by user tab, 55, tha – MultiDyne ACI-2058 User Manual
Page 94
Chapter 6: Ports/Blades
A54-3000-100 A
55
A
PCON
, Inc.
6.1.3.1.
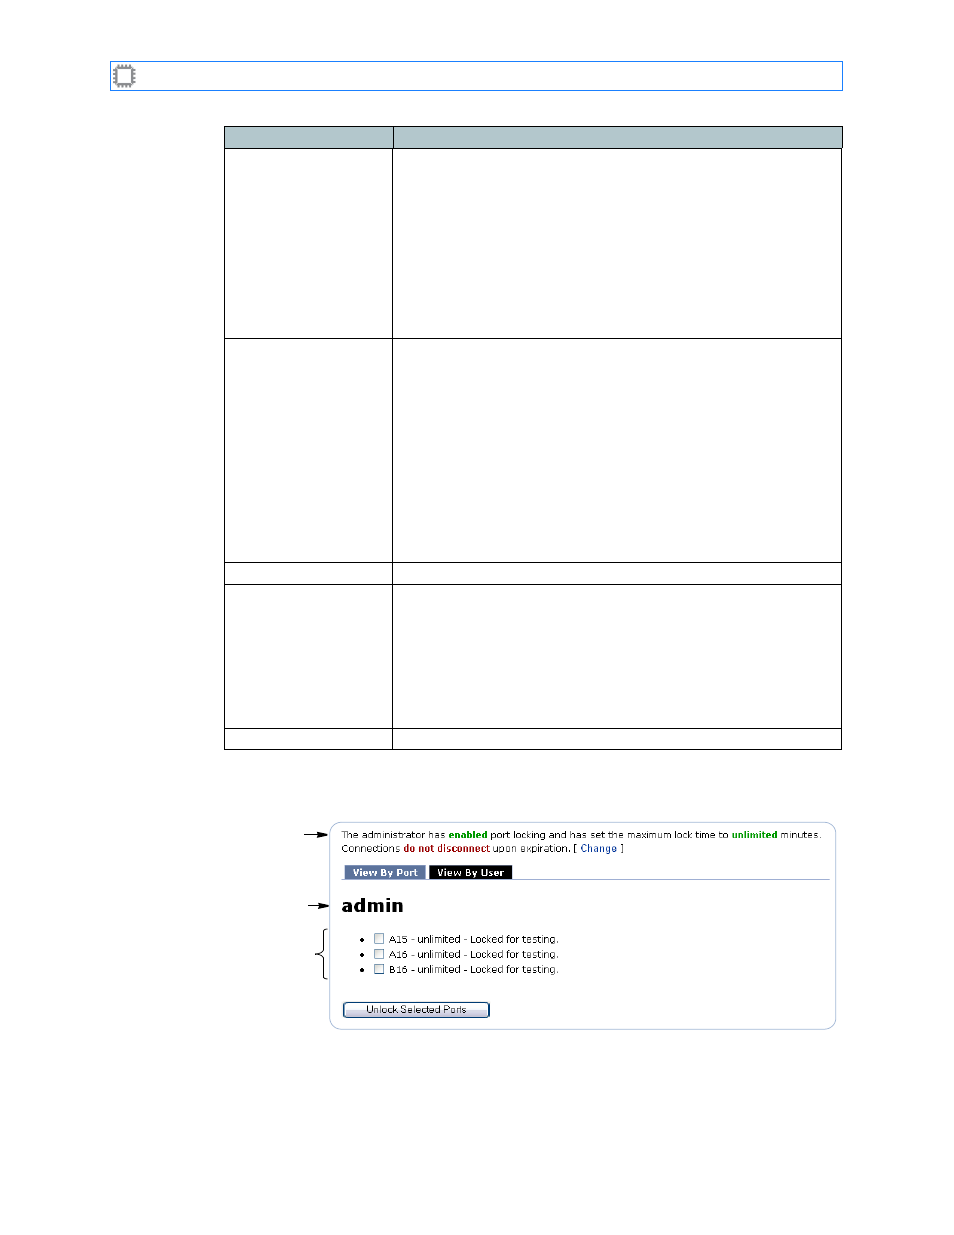
Locks: View By User tab
Figure 17. Locks: View By User tab
User name
Locked ports
Port locking
status
The screen includes these options:
Ports
Identifies the port and serves as the link location when locking
ports. To lock a port:
1. Select the port(s) you want to lock using one of these methods:
• Place the cursor over the port’s checkbox and click.
• Click the Toggle link, located on the right side of the screen,
for the blade whose ports you want to lock.
2. Specify the port lock settings, located at bottom of the screen.
3. Click the Save Changes button.
Locked ports display as red, while unlocked ports remain green.
Lock details
Hovering your cursor over a port displays the following lock
information for that port:
• Port number: Port name: Identifies the port assignment.
PortNumber is the number assigned to the port and PortName is
the name you specify. If you do not specify a port name,
Unnamed displays.
For information about naming ports,
• Locked by: The login name of the user that set the lock.
• Remaining time: The number of minutes the lock remains in
effect.
• Message (optional): A message from the user that set the lock.
Toggle
Checks or unchecks all ports on the selected blade.
Port lock settings
Specifies the settings for this lock operation:
• Lock selected ports for n minutes with the status message abc:
Specifies the duration of the lock and the message that displays
when users try to access a port while locked.
Note: To change the number of minutes, you must cancel the
lock, then lock the port again with a different duration.
• Unlock selected ports: Releases the lock
Save button
Clicking this button saves and implements your changes.
Field
Description