Grass Valley K2 Storage System Instruction Manual v.3.2 Aug.01 2007 User Manual
Page 209
July 3, 2007
K2 Storage System Instruction Manual
209
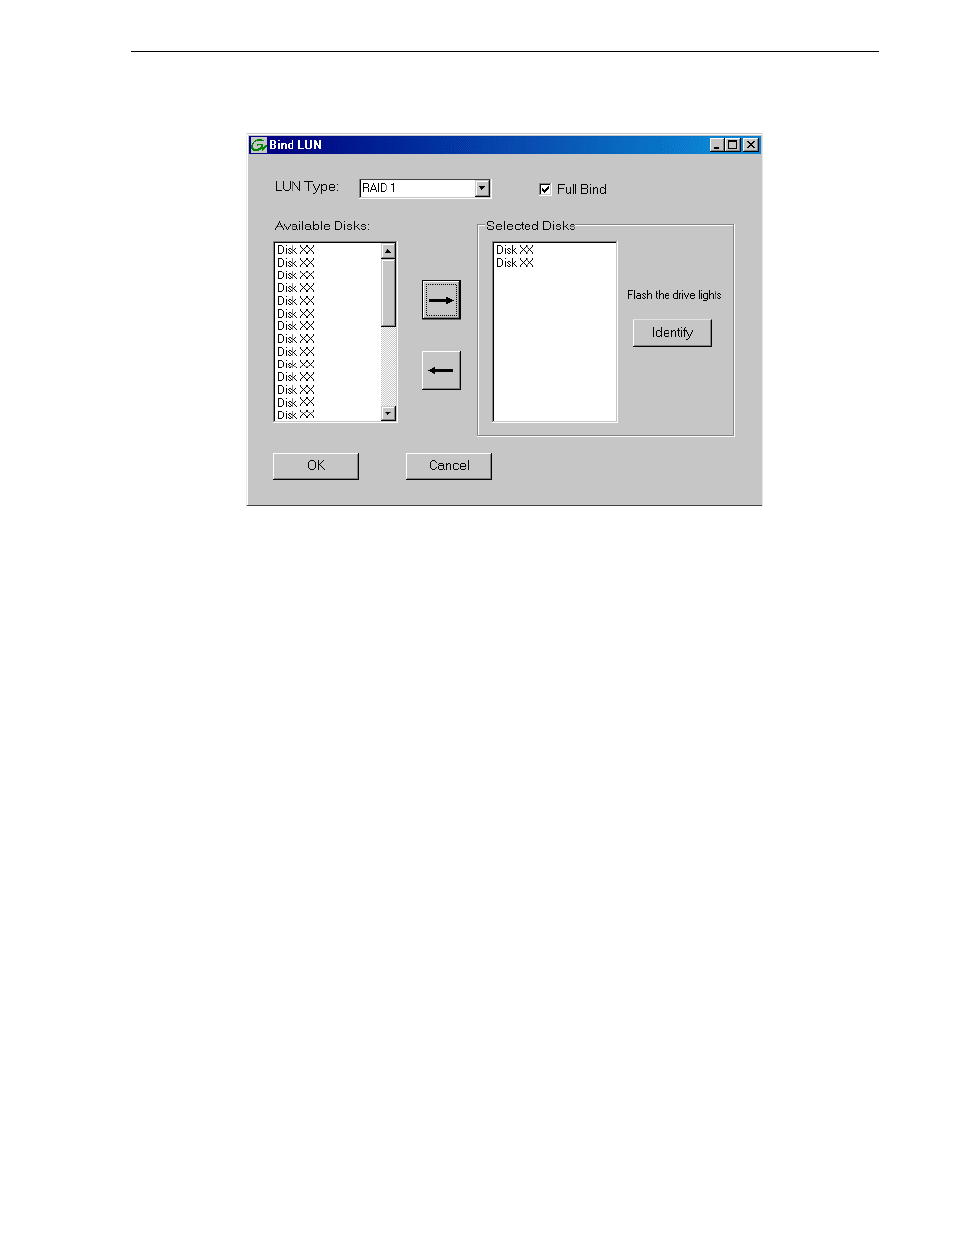
Configuring RAID
b. In the
LUN TYPE
drop down box, select
RAID 1
.
NOTE: Leave Full Bind selected. Do not uncheck it.
c. In the Available Disks box, select two contiguous disks at the top of the list.
These should be the first two disks in the primary RAID chassis. (TIP: Use
‘shift-click’ or ‘control-click’ to select disks.) This creates a RAID 1 LUN for
metadata storage.
d. Click the add (arrow) button to add disks to the Selected Disks list.
NOTE: As an aid in identifying a disk module’s physical location, select it in the
Selected Disks list, then click
Identify Disks.
This causes the disk drive light to flash.
e. Click
OK
to close the Binding LUN dialog box and begin the binding process.
The Progress Report dialog box opens, showing the status of the binding
process.
f. Close the Progress Report and repeat the previous steps, selecting two more
contiguous disks to create another RAID 1 LUN for journal storage. These
should be the next two disks in the primary RAID chassis.
g. Make the fifth disk in the primary RAID chassis a Hot Spare. In the
LUN TYPE
drop down box, select
Hot Spare
.
h. In the Available Disks box, select the fifth disk in the primary RAID chassis.
i. Click the add (arrow) button to add the disk to the Selected Disks list.
j. Click
OK
to close the dialog box and begin the binding process.
3. To bind unbound disks for media storage, do the following:
a. Right-click the
Unbound
node for a controller, then select
Bind LUNs
in the
context menu. (If the RAID chassis has two controllers, both controllers are