Adding a media id, Previewing a clip, Adding a media id previewing a clip – Grass Valley GV STRATUS v.3.1 User Manual
Page 106
4. Click
OK
.
Clips from the removable media folder appear in the RMI tool.
Related Topics
Limitations for creating and naming assets and bins
on page 298
Adding a media ID
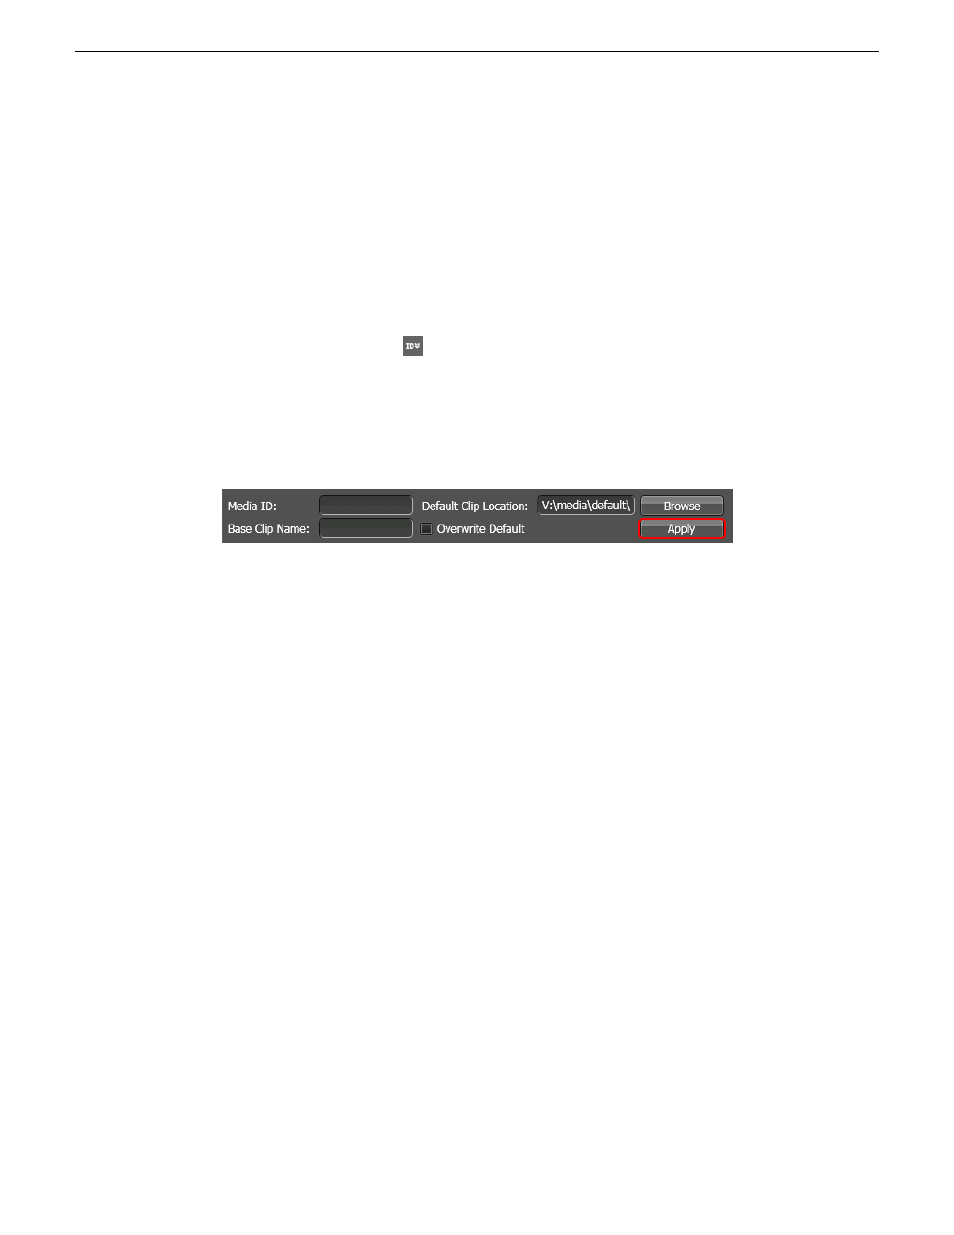
You can add a media ID to clips on the RMI to identify clips for your broadcast easily.
1. Click the
Media ID
button.
The Media ID section opens.
NOTE: The Media ID section also opens automatically when a new removable device is
detected, if the
Automatically prompt for Media ID
checkbox is selected in the user preferences
window.
2. Enter the Media ID to identify clips from each removable device.
3. Enter a default clip name in the
Base Clip Name
field. The application sets the base clip name
with a default suffix for every clip populated in the RMI panel. If you don't enter a base clip
name, the application uses original clip names from the removable device.
NOTE: The base clip name will only overwrite names that have not been previously altered.
For instance, if a photographer overrides the default clip name on the camera itself, RMI will
not overwrite that name. However, selecting
Overwrite Default
overrides all default clip names.
4. Change the
Default Clip Location
, if you want to import clips to a different location.
You can click
Browse
to search for other locations in your K2 Summit system.
5. Check the
Overwrite Default
box if you want the base clip name to overwrite original clip names.
6. Click the
Apply
button.
The Media ID section closes.
The RMI updates according to details entered in the Media ID section.
Previewing a clip
Clip previews allow you to easily select, deselect and decide what to import from the RMI tool. You
can preview clips using the Inspector and Source Viewer panel.
1. Select a clip that you want to preview from the RMI list.
106
GV STRATUS User Manual
2014 02 21
Ingesting assets