2 basic rotation (cycle 400, din/iso: g400), Cycle run, Please note while programming – HEIDENHAIN iTNC 530 (340 49x-05) Cycle programming User Manual
Page 310

310
Touch Probe Cycles: Automatic Measurement of Workpiece Misalignment
14.2 BA
SIC R
O
T
A
TION (Cy
c
le 40
0, DIN/ISO: G40
0
)
14.2 BASIC ROTATION (Cycle 400,
DIN/ISO: G400)
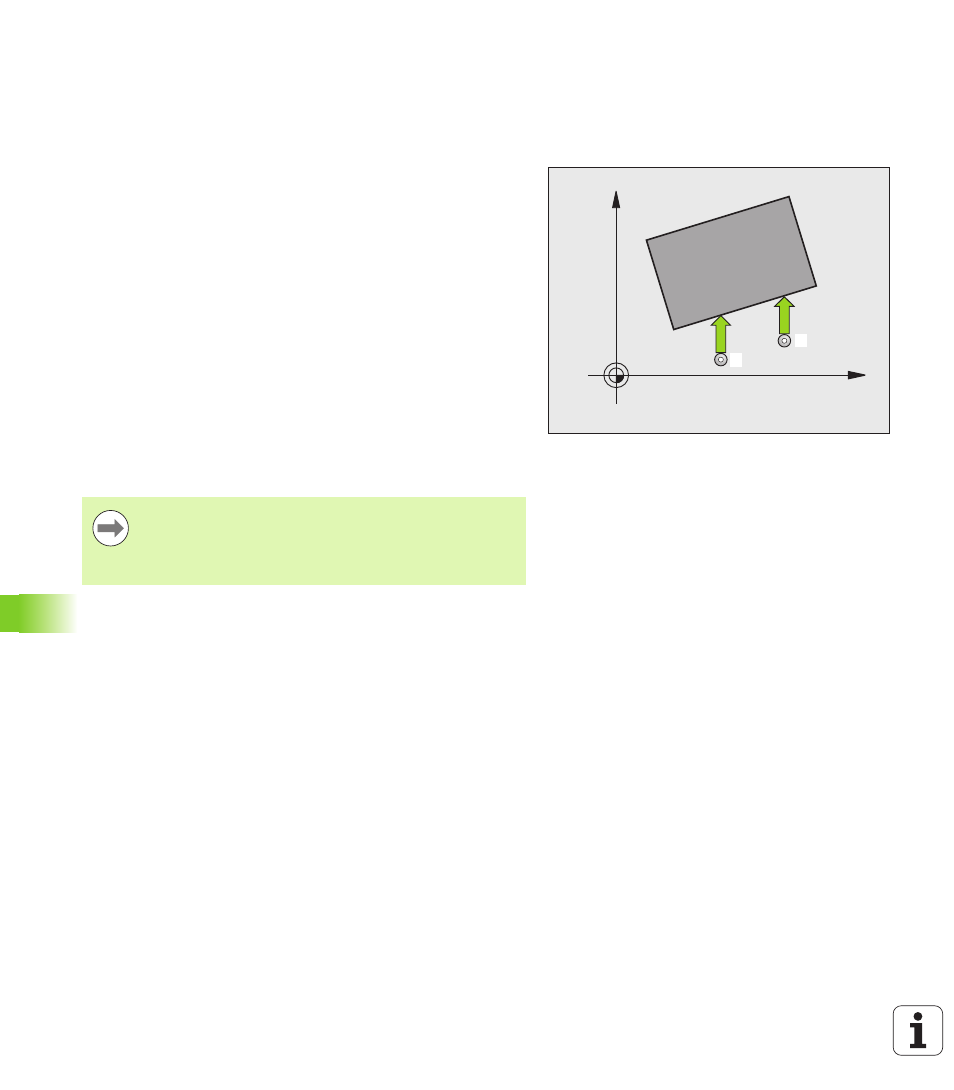
Cycle run
Touch probe cycle 400 determines a workpiece misalignment by
measuring two points, which must lie on a straight surface. With the
basic rotation function the TNC compensates the measured value.
1
Following the positioning logic (see “Executing touch probe
cycles” on page 306), the TNC positions the touch probe to the
programmed starting point
1
at rapid traverse (value from MP6150
or MP6361). The TNC offsets the touch probe by the safety
clearance in the direction opposite the defined traverse direction.
2
Then the touch probe moves to the entered measuring height and
probes the first touch point at the probing feed rate (MP6120 or
MP6360).
3
Then the touch probe moves to the next starting position
2
and
probes the second position.
4
The TNC returns the touch probe to the clearance height and
performs the basic rotation.
Please note while programming:
X
Y
1
2
Before a cycle definition you must have programmed a
tool call to define the touch probe axis.
The TNC will reset an active basic rotation at the beginning
of the cycle.