Please note while programming, Cycle parameters – HEIDENHAIN iTNC 530 (340 49x-05) Cycle programming User Manual
Page 404

404
Touch Probe Cycles: Automatic Workpiece Inspection
16.7 MEA
S
. RECT
AN. INSIDE (Cy
c
le
423, DIN/ISO: G423)
Please note while programming:
Cycle parameters
U
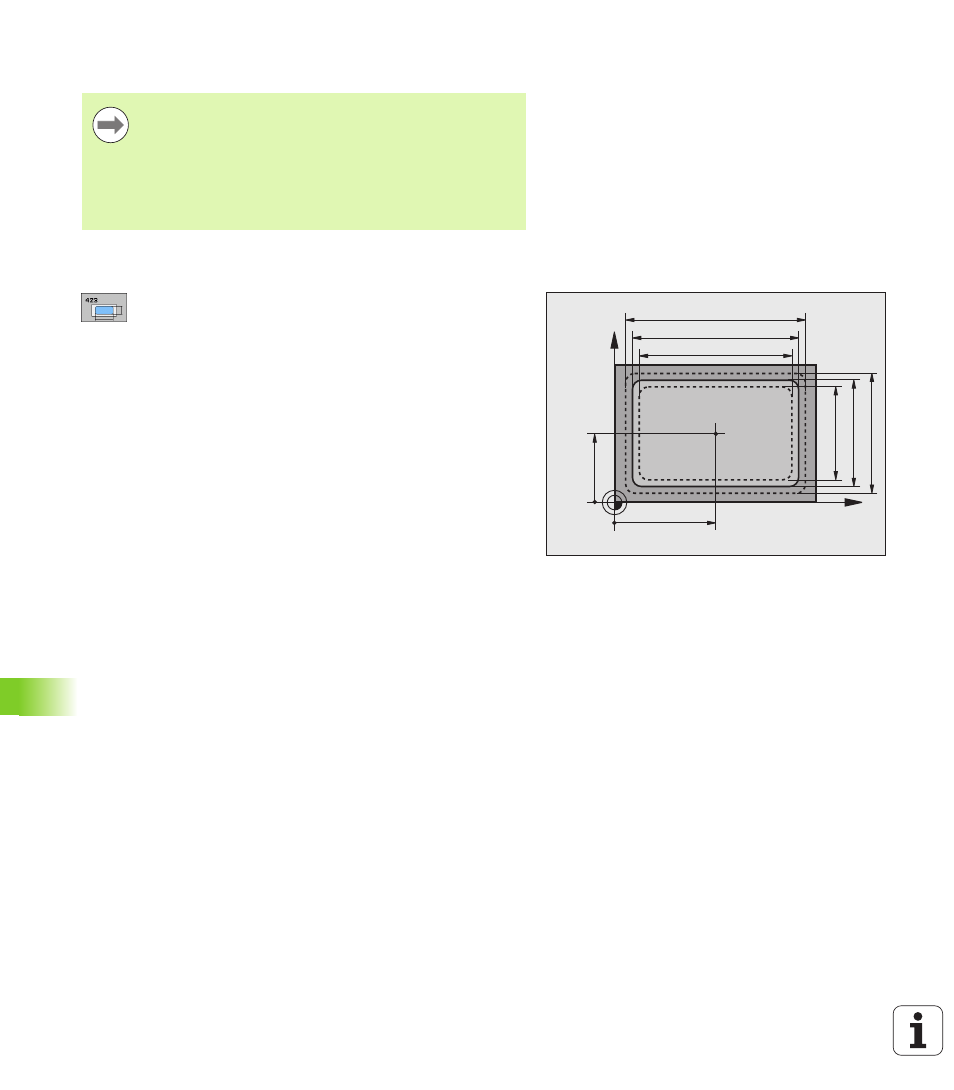
Center in 1st axis
Q273 (absolute): Center of the
pocket in the reference axis of the working plane.
Input range: -99999.9999 to 99999.9999
U
Center in 2nd axis
Q274 (absolute): Center of the
pocket in the minor axis of the working plane. Input
range: -99999.9999 to 99999.9999
U
First side length
Q282: Pocket length, parallel to
the reference axis of the working plane. Input range:
0 to 99999.9999
U
2nd side length
Q283: Pocket length, parallel to the
minor axis of the working plane. Input range: 0 to
99999.9999
U
Measuring height in the touch probe axis
Q261
(absolute): Coordinate of the ball tip center (= touch
point) in the touch probe axis in which the
measurement is to be made. Input range:
-99999.9999 to 99999.9999
Before a cycle definition you must have programmed a
tool call to define the touch probe axis.
If the dimensions of the pocket and the safety clearance
do not permit pre-positioning in the proximity of the touch
points, the TNC always starts probing from the center of
the pocket. In this case the touch probe does not return to
the clearance height between the four measuring points.
X
Y
Q287
Q285
Q274
±Q280
Q273
±Q279
Q283
Q286
Q282
Q284