Adobe Elements Organizer 12 User Manual
Page 185
Use Existing Audio Caption
Browse
Note:
Note:
Click Play to hear the narration you recorded.
Click Delete and then choose Delete This Narration to start over, or choose Delete All Narrations to remove all narrations from the slide
show.
4. To use an existing audio caption for the narration, click Open and choose one of the following:
Uses the audio caption attached to the photo.
Lets you search and choose another audio caption.
5. Click Next Slide to record a narration for the next slide.
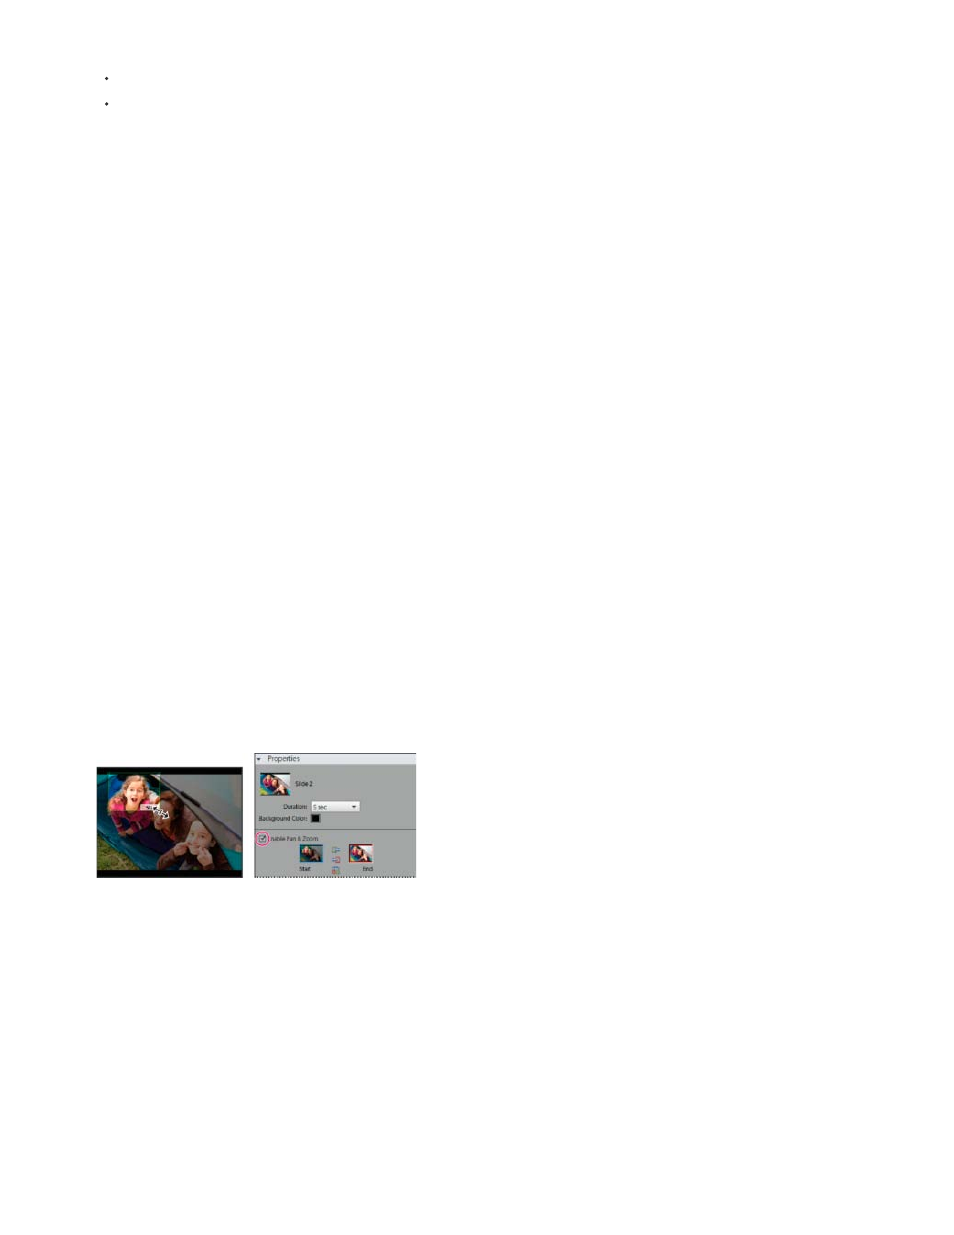
Set pan and zoom
With the Slide Show dialog box, you can customize panning and zooming in each slide. You determine the start point and end point by positioning
the bounding boxes on an area of a photo. The boxes are resizable; the smaller you make a box, the more dramatic the pan and zoom effect
becomes. You can also add additional pan and zoom start and end points to a slide. The end point of the previous pan and zoom marks the
beginning of the next pan and zoom.
You can use pan and zoom on photos, but not video files.
1. In the storyboard, click the slide to which you want to add pan and zoom.
2. In the Slide Show dialog box Properties panel, select Enable Pan & Zoom.
3. The Start bounding box has a green outline. In the main preview window, drag a corner of the bounding box to resize it.
4. Drag the Start box to the area of the photo where you want panning and zooming to begin. Resize the box until it surrounds the area you
want to focus on.
Setting the start point after enabling Pan and Zoom
5. Click the thumbnail marked End. The End bounding box has a red outline. In the main preview area, resize and move the box until it
surrounds the area where you want the additional pan and zoom to end.
6. To add additional area to pan and zoom, click Add Another Pan & Zoom To This Slide. This adds a new slide to the Storyboard with a Link
icon indicating the additional pan and zoom. The former end point and the new start point are linked (if you edit either point, the changes
affect both). Drag the new End bounding box until it surrounds the area where you want the pan and zoom to end.
Moving the Start box for an additional pan and zoom affects the End box of the previous pan and zoom.
7. To swap start and end points, select the point and then click Swap. To place the start and end points on the same slide, click Copy Start
Point To End Point or Copy End Point To Start Point.
182