Adobe Elements Organizer 12 User Manual
Page 184
Note:
Font Family
Font Size
Color
Opacity
Left Alignment
Center Alignment
Right Alignment
Font Style
Drop Shadow
Drop Shadow Color
2. Double-click the text and type in the Edit Text dialog box (to change the sample text it contains), and then click OK.
3. In the Properties panel, set any of the following options:
The text properties specified here become the defaults for adding text.
Applies a font family to the text. Choose a font family from the menu at the left side of the dialog box.
Applies a font size to the text. Choose a font size from the menu at the right side of the dialog box.
Applies a color to the text. Click the color swatch and use the Color Picker dialog box to specify a color.
Specifies how opaque the text appears. To have the contents of a slide visible through text, choose a lower percentage.
Aligns the left edge of each text line.
Aligns the center of each text line.
Aligns the right edge of each text line.
Applies a font style, such as bold, italic, underline, or strikethrough, to the text. Click a style icon to apply it.
Adds a drop shadow to text, giving the text a 3D appearance.
Changes the color of the drop shadow.
To edit existing text, click the Edit Text button.
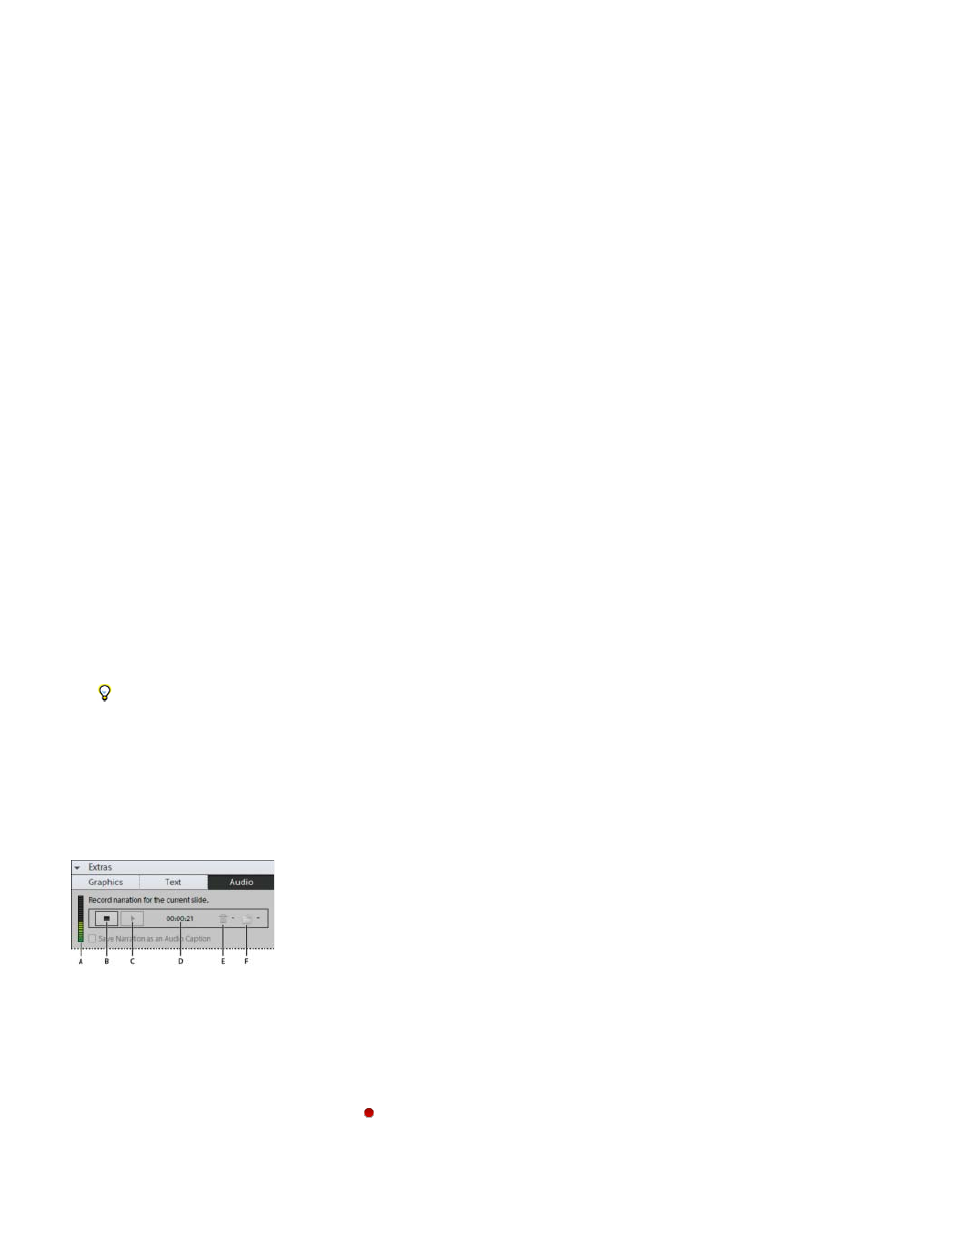
Add narration to a slide
You can record voice narration on a slide, if you have a microphone attached to your computer. You can also attach the narration to the photo as
an audio caption.
Adding a narration to a slide.
A. Record volume level B. Record button C. Play button D. Length of narration E. Delete button F. Open button
1. In the Extras panel of the Slide Show dialog box, click Narration.
2. To record a narration, click the Record button
and speak into the microphone.
3. After you’ve recorded your narration, do any of the following:
181