Torch mounting and alignment -35, Mounting the torch -35, Torch alignment -35 – Hypertherm HPR260 Manual Gas Preventive Maintenance Program Rev.5 User Manual
Page 84: Torch lifter requirement -35, Torch mounting and alignment, Torch lifter requirement
INSTALLATION
HPR260 Auto Gas
Instruction Manual
3-35
3
Torch mounting and alignment
Mounting the torch
Torch alignment
T
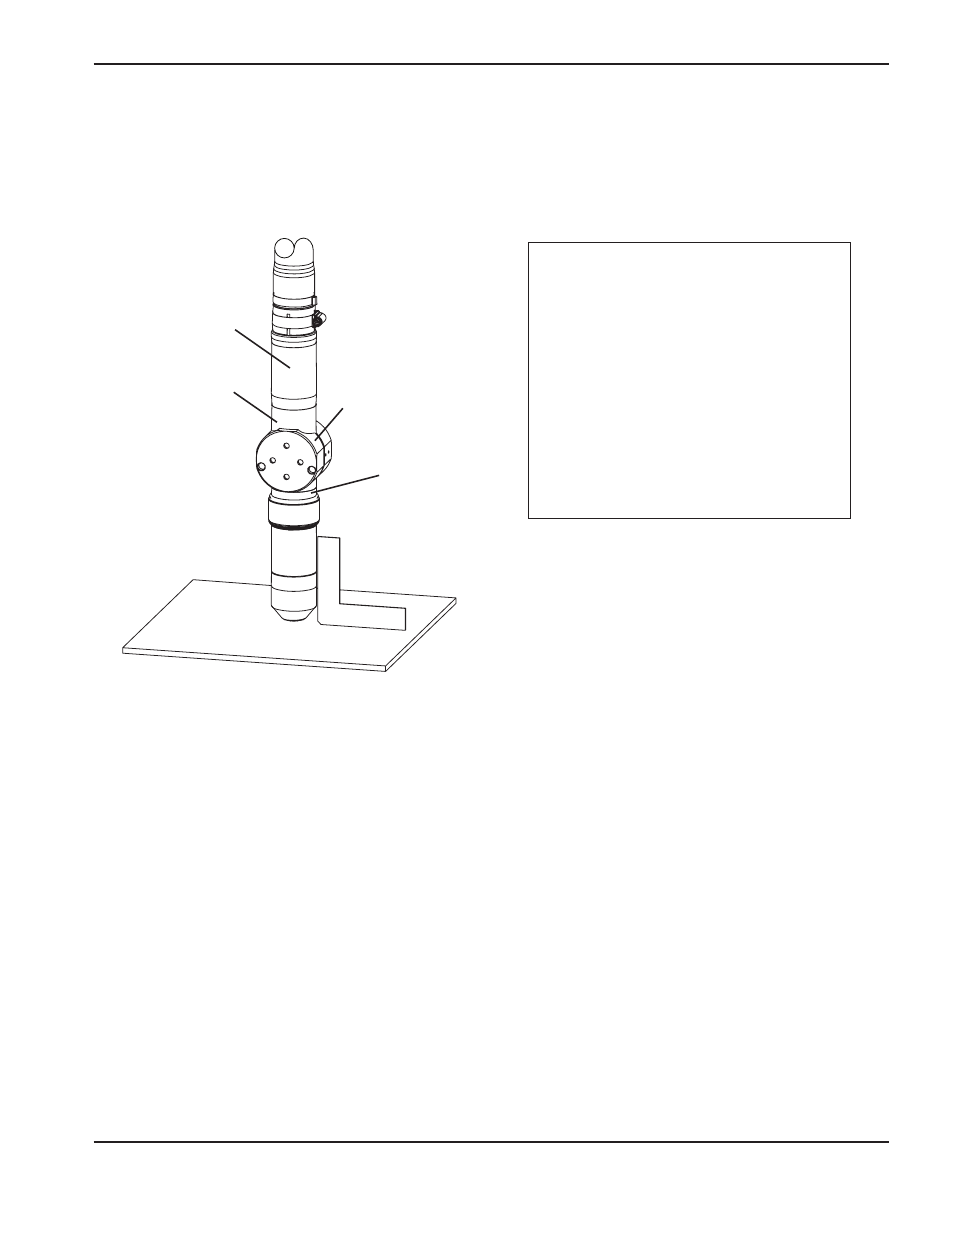
o align the torch at right angles to the workpiece, use a square. See figure above.
See also Changing consumables in Section 4 to install consumables in the torch.
Torch lifter requirement
The system requires a high-quality, motorized torch lifter with sufficient travel to cover all cutting thickness requirements.
The lifter must provide 203 mm (8 in) of vertical travel. The unit should have the capability of maintaining a constant
speed of up to 5080 mm/min (200 ipm) with positive braking. A unit which drifts through the stop point is not
acceptable.
Installation
1.
Install the torch (with torch leads
attached) in the torch mounting bracket.
2.
Position the torch
below
the
mounting
bracket, so that the bracket is around the
lower portion of the
torch sleeve
but
not
touching the torch
quick-disconnect
.
3.
Tighten the securing screws.
Note: The bracket should be as low on the
torch sleeve as possible to minimize vibration
at the tip of the torch.
Lower
torch sleeve
Torch mounting
bracket
(customer supplied)
Upper
torch sleeve
Quick-disconnect
receptacle