Cooling fan replacement: 5a0041 and 5a0052 – Yaskawa AC Drive Z1000 AC Drive HVAC Fan User Manual
Page 172
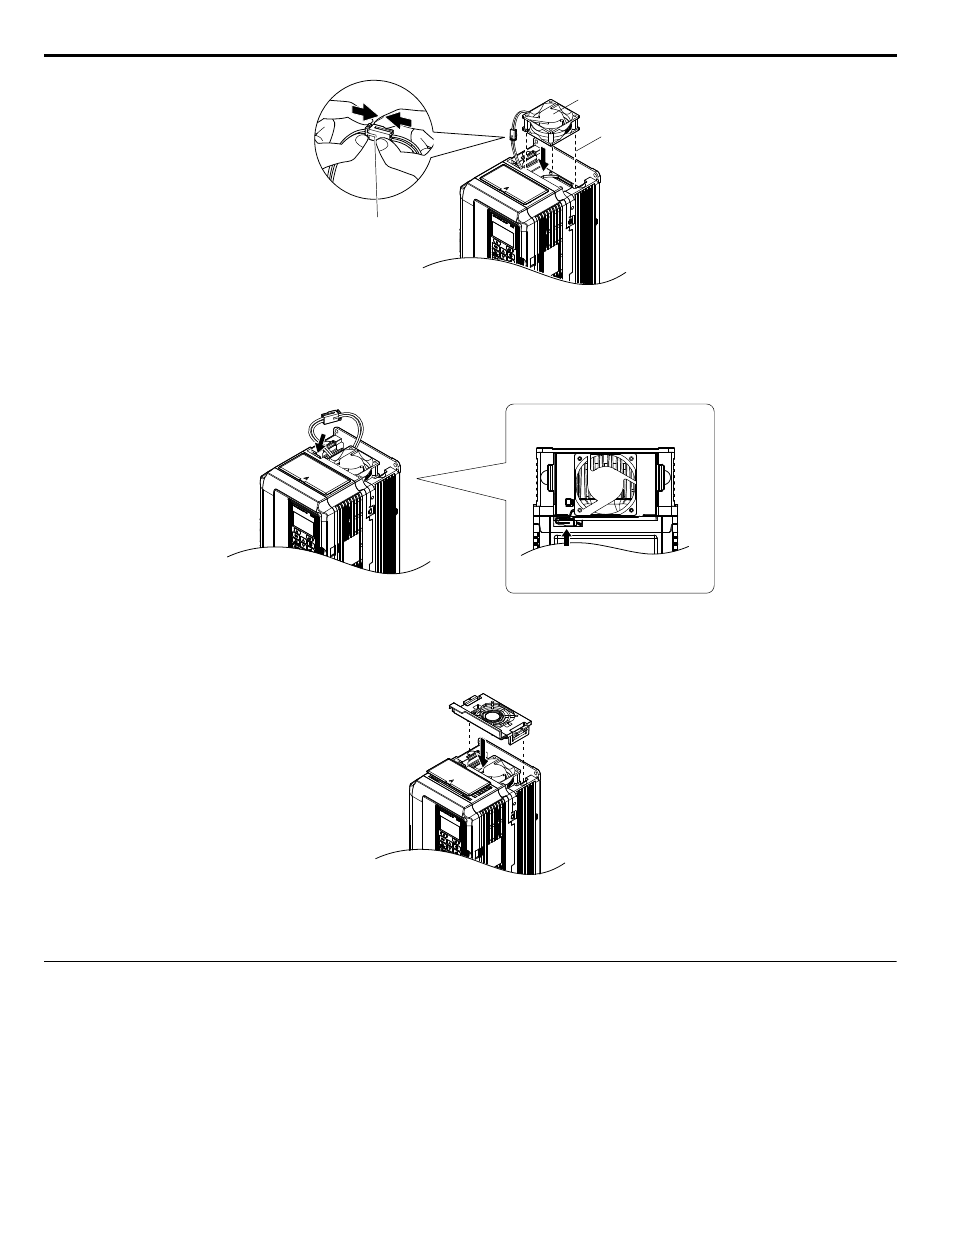
A
B
C
A – Push the connectors together so
no space remains between them
B – Label facing up
C – Make sure the alignment pins line
up properly
Figure 2.6 Install the Cooling Fan: 5A0006 to 5A0032
2.
Properly connect the fan power lines, then place the cable back into the recess of the drive.
A
B
A – Back
B – Front
Figure 2.7 Connect the Cooling Fan Power Supply Connectors: 5A0006 to 5A0032
3.
While pressing in on the hooks on the left and right sides of the fan finger guard, guide the fan finger guard until it
clicks back into place.
Figure 2.8 Reattach the Fan Finger Guard: 5A0006 to 5A0032
4.
Turn on the power supply and set o4-03 to 0 to reset the Maintenance Monitor cooling fan operation time.
u
Cooling Fan Replacement: 5A0041 and 5A0052
These models allow access to the fans from the back or top of the drive for fan replacement. The drive can also be dismounted
to replace the fans.
WARNING! Electrical Shock Hazard. Do not connect or disconnect wiring while the power is on. Failure to comply can result in serious
personal injury. Before servicing the drive, disconnect all power to the equipment. The internal capacitor remains charged even after the
power supply is turned off. After shutting off the power, wait for at least the amount of time specified on the drive before touching any
components.
CAUTION! Burn Hazard. Do not touch a hot drive heatsink. Failure to comply could result in minor or moderate injury. Shut off the power
to the drive when replacing the cooling fan. To prevent burns, wait at least 15 minutes and ensure the heatsink has cooled down.
2.5 Drive Cooling Fans
172
YASKAWA ELECTRIC SIEP YAIZ1U 03A YASKAWA AC Drive – Z1000 Programming Manual