Yaskawa AC Drive Z1000 AC Drive HVAC Fan User Manual
Page 173
NOTICE: Follow cooling fan replacement instructions. Improper fan replacement could cause damage to equipment. Make sure the fan is
facing upwards when installing the replacement fan into the drive. Replace all fans when performing maintenance to help ensure maximum
useful product life.
NOTICE: When dismounting Flange Type Enclosure (NEMA 12 Backside) drives, ensure that the gasket of the mounting flange is not
damaged. If the gasket is damaged, contact a Yaskawa representative or the nearest Yaskawa sales office for replacement gasket.
to Gasket Replacement for Flange Type Enclosure (NEMA 12 Backside) Drives on page 178
for gasket replacement parts and
procedures.
n
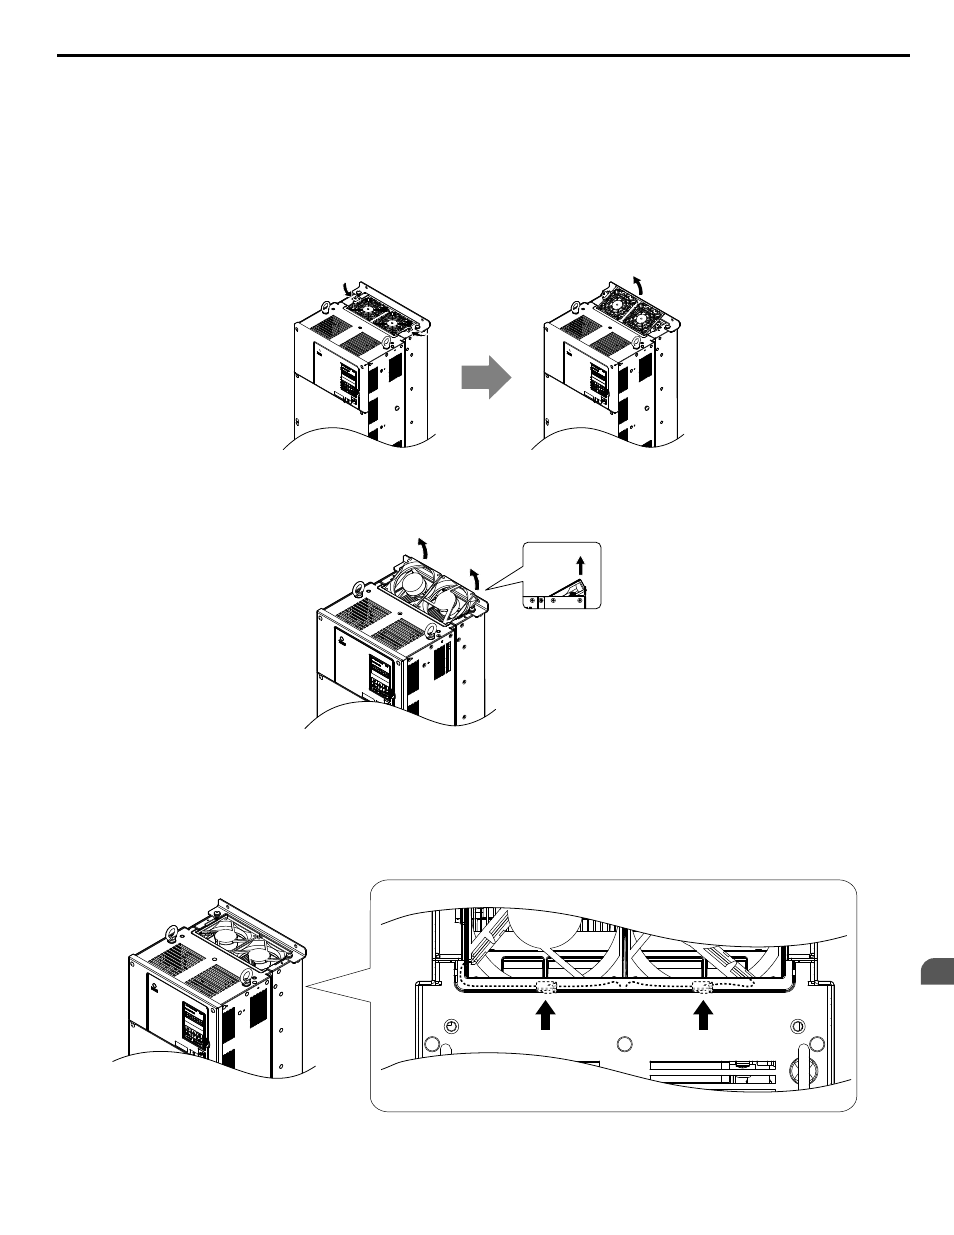
Removing the Cooling Fan Finger Guard and Cooling Fan
1.
While pressing in on the hooks located on the left and right sides of the fan finger guard, free the fan finger guard
leading by lifting the back end first.
Figure 2.9 Remove the Cooling Fan Finger Guard: 5A0041 and 5A0052
2.
Lift out the back end of the fan finger guard first. Unplug the replay connector and free the fan finger guard from the
drive.
Lift the fan finger guard out of
the drive leading with the
back end.
Figure 2.10 Remove the Cooling Fan: 5A0041 and 5A0052
n
Installing the Cooling Fan
Reverse the procedure described above to reinstall the cooling fan.
1.
Properly connect the fan power lines.
2.
Place the power supply connectors and cable back into the recess of the drive.
A
B
A – Back
B – Front
Figure 2.11 Cooling Fan Power Supply Connectors: 5A0041 and 5A0052
2.5 Drive Cooling Fans
YASKAWA ELECTRIC SIEP YAIZ1U 03A YASKAWA AC Drive – Z1000 Programming Manual
173
2
Periodic Inspection & Maintenance