3 music archive – MacroSystem Bogart SE Ver.4 User manual User Manual
Page 101
101
Bogart SE 4 User manual
2.2.10 Direction buttons
By pressing the left/right direction buttons, you can switch be-
tween the different displays: All films, all series or the respec-
tive album/folder contents .
2.3 Music archive
Press button ‘5’ from the main menu to enter the music
archive . You should already have a few imported CDs in
here . The menu works in exactly the same fashion as the film
archive . You can therefore read up on the basic options and
possibilities in chapter 2 .2 (Media Manager) .
2.3.1 Importing music from a CD/DVD/USB/network
Press the Record button to enter the ‘CD/DVD import’ screen .
You will be prompted to insert a CD/DVD . This can be both a
regular audio CD or an MP3-CD/DVD . If you want to use data
on a USB device, such as a USB stick, or from a PC network,
press buttons 5 or 6 to access these sources . If you use mul-
tiple USB devices or multiple network folders, you must first
choose the correct source . After a short while, the data will be
shown . Select a music track from the left list and press OK to
add it to the right list . During import, the system automatically
checks if the file already exists on the hard-drive . If this is the
case, the music piece is shown in a different color in the list . If
the title is the same, but all other information not, the item will
be shown in yellow . If the title, album and length are the same,
it will be shown in red . Use the information button to retrieve
supplementary information with respect to the selected title,
if it is available . Of course, you can play the selected title by
pressing the Play button . Press Stop to stop playback . In order
to delete a piece form the list, select it and press the red heart
button . If you have inserted an regular audio CD, you can now
press the Options button to determine the storage format . The
available formats are: ‘1 No compression’, and the compres-
sion format MP3 (in three quality settings ‘2’ high, ‘3’ medium
and ‘4’ low) .
Select the quality and exit the screen by pressing ‘Close’ . To
store the selected titles on the hard-drive , press ‘7’ (Import) .
Alternatively, you can press ‘8 Import new’ or ‘9 Import all’ .
While importing MP3 music, the system will display the state of
progress . While importing MP3 music, the system will dis-
play the state of progress . For example, 3/10 means that the
system is currently importing track 3 or 10 . The bottom line
displays the title that is currently being imported, and the bar
shows you the progress of the import . When all of the tracks
have been imported, the tray will open and you can remove the
CD . The list will now be empty and you can return to the music
archive .
Note: When importing a large number of audio CDs, you can
also do this in the background. In the meantime, you can play a
film or listen to music from the archives or even use other func-
tions. Read more about this in chapter 2.3.11.
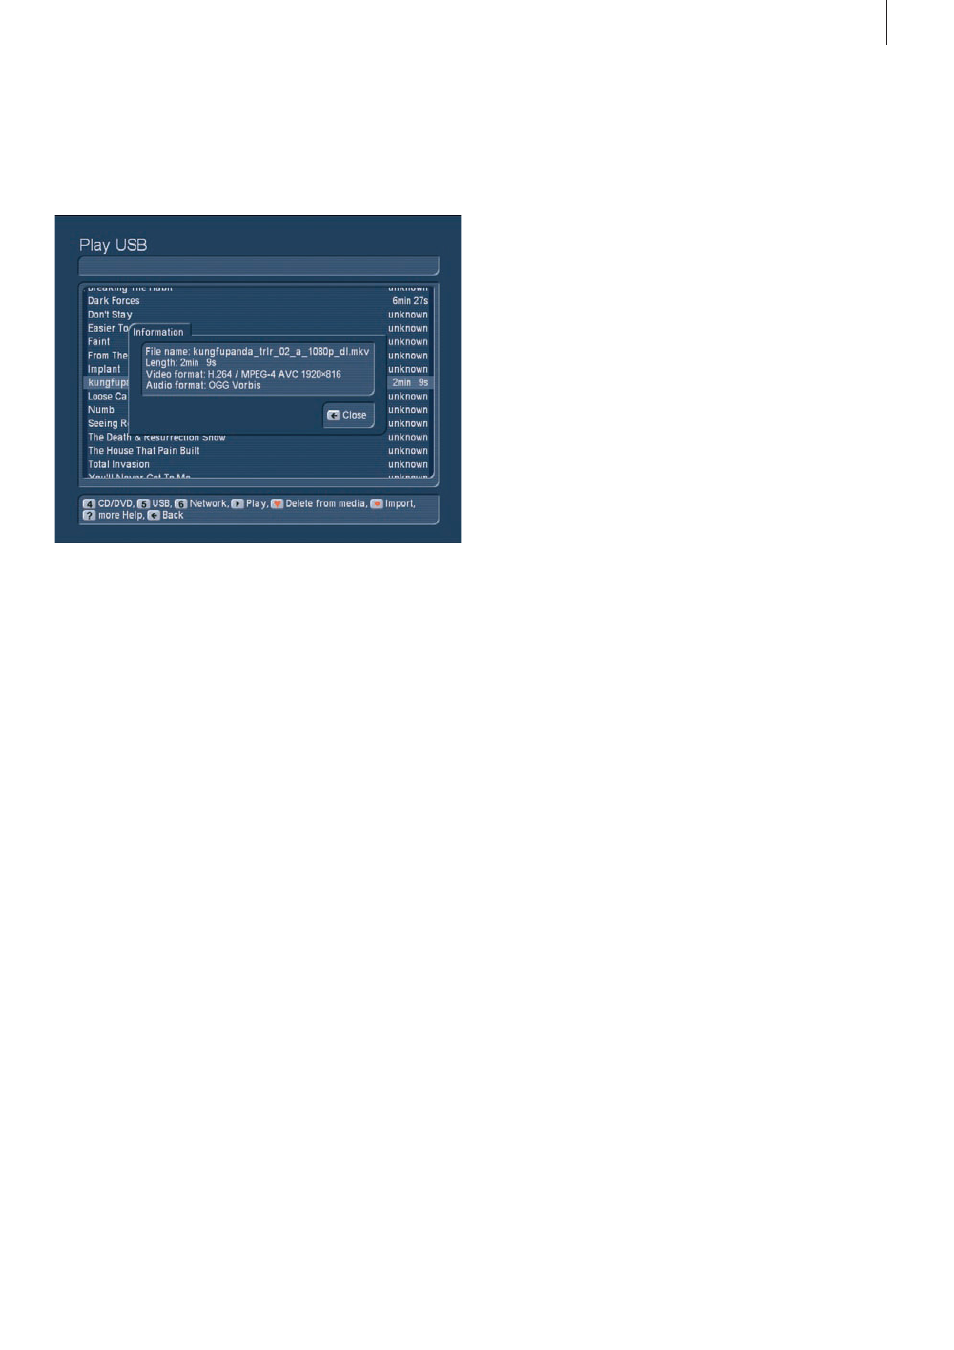
Universal Player / Import
Press button ‘6’ to enter the ‘Universal Player menu . The
Universal Player is capable of playing and importing many
PC-typical formats (e .g . film or music downloads on CD/DVD/
Blu-ray, network or USB connection) .
Insert a CD/DVD to see the contents of the medium (this can
take a moment) . If your data is located on a USB medium,
connect the USB device and select the function for searching
USB devices . When you search a network, all public folders
will be shown . Once you have selected a folder, the system
will search for music and video data . You can find the format
type and length right behind the file name . Press the informa-
tion button to get more info . You can now start playback of the
file by pressing the Play button . Access the help menu to get
more control . In order to import the file, press the Record but-
ton to access the respective menu (CD/DVD, USB or Network
import) . You can then use the Options to set various quality
levels for audio and video . Finally, you can select the item and
add it to the list on the right . Press ‘7 Import’ to load the entire
list . Alternatively, you can press ‘8 Import all new’ or ‘9 Import
all’ .
Copy audio to the music archive ‘7’: This will copy the audio of
the currently selected movie to the music archive . The original
movie remains unchanged in the movie archive .
Printing CD/DVD labels “8”: This function is only available for
use with the add-on product Caladan for Media Manager . It
enables you to create and print a label for a movie . Please refer
to the product manual for more information .
2.2.9 Film information
Press the info button <i> to see all information about the cur-
rent title on the archive .