MacroSystem Bogart SE Ver.4 User manual User Manual
Page 75
75
Bogart SE 4 User manual
If you then trim a sample or move it, the fade in and fade out
times remain .
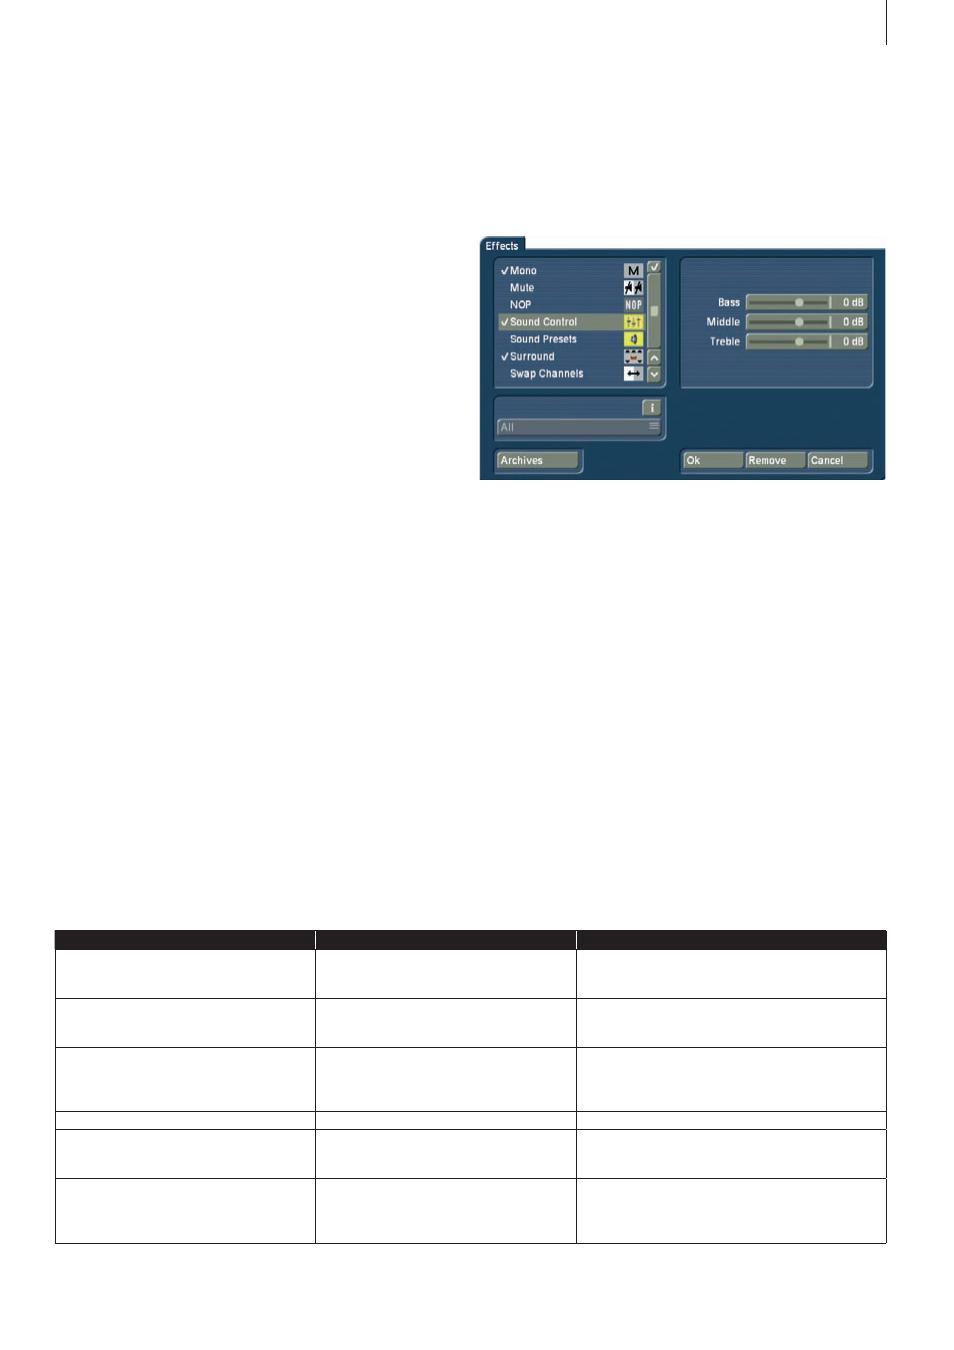
(14) The Effects button calls up the Audio Effects menu . Audio
effects can be applied to either a single audio sample or a
complete sound track .
• To add an audio effect to an audio sample, first select the
desired audio sample, which is then highlighted in blue . Then
click on Effects .
• To add an audio effect to a sound track, call up the Audio
Effects menu as described under item (3) by means of the fx
button to the left of the sound tracks . The audio effects are
divided into several categories:
All All effects are displayed .
Standard Only the effects contained in the Bogart SE software
are displayed .
Optional Only the effects from any add-on software packages
are displayed .
[Effect Package] Only the effects from the current Effect
Package concerned are displayed .
In order to combine multiple audio effects within one sample,
note - as is the case for the clipboard and when importing CDs
functions Fade and Envelope from within the timeline display .
The symbols >> and << indicate that the audio sample does
not end at the edge of the timeline, but continues . The original
sound track is displayed twice, one display above the other .
The reason is as follows: if for example you have inserted a
transition effect, two audio samples overlap . In the timeline
display, these two audio samples are then displayed in two
lines (in both original sound tracks) .
(13) Click on the Fade button to call up a dialog in which
you can adjust fade-in and fade-out of the currently active
audio sample . The audio volume is consequently reduced or
increased for the selected duration (which of course cannot
exceed the length of the audio sample), reaching the selected
baseline volume at the end of fading .
In the “Audio settings”, you will also have the ability to apply
a “constant” or a “lowered” sound fade . Certain practical time
values for fading in and out are already provided as defaults .
Should you therefore wish to fade a commentary in softly, you
can for example select a fade-in time of 1 second (1 s), and
thereby prevent the sound from being clipped . Should you
wish to fade out an audio sample, the volume is gently re-
duced towards the end of the sample and is completely silent
at the end of fading .
The fade-in and fade-out times act upon all selected changes,
i .e . including any changes to volume of the adjacent tracks .
For example, as the commentary volume is being increased,
the background music is gently reduced to the selected value .
Please note that the fade-in or fade-out of a commentary must
be taken into account at the time the commentary is recorded .
When recording a commentary, you should wait 2-3 seconds
before you start to speak and then continue the recording for
2-3 seconds after the commentary is finished . Only then will
you be able to use these 2-3 seconds for fading in or out . The
volume characteristic is displayed clearly in the audio samples .
Function
Available at . . .
Description
Change volume
An existing point
Move the point up or down to adjust the volume .
The volume is displayed in the info box . The position
remains unchanged .
Change position
An existing point
Move the point left or right to change the position in
the sound sample . The position is displayed in the
info box . The volume remains unchanged .
Change position and volume
An existing point
Move the point in order to modify volume and posi-
tion at the same time .
It is also possible by clicking directly with the big left
trackball button .
Remove point
An existing point
Deletes a highlighted point .
Remove envelope
An existing point, any spot on the envelope Deletes all points (except the start and end points)
of the envelope . This also deletes all settings for the
envelope .
Insert point
Any spot on the envelope
Inserts a point on the envelope at the location of the
mouse pointer .
It is also possible by clicking directly with the big left
trackball button .