MacroSystem Bogart SE Ver.4 User manual User Manual
Page 46
46 Chapter 4
Transition effects must be calculated . Creation can be time-
consuming, depending on the effect desired . For this reason
it is possible to preview the effect in a small window . You can
then “batch-render” the effects in the Finish menu (please refer
to chapter 4 .8, item (3): “Create”) .
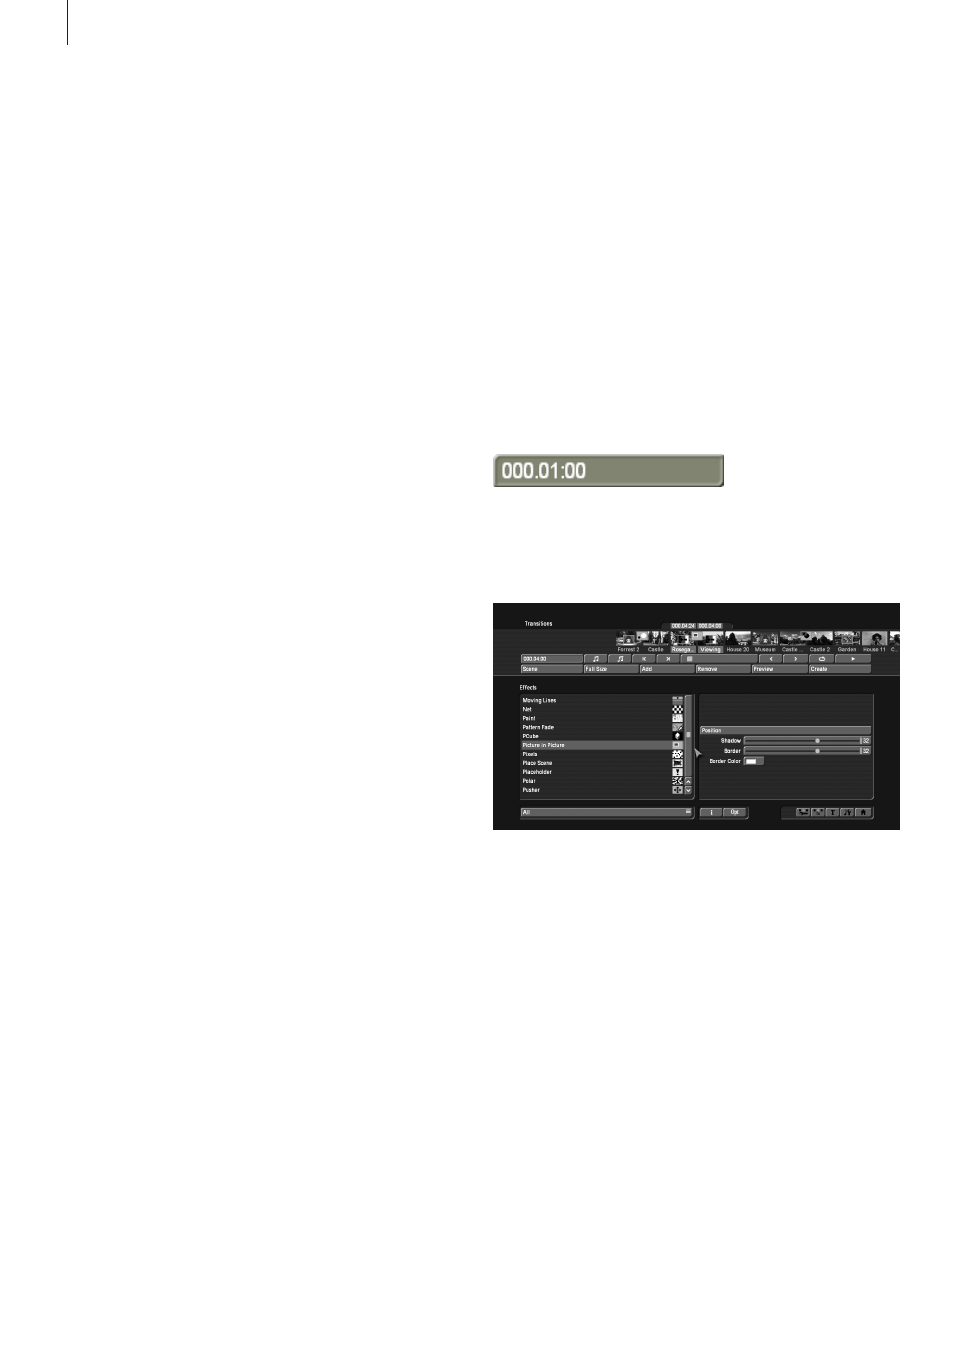
(1) The “Transitions” screen shown above displays the sto-
ryboard you are already familiar with . But here, two scenes
instead of one are displayed in the center . You thus see two
time displays in the upper panel . You can now move the
scenes meant for the transition to the middle . A further differ-
ence is the Play button which in this menu only plays the effect
with 1 second before and after, and not the entire storyboard .
If you have not already inserted an effect, clicking on this but-
ton plays the last second of the first scene and the first second
of the second scene . This enables you to view hard cuts even
between very long scenes . The slider and the arrow buttons
are used in the same way as in the Edit menu .
(2) You can choose the desired transition effect in the effect
list by selecting directly or using the slider . A red flag identi-
fies a demo effect, that is played with a superimposed “demo”
text . To purchase and unlock an effect, contact your Dealer .
The list is already split up once you chose the first effect, as
long as that option has been activated in the extended set-
tings . The top part -above the dividing line- contains the
effects that you have already used . This is the favorites list .
It contains the last 10 used effects . You can use this list for
faster access to these effects . Below the line, you can see the
regular effect list . In this menu you can change the settings for
the starting point .
(3) After you have selected an effect that has further options,
the effect options are displayed in the field to the right of the
effect list . There you can, for example, define colors and effect
directions, and other parameters specific to the individual ef-
fects .
(4) The selection button below the effect list allows you to
switch the effect list to single points . The button offers at least
three settings . The function “All” shows all transition effects
which are to be found in the system . “Default” shows the tran-
sition effects, which are integrated in the system and “Option-
al” only shows the transition effects which have been installed
afterwards . If you have installed additional transition effects,
they are also shown in this list (below the three settings listed
above) . Thus it is possible just to see only one effect type in
the list .
(5) Clicking on the “i” button, you’ll get information about the
transition effect activated in the effect list . If it is an add-on
effect, the window “product information” appears, which offers
a description of the effect . Is the effect to be found a standard
effect, the product information refers to the manual .
(6) Use the “Add” button to apply the selected and defined
effect between the scenes in the storyboard middle . The ef-
fect symbol then appears between the two scenes with a red
flag (must be created) . The effect duration corresponds to the
duration that was last used . This enables you to insert many
effects with the same duration between different scenes . If you
select an new transition effect although there already is one
between the two scenes, then the new effect replaces the old,
without you having to click again on “Add” .
(7) A click on the “Remove” button removes the added effect
from the storyboard . If you would like to replace the current
effect with another, then you can simply select the new effect
and it automatically replaces the current effect in the story-
board . In this case you don’t have to click on the “Remove”
button .
(8) With this button you
can set the duration of the
effect . This button is enabled after you have inserted an effect
between two scenes . The duration then shown is 1 second
(assuming that neither of the two scenes lasts less than 1
second) . Clicking on this button displays a window in which
you use a slider to set the time exactly .
Also provided are the durations 1/2 sec, 1 sec and 2 sec,
which you can click directly, or use the slider to set the dura-
tion to its maximum limit - the length of the shorter of the 2
scenes used . You can set your own values for the three but-
tons with fixed transition lengths . This way, you can set your
own transition durations for quick access .
This is how you can set a new effect length for a button . Set
the desired effect length with the slider . Next, click on the
Save button . It will remain pressed until you have selected one
of the three buttons . This will then transfer the new duration,
which will be available for new effects .
An effect between two normal scenes shortens the total
storyboard length by the running time of the transition ef-
fect . An effect between a normal scene (background) and an
Insert scene (foreground) does not shorten the length of the
storyboard . Transition effects may not overlap . For example,
if a scene is 5 seconds long then the total duration of the two
effects connecting this scene with the previous scene and next