MacroSystem Bogart SE Ver.4 User manual User Manual
Page 72
72 Chapter 4
• New name: This is where you enter the name of the new
sound sample .
Notes:
• When you want to create a new sound sample, you should
either replace the sample in the track, or insert it in the bin . If
you did not select one of these two possibilities, a new sample
will not be created .
• Since you are able to hide individual sound tracks in the
timeline view, for the sake of more clarity, you should take this
into account when you are creating a new sample . You could
insert the new sound sample in a hidden sound track and then
find it difficult to recognize the results . It is also possible that
a hidden sound track contains samples that have, of course,
been included in the newly created sound sample .
4.13.2.2 Screen elements in the storyboard view
This screen can be seen in the audio-mix with the storyboard
view:
(1) The storyboard and its operation is familiar to you from
other menus . You can use the slider to move very quickly
through the storyboard scene by scene .
With the buttons, you can go from sample to sample through
the film strip in the currently active sound track . This function is
very helpful when a large number of audio samples are located
below a single video scene, as the samples are displayed only
very briefly during normal play-back . Select the desired sound
track either directly or by clicking on the corresponding symbol
on the right-hand side of the screen .
(2) This color control bar directly beneath the storyboard
shows the range of the original video scenes in which the
audio has not been created (yellow) or has already been
completely created (blue) . Over-modulation is indicated in red .
Overmodulation will be indicated as soon as the audio level is
clipped . Such clipped audio should be edited until it is no lon-
ger clipping . In most cases, you can simply reduce the volume
level by -1 db for the original audio .
(3) Select a button with the fx symbol to the left of the sound
You have now two buttons at your disposal:
• The left play button plays only the sample you are presently
editing, i .e . the one displayed in the envelope curve .
• The right play button plays also all the other sound tracks.
This way, you can check the overall sound of all sound tracks .
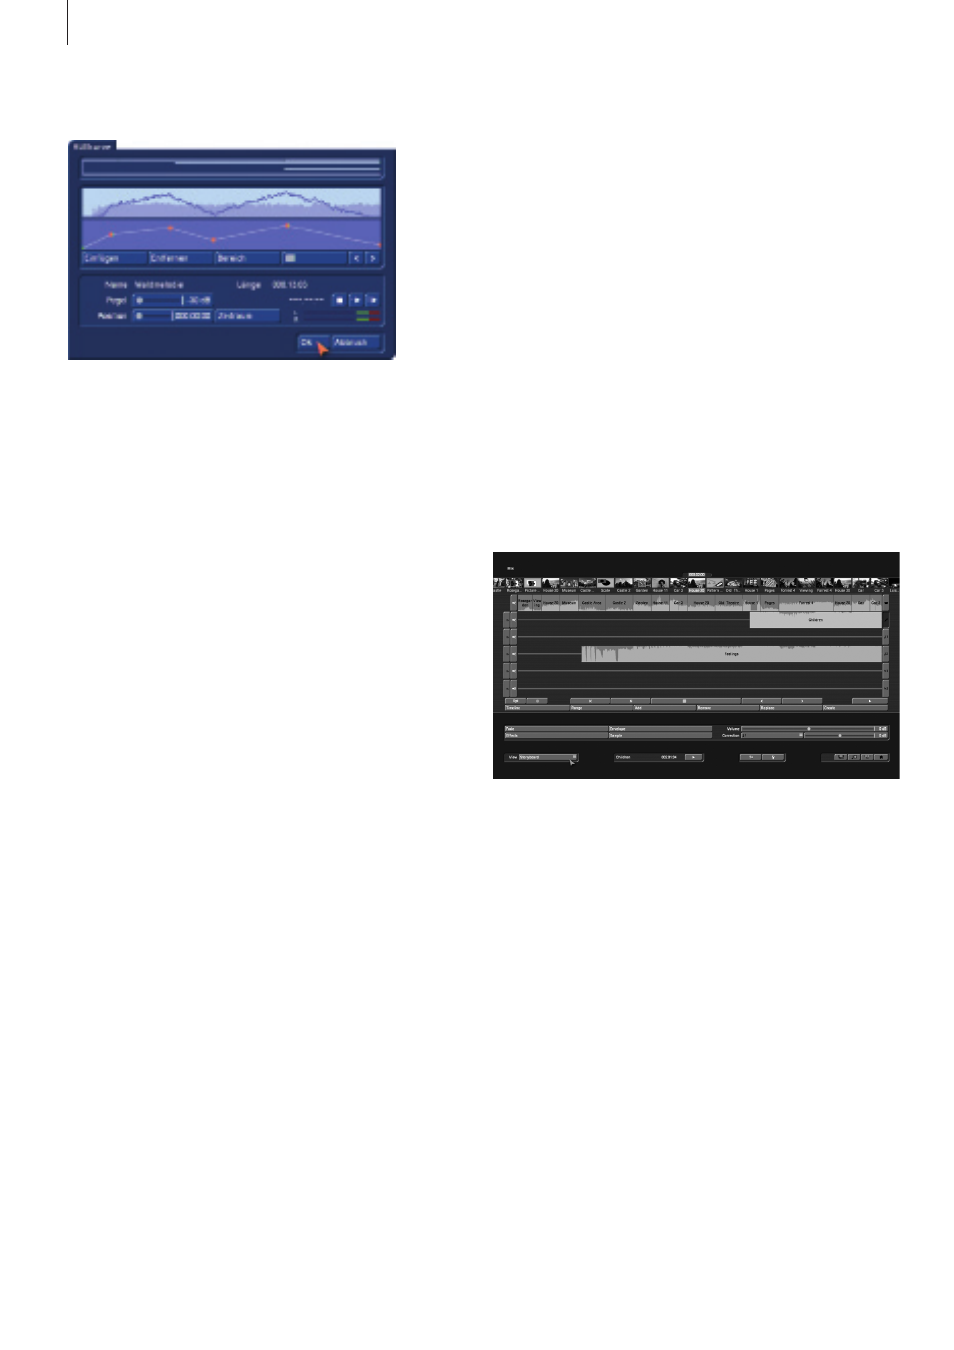
Creating samples
This function is available in both the storyboard and timeline
views . If you want to create a new sound sample from a part
of the audio-mix, this is the option you should select . You will
then get a menu with the following options:
• Range: Choose the range that should be combined into a
new sound sample .
• Current sample: The current sample is used as the range.
• Active scene: The current scene is used as range and may
therefore start/end in the middle of a partly underlying sound
sample .
• Active sample+scenes: The entire length of the active sample
is used . Should the scenes that are connected to it go fur-
ther, this range of the scene will also be added to create the
sample .
• Freely selectable: You can freely choose the range you want
to include . After confirming, you end up in the Trimming menu
where you can enter the range .
• Use original sound: Should the original sound of the scene
be included in the calculation? If yes, you should put a check-
mark in this selection otherwise, a dash should be visible here .
All other tracks will be always be put together .
• Replace sample(s) in track: Should the samples in this range
be replaced by this new sample? If this is what you want, you
should put a checkmark in the box . Your samples will then be
combined into one . This will free up space in this location to
add new sound samples .
• Insert in track: This option is activated when “Replace sound
sample(s) in track” is checked . This is where you indicate in
which track the new sample should be located . Track 1 is not
shown, since nothing can be added to the original sound .
• Insert sample in bin: Do you wish to make this new sample
also available in the audio bin? You should then put the check-
mark here . The new sample will be inserted behind the then-
current sound sample in the bin .