MacroSystem Bogart SE Ver.4 User manual User Manual
Page 23
23
Bogart SE 4 User manual
The setting for “larger mouse pointer for higher resolutions”
displays a larger mouse pointer when you set a higher screen
resolution . The relationship between the size of the mouse
pointer and the resolution is internally fixed . This setting only
allows you to activate or deactivate this function .
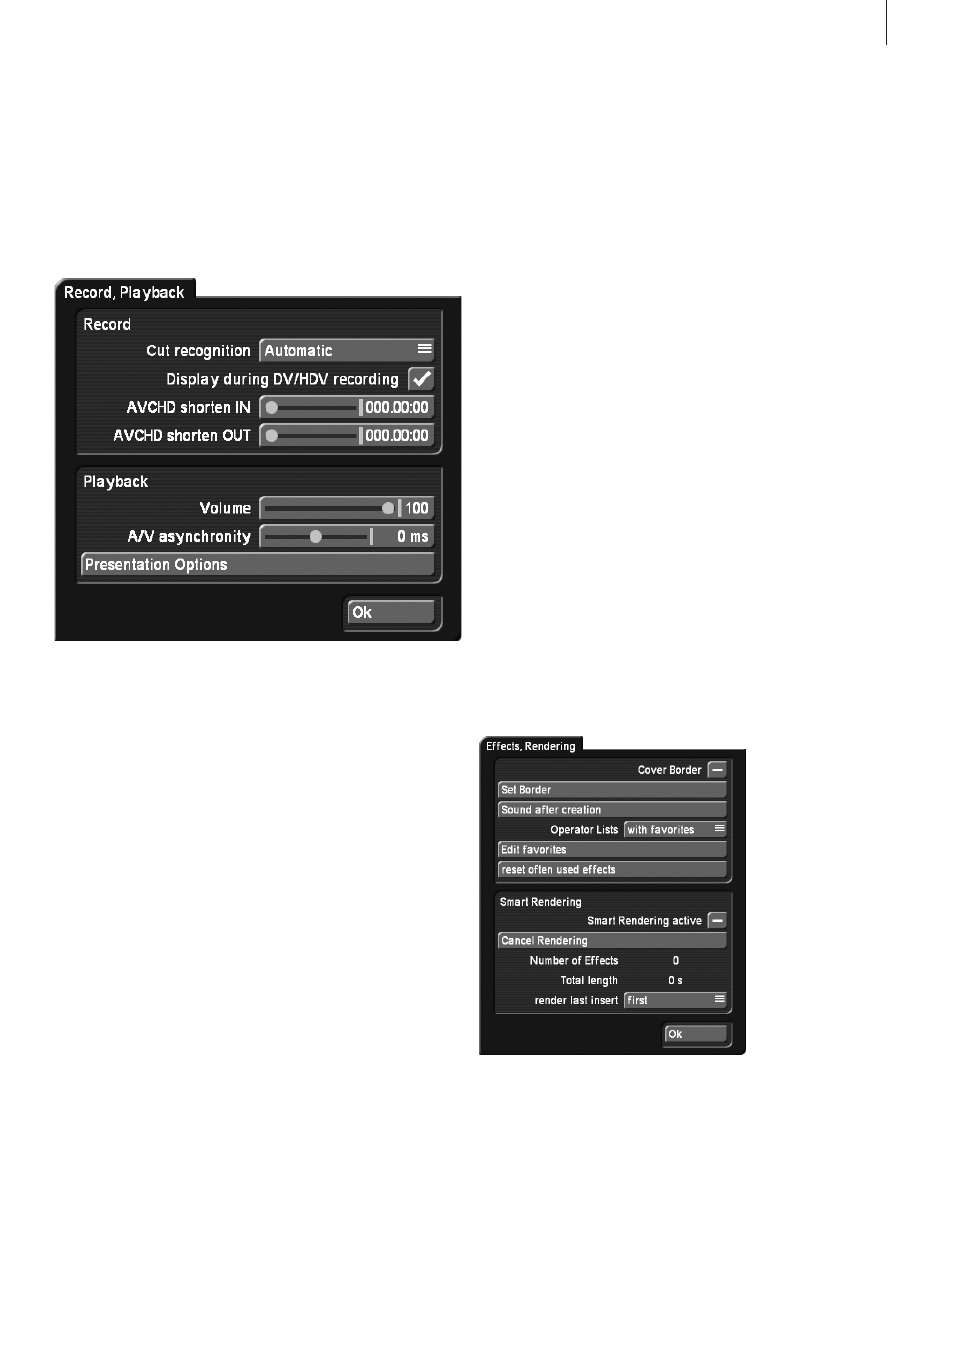
Recording, playing
This menu has several settings for recording and playing .
The selector “Cut recognition” gives HDV videographers the
ability to recognize cut points automatically, even if the HDV
signal was converted in the camera and sent to Bogart SE as
a DV signal . The default setting of the software is “Automatic” .
It attempts to recognize the best setting by itself . If the auto-
matic split using the start code is not possible, the system is
able to search for cut points via the “clock time” . It is essen-
tial to switch to this mode before transferring the footage to
Bogart SE . Depending on the camcorder you use, the required
method and editing accuracy can vary .
“Display during HDV recording”: On current devices it is pos-
sible to activate an HDV preview when recording . This makes
it possible to monitor the footage that is being input . In older
devices, the preview has been deactivated and this option is
switched off . The advantage of not showing an image when re-
cording is that HD footage is stored faster in the background .
This way, finishing after recording will take less time .
“AVCHD shorten IN/OUT”: The recording menu also allows
the import of recordings via USB/CD/DVD . These recordings
can now be shortened while they are being imported . A value
of up to two seconds can be entered in order to shorten the
beginning (IN) and the end (OUT) of sequences that are being
imported . This can be useful to remove imperfections at the
start and the end of a recording .
“Sound volume”: Use this slider to set the sound volume of
your system . This allows you to adjust the sound volume on
your monitor . This is particularly useful on notebooks .
“Headphone volume”: This is a setting on some systems,
especially on laptops . It controls the sound volume of your
headphone output .
“A/V asynchronicity”: This controls the adjustment of the
synchronisation between image and sound . This setting only
influences the display of footage with the device . It has no
effect when burning to DVD or exporting to tape . It can be nec-
essary to use this setting to adjust the time difference between
the sound and the image when you play the sound on another
device than the image (for example via a monitor and a sepa-
rate amplifier) . Many monitors need a short time to display the
video . In case you are listening to the sound via headphones or
a sound system, this can lead to a minimal, but irritating timing
difference . In order to adjust the timing difference during play
back, you should do the following:
• In case your sound comes before the image, e.g. in case the
sound of a closing door can be heard before you see it, you
should move the slider to the right (positive direction)
• If, on the contrary, you see the image before you hear the
corresponding sound, you should compensate by moving the
slider to the left (negative direction)
Effects, rendering
This menu contains settings for the display of effect lists and
effect rendering .
“Render Border”: This function can be activated by placing a
mark next to it . This creates a black border around the edges
of the screen, covering any unwanted disturbances during play
back . Please note that the affected border is so thin that it is
normally not visible on a normal TV set . This function will only
become visible when displayed on an HDTV screen or projec-