MacroSystem Bogart SE Ver.4 User manual User Manual
Page 104
104 Appendix
mode and return to the full image, press the yellow star symbol
once more . This then continues with the slideshow . Alterna-
tively, you can also use the P+ and P- buttons to exit the zoom
and return to the slideshow .
• Pause photo:
Press the pause button to hold the slideshow .
• Stop slideshow:
Press the stop button to end the slideshow and return to the
menu you started playback from .
• Remove photos:
If, during the slideshow, you decide to remove certain photos,
enter the help menu and press the red heart button to tag the
unwanted photo for removal . In this fashion, you can continue
through all your photos tagging all unwanted images . You
can press the red heart button once more to untag the photo
again . When the slideshow ends, all tagged images will be
moved to the trashcan . You can see the trashcan in the ‘All al-
bums’ view and restore the photos back to the list from there .
Make sure to do this soon, as the trashcan items are deleted
when the system requires more space .
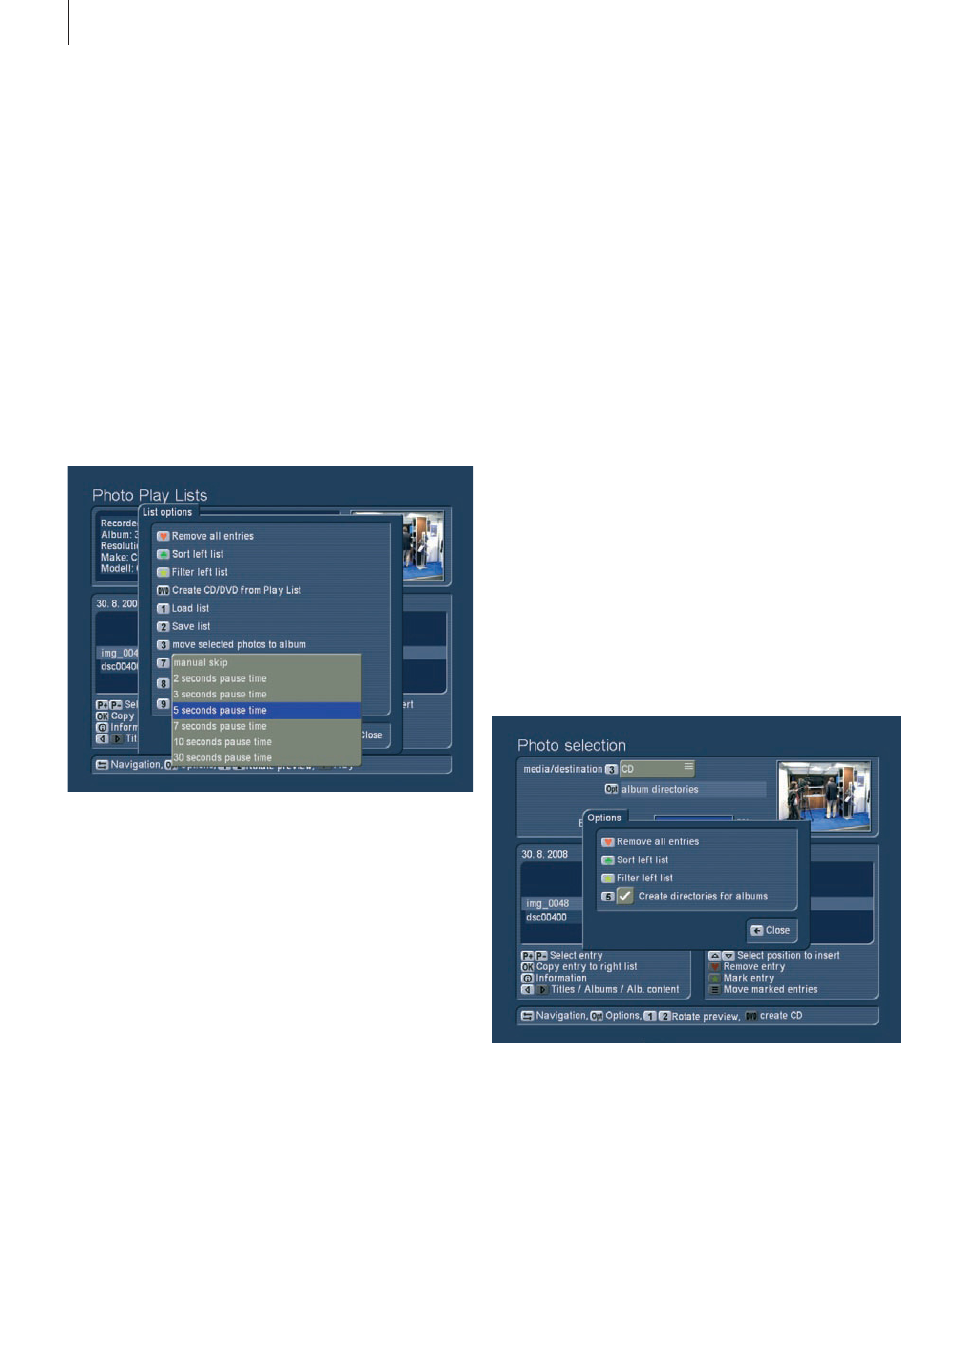
2.4.4 Creating CD/DVDs with photos
Press the DVD button to enter the menu for creating CD/DVDs
with photos . Here, you can assemble a list of images to export
to a CD/DVD or a USB device .
With this function, you can store your photos, give them to
family or friends or hand them to a print service . Operation is
basically just like the film archive, so make sure to read chap-
ter 2 .2 .7 . first . One particular difference here is the Options
menu that allows you to create folders for albums . In this way,
each exported album is stored in a separate folder .
Once you have created a list of your photos that fit onto the
selected export medium, press the DVD button to create the
original file. The larger the resolution is, the longer the system
will require for the scaling. Also note that exporting the images
to Bogart SE also requires scaling to the project resolution. For
a DV project, an 8 Mega pixel image will have to be reduced
to 0,4 Mega pixel as the image is almost 20 times as large as
the PAL TV resolution. Even in HD projects, the 8 Mega pixel
image must be reduced to 2 Mega pixels, losing 75% of the
resolution.
Display options
Press the Play button to play/display the images of the select-
ed album from the start . If you start the slideshow from within
an open folder, the playback will begin from the current image .
You can use Options to show pictures in loop, random and
how long each image is to be shown for . Just like in the other
two archives, you can switch between the different display
types by pressing the left/right directions:
• Change still time for photos:
You can press the Play button multiple times to change the still
time during playback .
• Jump to the next photo:
If you wish to jump to the next photo, press the P+ button . To
jump back to the previous image, press P- . The Chapter+ and
Chapter- buttons allow you to jump 10 images back and forth .
• Rotate photos:
If you wish to rotate a photo during playback, use the help
menu to press ‘1’ (image is rotated counter clockwise) or ‘2’ (to
rotate the image clockwise) . Each press rotates the image by
90 degrees .
• Zoom with pause:
Press the help menu button and then the yellow star button to
centre and zoom the image . The centre of the photo is shown
in full quality . During zooming, the slideshow is paused . If you
want to show a different part of the photo, enter the help menu
and use the direction buttons to move in the desired direc-
tion . To re-centre the image again, press OK . To exit the zoom