MacroSystem Bogart SE Ver.4 User manual User Manual
Page 71
71
Bogart SE 4 User manual
key on the external keyboard, and then select the square at
the other end of the range you want to select. The squares in
between will also become green and moveable.
Should clipping occur, this will be indicated in red . While edit-
ing the envelope curve, the red color changes of the gauge line
will indicate where clipping occurs . Of course, this information
is only about the sound sample, not about the overall relation-
ship with the other tracks .
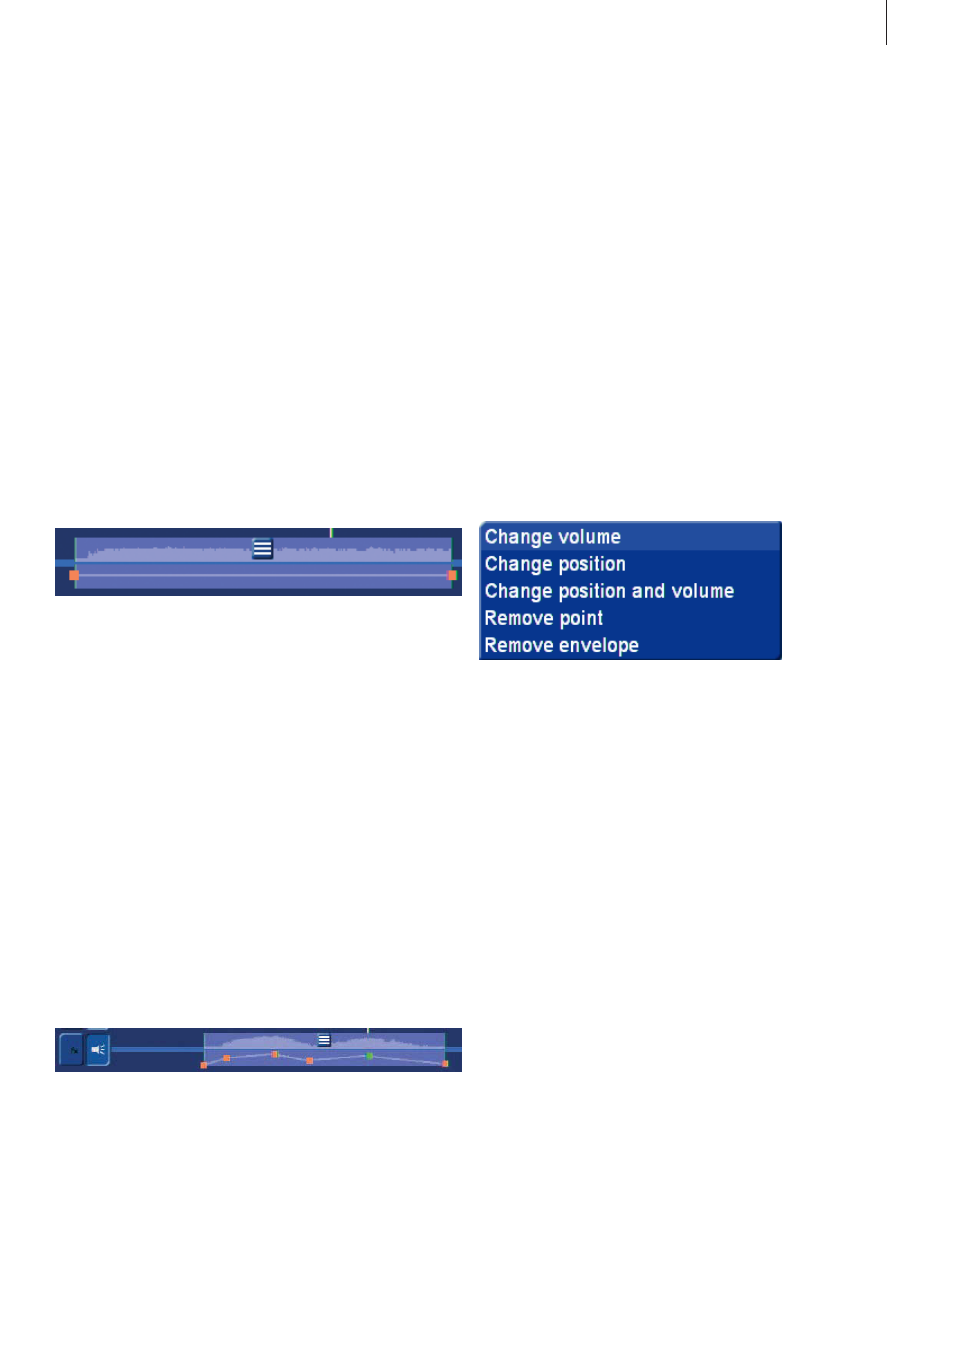
Context actions
If you place the mouse pointer over the envelope curve, you
can click on the small left trackball button to call up a context
menu .
Note: If you have a trackball with only two buttons, you should
click in the sound sample menu above and then select “Con-
text action”. The mouse pointer will change and you can then
use it to click the left trackball button inside the envelope curve
to activate the context menu for the envelope curve.
The table below shows the functions that apply to the enve-
lope curve and when they are available .
If you want to delete a point, simply select it and then click
on the small left trackball button to open the context menu .
There, you can select “Delete point” . A point that has already
been colored green can also be deleted via the sample menu .
Click on the large left trackball button and select “Delete active
point” . The green colored point in the envelope curve will then
be deleted . If you are using a two button trackball, this may be
more convenient .
Envelope window
Open the sound sample menu by selecting it with the big, left
trackball button . You can then select Envelope window in the
sound sample menu .
You already know this window for editing the envelope curve
from earlier Bogart versions . It has been explained in the cor-
responding manual . In Bogart 3, the window has gained new
buttons to play sound samples .
The functions displayed here are directly connected to the
corresponding sound sample . This is called a “context menu” .
Thanks to this type of menu, you can prevent long clicking se-
quences with the trackball, and save a lot of time as well . Here,
you should find several functions you are familiar with, but also
new functions .
You should move the mouse pointer to the icon and then click
on the left trackball button . Fewer functions will be displayed
for samples of the original sound than for samples of the
mixing tracks . The table below contains a description of the
functions .
Envelope
The envelope curve can be changed directly in each sample
that has been displayed . When you are in the timeline mode,
you can now edit the envelope curve directly while you are
editing the sound . You can now also see immediately if there is
clipping (overmodulation) in the sample .
If the peaks of the envelope are market red, this indicates clip-
ping in these spots . This is purely computational . It is best to
also test if this clipping can be heard . Should you want to mix
this sound recording with other sound tracks, clipping will very
probably occur at these peaks . However, this function is not
available for the lowest screen resolutions (such as SCART) .
Should you wish to insert a point while in this view, you could:
• Click with the large left trackball button on the line of the
envelope curve, or
• Click on the small left button. This will activate a context
menu in which you should select “Insert point” . (Please refer to
“context actions” below) .
A red square will be inserted in this spot . It serves as a set
point . Should you want to move such a point, you should
move the mouse pointer to the icon and then click on the left
trackball button . This selects the red square and its color is
subsequently changed to green .
In order to move, you should click on the green dot . It will now
become blue to indicate that you can move it .
Note: If you have installed and activated the Power-Key Op-
tion (an add-on product), you have the ability to select several
squares at the same time and move them together. To do
this, you must select a square on the envelope, press the Shift