MacroSystem Bogart SE Ver.4 User manual User Manual
Page 30
30 Chapter 4
as individual scenes or all together as a single scene into the
scene bin . Should you wish to store all scenes separately, you
should select the appropriate checkbox .
Once confirmed, the scenes you selected will be imported
into the scene bin . You can now split them either manually or
automatically .
Mode: The selection button “Mode” offers several possibilities .
In HDV projects, they may partially not be available .
“Normal” indicates a normal recording . The setting “Time”
activates the “Time” slider (see item (4)), with which you can
set the recording duration exactly . After this time, recording is
automatically stopped . The setting “Photo” is appropriate for
single, flicker-free pictures . Casablanca records about a half
second of material that is then extended as a single image to
the duration you have set (see (4) “Time”) . The video record-
ing mode “Fast M .” allows you to create extreme fast motion
recordings using Bogart SE . To use it, connect your camera
and switch it to record mode . Make sure that there is no tape
in the camcorder . Focus and light should be manually set to
an optimal value . The camera should be able to stand on a
firm surface or be mounted on a tripod . The “live” image from
the camera shall now be transferred to the video record menu
using the “Fast M .” mode at the intervals that have been set .
These single images are then used by Bogart SE to construct a
continuous sequence .
The slider “Time” is used to set the interval at which single
images are “shot” . For example, if you set the slider to
“00:00:10:00”, Bogart SE will record an image every 10 sec-
onds . The slider allows for values ranging between 1 second
and 24 hours, making even extreme fast motion recordings
possible . If you exit the menu after a fast motion recording, the
recorded sequence will be placed as one scene in the edit bin
of the Edit screen . Make sure to use the correct video input in
the video settings .
Note: Fast motion does not record sound.
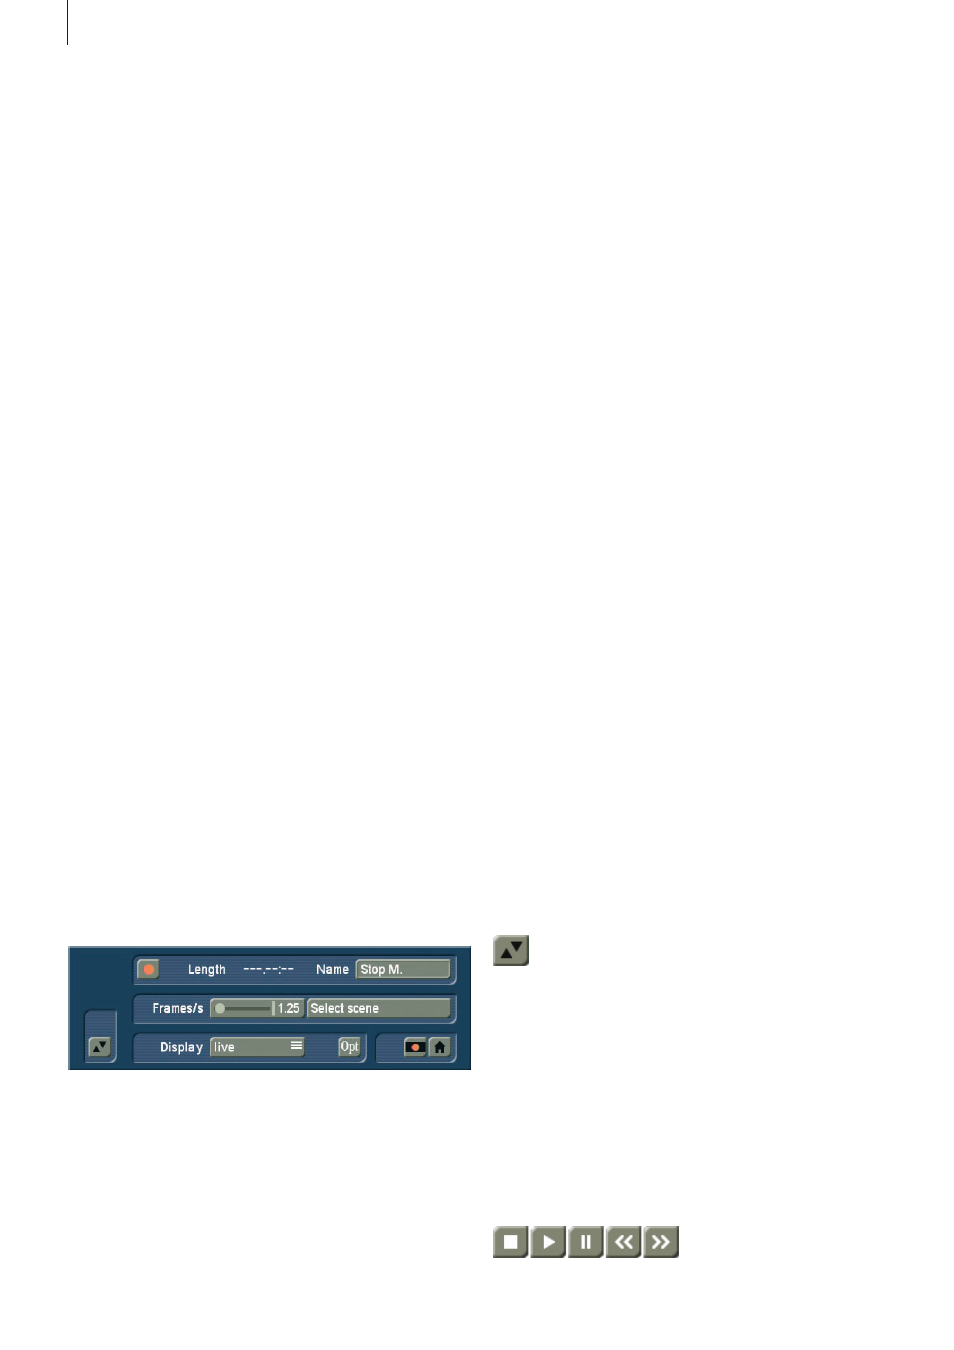
The “Stop M .” mode allows you to create animations, much
like the famous claymation films . Using this feature, the system
merely records images to create an animation using the stills .
This animation recording (unlike the “Photo” mode) creates
scenes in the scene bin and automatically connects them . So,
to create an animation, connect the camera pointing towards
the object you wish to animate . You can decide if the scene
is to be added to a previous animation (using the scene bin
selection “Choose scene”), or if you want to create a entirely
new scene . Define the number of frames per second to be
recorded . As a rule of thumb, animations usually use 3 to 10
frames per second . More fluid animations can be achieved us-
ing about 8 to 10 recordings per second . The “Display” button
changes the live image:
“Live” always shows the image as received from the camera .
“Loop” plays the last few single frames and the new camera
image . This is useful for checking if the new image suits the
animation so far .
The “Time” slider is activated by the modes Time and Photo .
The Time mode allows setting the duration for the still scene
to up to 180 minutes . A duration for up to 10 seconds can be
set to a precision of a single image, while a duration of 10 to
59 seconds can be set to a precision of one second and from
1 minute onwards to a precision of 1 minute . In Photo mode,
a duration of up to 10 seconds can be set to a precision of a
single image, and up to one minute to a precision of 1 second .
You can always stop recording with the stop button, regard-
less of the time that has been set .
When a new scene is recorded, the system will automatically
name it (S1, S2 etc .) . Its name is displayed below the record
button . Clicking on the name brings up the keyboard which
allows you to give scenes the name you choose .
After the scene name, you can see the length of the scene that
was just recorded .
Rest: The field Rem . shows you how much time remains,
meaning how much video can still be recorded . This amount is
an estimate . This is especially the case for longer recordings or
for HD footage, because the system calculates the remaining
time on the basis of the level of detail of the footage already
recorded . The value is not recalculated until the current record-
ing is finished . If the quality settings change, the actual space
may be slightly more or less than this estimate .
Just like the video settings, this menu is superimposed
over the video . You can see the video during recording
and thus always decide whether you want to digitize a se-
quence or not . The symbol at the bottom left with the two
triangles moves the panel to the top edge of the screen . This is
useful if the panel happens to be covering important parts of
your material .
You can use the button above it to reduce the menu to a
much smaller bar, in case too much of your video image has
been covered . Then the only buttons available is the button
described above and the button (Recording menu symbol) to
restore the entire menu .
”DV control” is done with these
five buttons . You can directly