MacroSystem Bogart SE Ver.4 User manual User Manual
Page 60
60 Chapter 4
(If you have made changes but still see the default values of
100% in the “Line” screen, then you have selected the wrong
line before clicking on “Line” .) There is an extra function in this
window . It can be activated with the “Delete active line” but-
ton . Clicking on “Delete active line” causes the line containing
the position marker to be deleted . The window disappears .
The switch Import (CD symbol with an arrow) allows you to
import texts written on a computer for titling (for instance, a
text from an e-mail with a customer’s preferred credits text) .
This saves work and prevents typos . The system supports the
standard text formats ASCII and UNICODE . When saving a
text from a word processing package, the text must be saved
accordingly . In order to make sure that even unusual char-
acters are imported correctly (such as the Euro symbol), we
recommend that you use the UNICODE format .
If you wish to import a PC text, note that only the pure text is
actually loaded, not the settings such as font type, size, style
etc . Such settings (like the text format) must be made in the
Bogart SE title program after importing . Before starting, make
sure that you have inserted the correct medium (CD/DVD) or
connected the right device (USB key, Firewire hard-drive) .
Click onto the symbol button . Now you can select the source
for the text you wish to import . Choose either the CD/DVD, the
external drive or the USB key (for this, you require the Card
Drive software) .
Following this, the texts on the source medium will be dis-
played and you can now choose the text for import .
With the buttons on the left in the menu “Text” you can reduce
the task bar to these buttons or move it to the opposite screen
edge . Use the “TE” button to return to the titler menu .
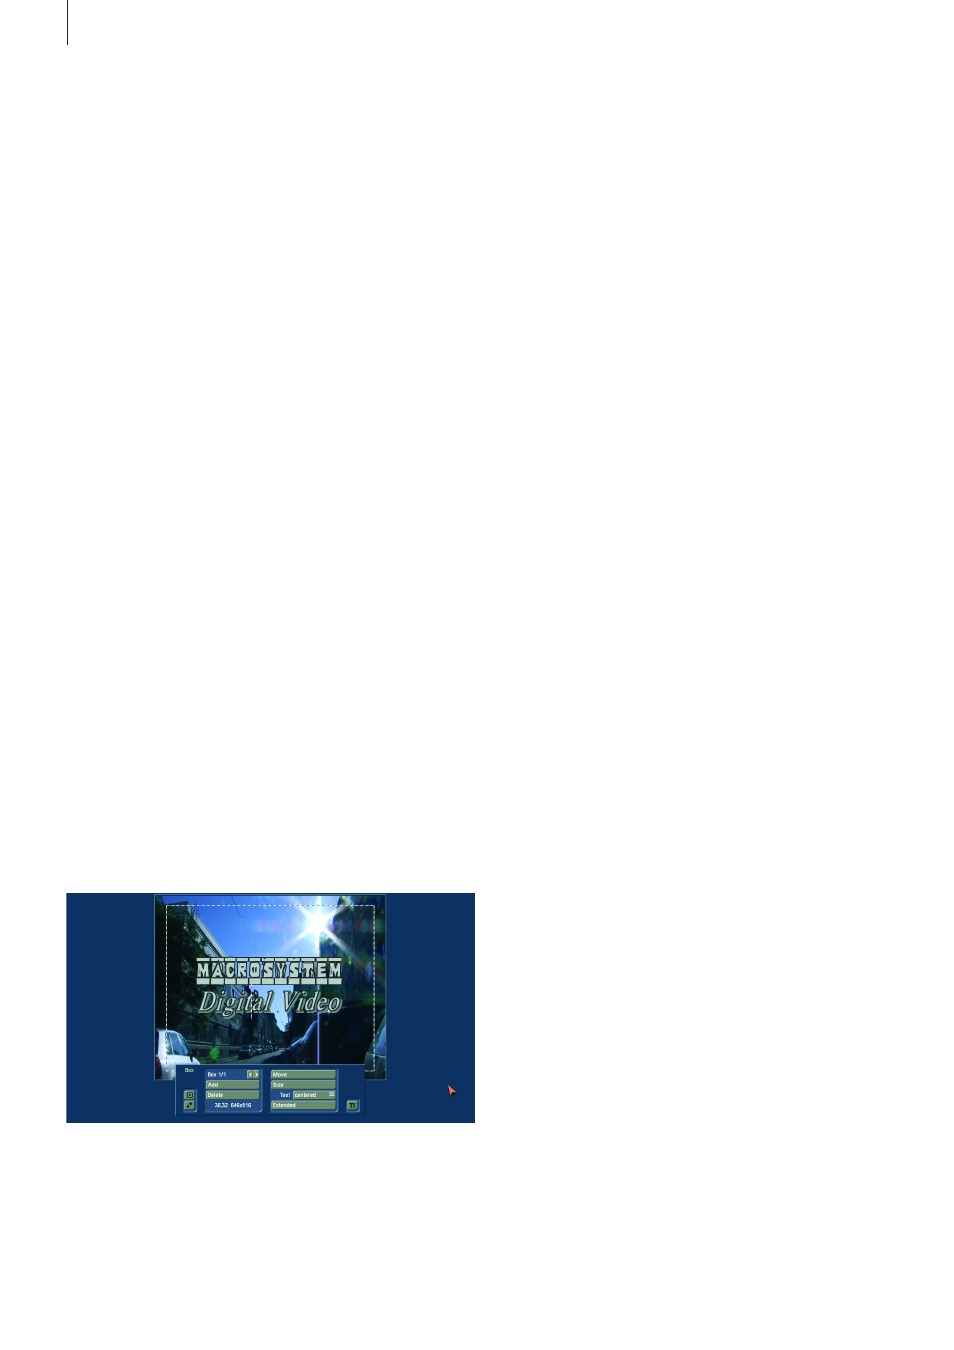
(3) Clicking on the “Boxes” button calls up an additional tool-
bar, with which you can create and edit text boxes .
• To the above left you at first see the label “Box 1/1”. You see
the display “Box 1/2” after you have added a text box . After
adding still another text box “Box 1/3” is displayed, and so
on . With the help of the right arrow key you can move forward
through the boxes . The left arrow key is used to display the
previous box .
Note: You can toggle between the text boxes by clicking
directly on the corresponding spot in the preview screen. The
box is then marked with a broken line.
• Use the button “Add” to put an additional text box onto the
video image . When you click the button a dashed box appears
in the upper left corner of the video image . You can now use
the trackball to position the box . After the upper left corner of
the box has reached the desired position, confirm by clicking
the left trackball button . Rolling the trackball now determines
the size of the box . Clicking on the left trackball button again
confirms the setting .
You can define any number of text boxes . The last text box to
be added is indicated with a dashed frame . When a text panel
is hidden by others you can make it visible either by resizing or
moving the overlying panel, or by clicking repeatedly the TAB
key on the keyboard (to the left of the letter q) until the text
panel you want appears .
Note: Please note that after calculation the text boxes are
ordered in the same sequence as they were created. The se-
quence that you used to place the boxes on top of each other
is irrelevant for the calculation.
• Clicking on “Delete” causes the active (outlined) panel to be
deleted . The previously inserted panel now becomes the active
panel .
• Both the coordinates and the size of the currently active text
box are displayed at the lower left edge of the task bar .
• With “Move” you can change the position of the active
text box . You drag it with the trackball and confirm the new
position with the left trackball button . Alternatively, you can
position the trackball cursor on the upper left corner of the text
box so that a symbol (four spearheads) appears . Then click
on the left trackball key so that the task bar is hidden and you
can move the selected text box . After you have reached the
desired position, click again on the left trackball key .
• After clicking “Size” you use the trackball to resize the panel
at the bottom and right edges and fix the new size by click-
ing on the left trackball button . Alternatively, you can change
the box size by clicking directly . Point the screen cursor to the
upper or lower edge so that an arrow symbol appears, click on
the left trackball key and drag the edge up or down by roll-
ing the trackball . Moving the left or right edge functions in the
same way .
If you point the cursor to the lower right edge, a diagonal arrow
symbol appears . Click on the left trackball key and then roll the
trackball to change box height and width simultaneously .
• Use the selection button “Text” to specify whether you want
to align the text you have entered or still have to enter at the